The weather was ideal. Contrary to popular belief, clear blue skies are not great for (most) photography because the sky ends up as a featureless sheet – especially in black & white. We were treated to a spectacular blue sky with fluffy white clouds, which renders excellently in monochrome. We also got to go up the tower of Liverpool Cathedral which afforded excellent views across the city.
The rest of this info is geeky stuff about cameras and film, so if you’re just here for the pictures, then skip ahead!
I took two cameras and a rucksack of lenses – the Canon AE-1 Program was loaded with Kentmere 100 and Ilford FP4 for outdoor use, and the Canon T90 was loaded with Fuji Neopan 1600, which I pushed to 3200 for low-light use inside the cathedrals. Most of the shots were taken with a Cosina 19-35mm f/3.5-4.5 lens which is super-wide on these full-frame cameras. On the occasions I needed a bit more speed indoors I switched to a 28mm f/2.8 or even a 50mm f/1.4 on a couple of occasions. All films were developed in Ilford Microphen, which particularly lends itself to pushing the Neopan to ISO 3200. Unfortunately the push-processing didn’t work out perfectly and most of my interior shots are under-developed.
I know very little about this camera. It’s a silent Super 8 cine camera with auto-exposure, manual zoom and fixed focus. It shoots only at 18 fps and the only control is a trigger to start and stop.
This week the Photo Challenge theme says we have to take a photo that looks like it has been edited – but hasn’t. I decided to shoot a set of fake-miniature shots, otherwise known as tilt-shift. These days, this is usually done with Photoshop but it’s also possible to create the effect at the time of exposure by tilting and shifting a view camera.
These images were all taken with a Horseman 980 view camera, using either a 65mm (wide) or 90mm (normal) Topcor lens, and Kodak Ektar 100 medium format film, which is famed for its bold and saturated colours. Unfortunately my C-41 developer seems to be past its best and the colours are a bit “odd”. I also used a polarising filter to add some extra saturation.
This evening, Mittens brought a live slow-worm into the house. I’m not a huge fan of sharing my living space with reptiles, so I carried it outside and took its picture.
Despite their appearance, slow-worms are not actually snakes, although they look similar to small grass snakes. Unlike snakes, their eyes can blink. To give a sense of scale, the head of this slow-worm is about 1cm across and 1.5cm long. Pretty tiny! They’re not harmful to people, and are actually good for the garden – but I still don’t want them in the living room!
This week I picked up a kit to make your own camera out of cardboard. The box said it was OK for ages 12 and up so there was a vague possibility than even I might manage to build it! I’m not known for my patience, but I managed to construct the camera in the end.
Hole-On EX
It’s a 35mm pinhole camera with a manually-operated shutter and manual film advance. The camera is styled like a traditional SLR, but it is actually a lot smaller – the size of a small 35mm compact camera. The pentaprism “hump” is simply a tiny viewfinder, and none of the controls do anything (except the film advance knob and the shutter slider). However, the lens barrel is detachable with a bayonet mount!
I’m pretty sure this camera will have light leaks because the construction isn’t watertight, but some say this adds to the art (if you’re a hipster).
The diameter of the pinhole itself seems to be about 0.4mm, judged by comparing it with a set of pinholes that I had cut last year. The distance between the pinhole and the film is about 35mm, despite the manufacturer’s website claiming it is 32mm. This means the speed of the pinhole is about f/88 which is a useful figure to bear in mind, whether you are calculating the exposure in your head or using a handy app.
Given that it’s such a slow lens I’m going to have to wait until there’s some sunlight, but watch this space for some pictures from this camera!
I’ve been using a pair of Behringer C-2 small diaphragm condenser microphones for several years now, and I’ve been extremely impressed. This week I had cause to buy another pair – but I noticed that since I bought my C-2 microphones, Behringer have introduced the C-4. So what’s the difference?
Behringer C-2 and C-4
The blurb on Behringer’s website is identical, except to say that the C-4s are black rather than silver, and blend in more discreetly with stage surroundings. Both microphone kits come with the same accessories: a pair of microphones, wind shields, microphone clips, a stereo mounting bar and a hard carry case.
The specifications are also similar, but not identical. I’ve emboldened the rows that differ.
The C-4 is 3 dB more sensitive than the C-2, at the expense of having a 4 dB lower maximum sound pressure level
The C-4 is slightly fatter at its fat end (it’s not straight-sided like the C-2)
The C-4 is significantly lighter, at just two-thirds of the weight of the C-2
Behringer C-2 and C-4
Difference 1 is exactly why I purchased the C-4s. I wanted a slightly more sensitive microphone for use with choirs and classical instruments. SPL is not a limiting factor here. I would favour the C-2s for use as drum overheads or in other loud applications.
Difference 2 is irrelevant although in my opinion the C-4s look a bit silly.
Difference 3 is a huge disappointment for me, though. For the benefit of those people who have handled neither of these microphones, the C-2 is cast of thick solid metal. It’s heavy and sturdy; it feels a lot more expensive than you might think. It reminds me of holding something heavy like a spanner. Unfortunately, the C-4 has a much thinner metal shell. It feels cheap, fragile, light and like it would dent if I dropped it.
But the real test of these microphones will be in a recording. I’ve only owned the C-4s for a few hours so I haven’t yet had the opportunity to use them in anger. You can hear some the choral recordings I’ve made with the C-2s on the St Mary’s Choir website. When I get round to testing the C-4s in the choir, I’ll comment at the bottom of this post and provide samples.
For now, suffice it to say: if you have no need for the extra sensitivity of the C-4, I recommend you stick with the C-2 for its vastly superior build quality.
[1] If anyone else is able to get their hands on the noise characteristics of the C-4 I’d love to hear from you!
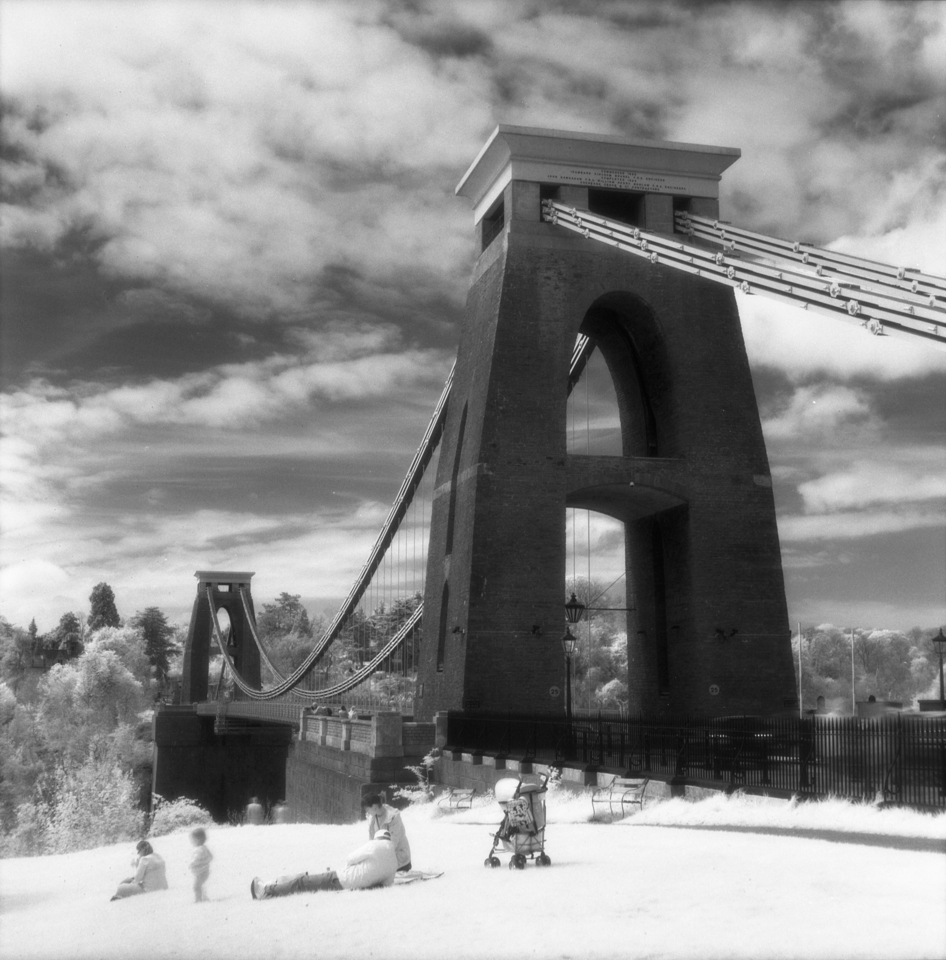
Our final instalment of Infrared Week is an image of Clifton Suspension Bridge. Foliage turns white and the grass resembles snow. The stonework of the bridge appears a dark grey. This is my favourite image of Infrared Week, and so I have saved it until last 🙂
Tonight at St Mary’s, the (acting) Archdeacon of Bristol visited. The church band (who usually play at Taste) were on good form and so I made these recordings. Click the links to listen, or right-click to save them. Enjoy!
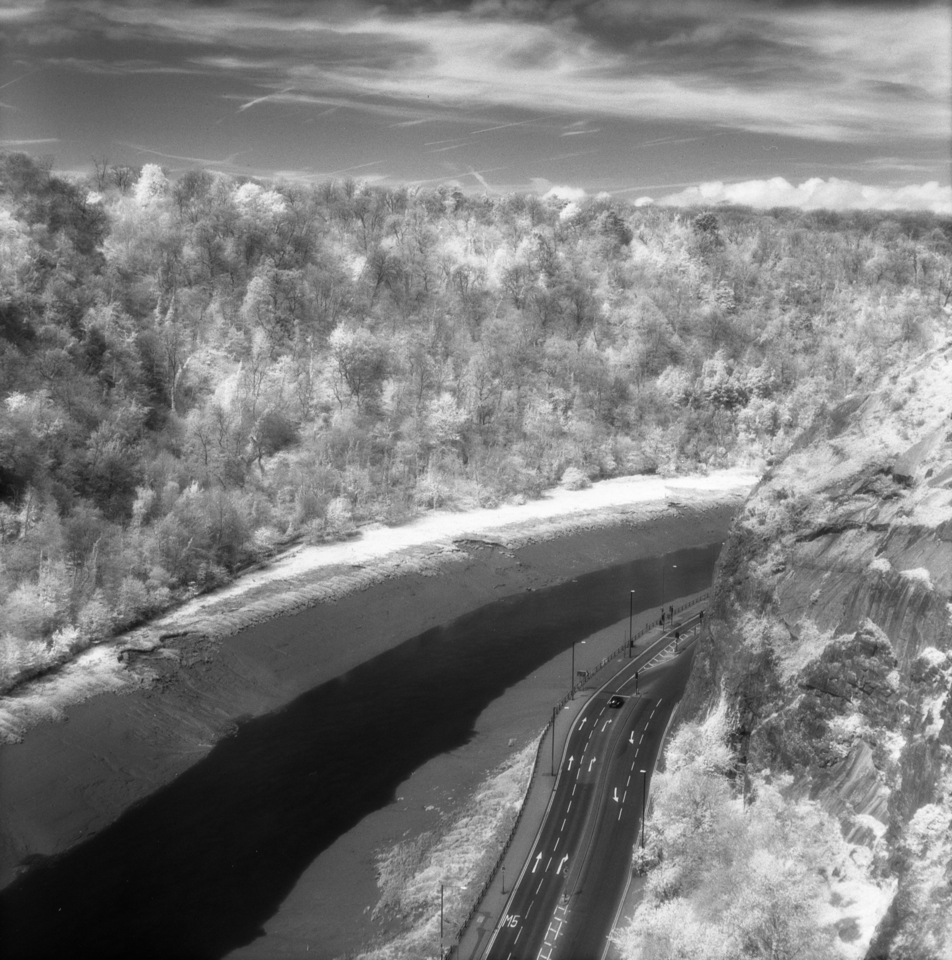
Part six of Infrared Week. This is a view down into the Avon Gorge, seen from the Clifton Suspension Bridge. The use of infrared film makes the water turn an eerie black while trees glow a pale white.
Part five of Infrared Week takes to Ashcott, just west of Glastonbury. The site of the former Glastonbury Canal is now given over to marshland, some of which is preserved and used for birdwatching. This boardwalk takes visitors on a journey over marshes and through beds of reeds.