Bristol Aquarium

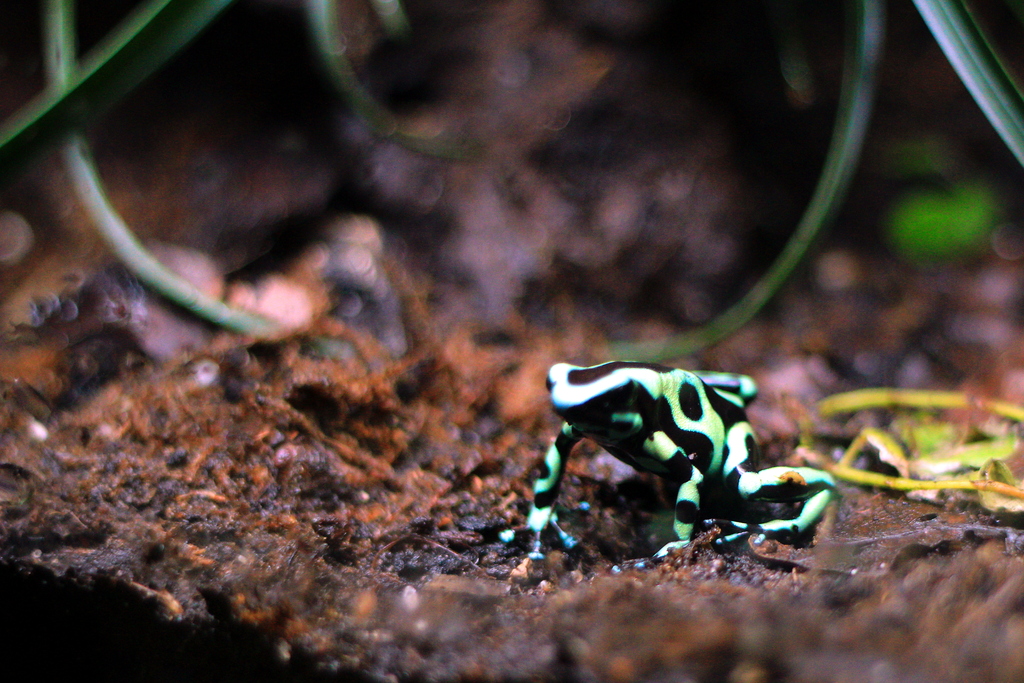
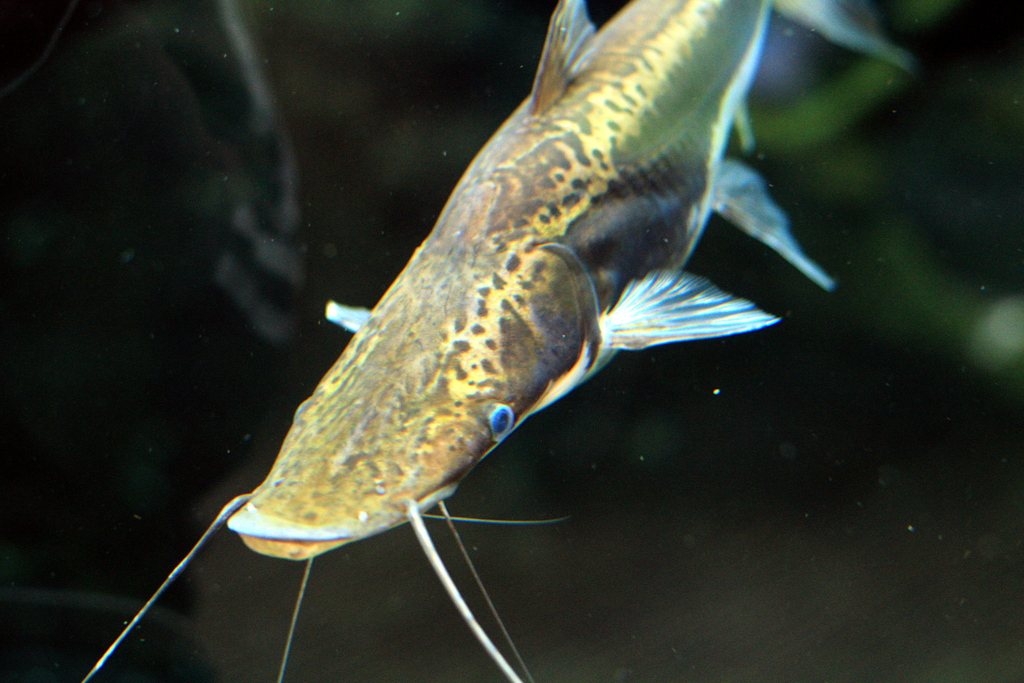
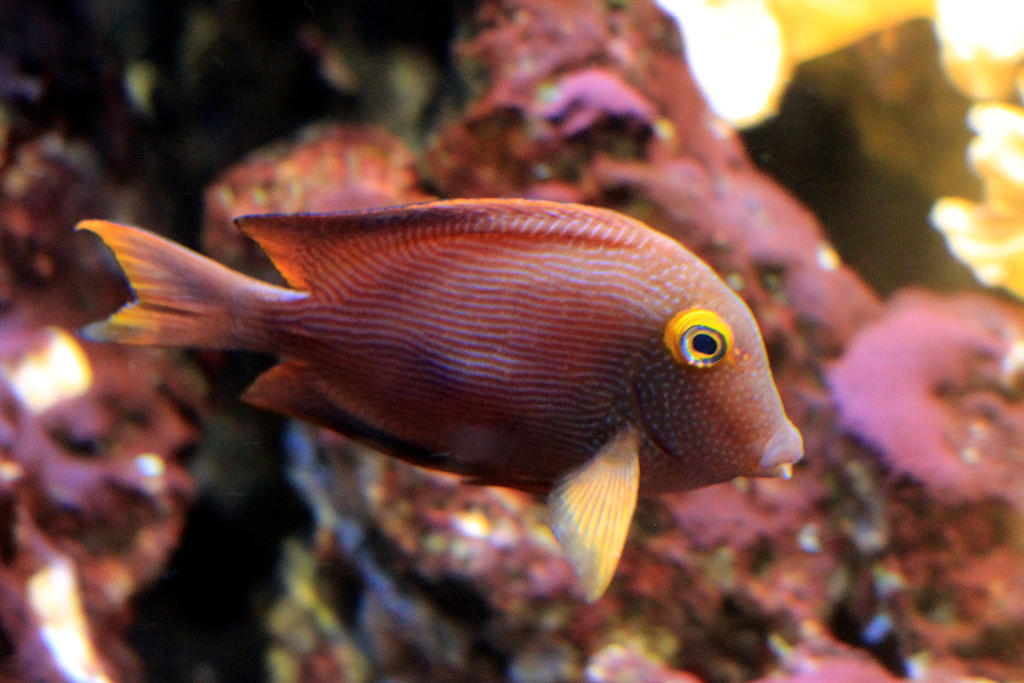
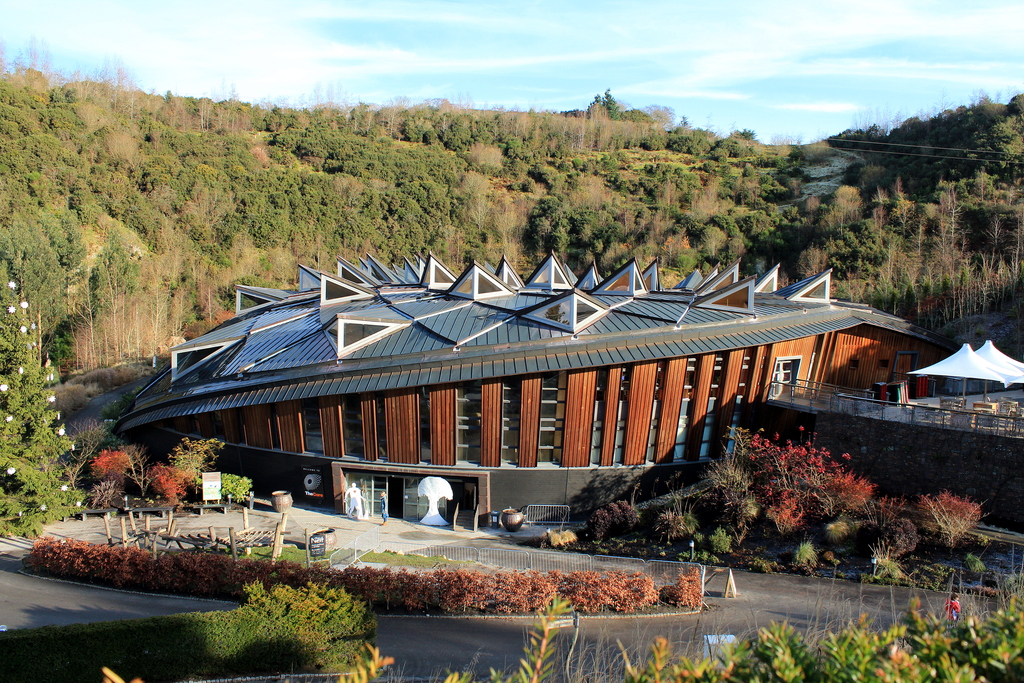
Bristol Aquarium has been open for a while, but I only just got around to going with some friends, for Hannah’s birthday.

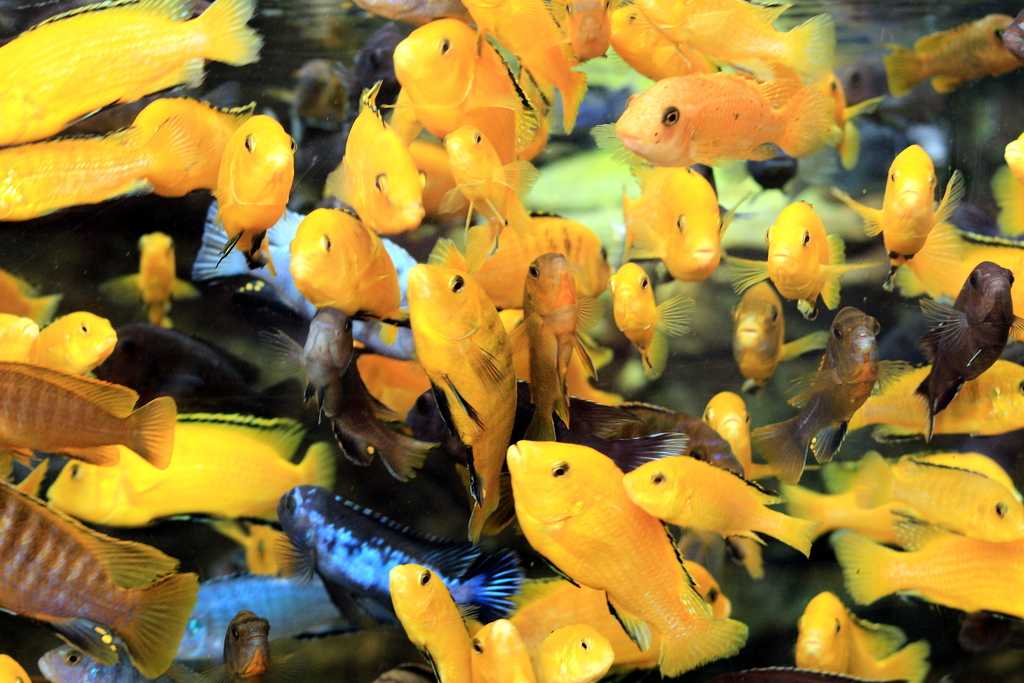
Shooting inside the aquarium was a challenge as it was quite dark. I had to use my fastest lens (a Canon 50mm f/1.8) even though it wasn’t the ideal lens for the job. Even then, with high ISO of 1600, the shutter speed was a bit slow and any fish that were moving tended to be unsharp. Flash wasn’t allowed so I had to make do with shooting the slow-moving fish with a slow shutter speed.

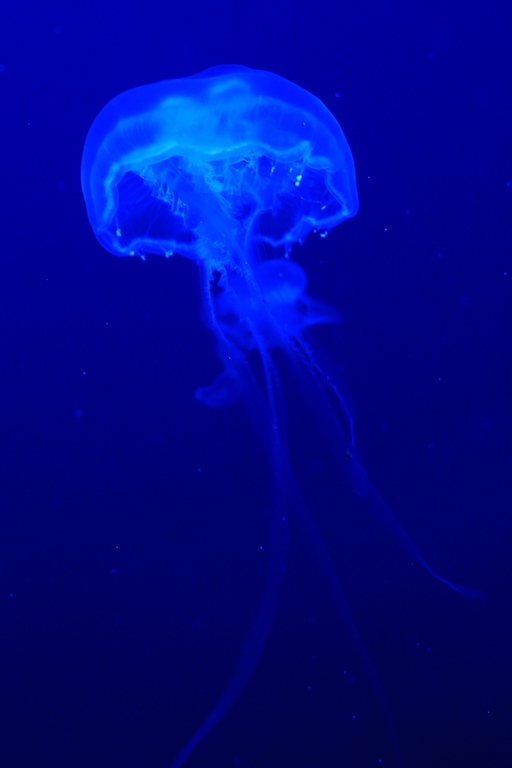
On top of that, lots of the tanks were lit with coloured light (for example the jellyfish were illuminated with blue LEDs) which played havoc with my white balance.

Photographic challenges aside, we all had a fun time, I learnt some things (which I’ve since forgotten) and I came away with at least some decent pictures.

Eden Project

A couple of weeks ago I visited the Eden Project. I haven’t been for a couple of years, and it was interesting to go in winter this time. Although the biomes are still heated, it is still winter for the plants and they are at different stages of their life cycle. It was slightly disappointing that most of plants lacked colourful flowers or buds, though.

To get us started, here’s the obligatory Eden Project panorama.

The Eden Project
The Eden Project

On the day we went, it was -4°C outside and my camera immediately steamed up as soon as we went into the tropical biome because it was too cold. It took too long for the camera to warm up to ambient temperature, so I didn’t get to take any pictures at all.

However, the humidity was much lower in the Mediterranean biome and so I was able to get the camera out without it becoming wet in my hands. Always a bonus for electrical items.

Most of these pictures were taken with a Tamron 90mm f/2.8 macro lens. Exterior shots taken with Canon 18-55mm f/3.5-5.6 kit lens. Body was a Canon 600D.

Orion Nebula

Last night it was incredibly clear so with a few friends I ventured out to my favourite dark-sky spot in rural Somerset.

The moon was below the horizon for most of the evening so it was sufficiently dark to see the Milky Way. We had a quick peek at Jupiter, as it’s easy to find, and then we turned our attention to examining some deep-sky objects (DSOs) from the Messier catalogue. For the uninitiated, the Messier catalogue is a list of DSOs compiled by Charles Messier in 1771. They’re easy for beginner astronomers to find – if they can be seen with a crude 1700s telescope, it should be easy to view them with a modern telescope!

We viewed several Messier objects including M110 and M42, the Orion Nebula. I’ve never really had the opportunity to observe DSOs before and have mainly examined the planets, so this was the first time I saw the Orion Nebula. It’s a nice, bright object so I decided to photograph it as an “easy” introduction into deep-sky astrophotography.

This image is a composite of 10 images, each shot at ISO 3200, 10-second exposure with a 5″ telescope – a Celestron NexStar SLT 127. The focus isn’t quite right but my technique seems to have worked 🙂

Orion Nebula (M42)

Angle of view on various formats

I’ve probably discussed before the way that different size “sensors” (or pieces of film) need different focal length lenses to achieve the same angle of view. For instance, it is well known that a 50mm lens on an APS-C crop-sensor DSLR behaves a bit like a 75mm lens on a 35mm full-frame camera. I’ve extended the idea a bit further and represented various formats and various focal lengths in a graphical form[1].

Along the top are various formats[2], and down the left are focal lengths in millimetres. Each cell contains the diagonal field of view in degrees[3], and is colour-coded to show what kind of lens this represents.

Angle of view
Angle of view

It’s absolutely inconceivable that anyone could possibly improve on my incredibly awesome spreadsheet, but just in case you want have a play, you can grab the file here.

Notes

  1. Unlike Microsoft Excel, LibreOffice Calc doesn’t have a contour graph type, so I had to do the graphic this way. Anyone suggesting the use of Microsoft Office will have their teeth cut out 😉
  2. 10×8, 5×7 and 5×4 are large format and are measured in inches. All of the 6×9, 6×7, 6×6 and 6×4.5 formats are medium format and measured in centimetres. I probably should have indicated this in my column headings.
  3. Equation for angle of view: alpha_d = frac{360}{pi} arctan(frac{d}{2f}) 
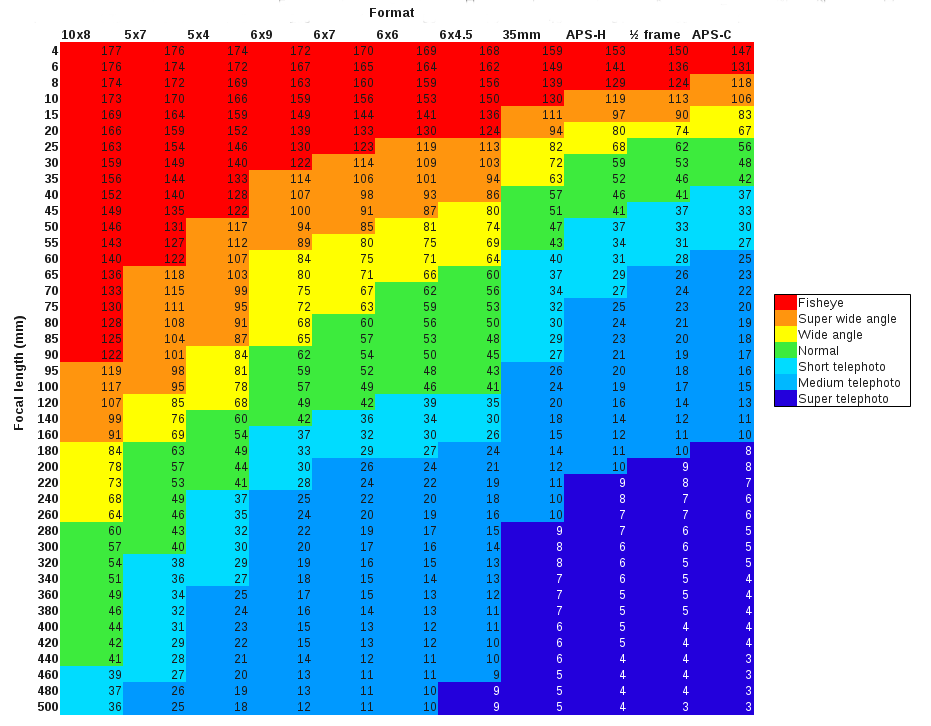
where αd is the diagonal angle of view, d is the diagonal measurement of the sensor and f is the focal length of the lens.
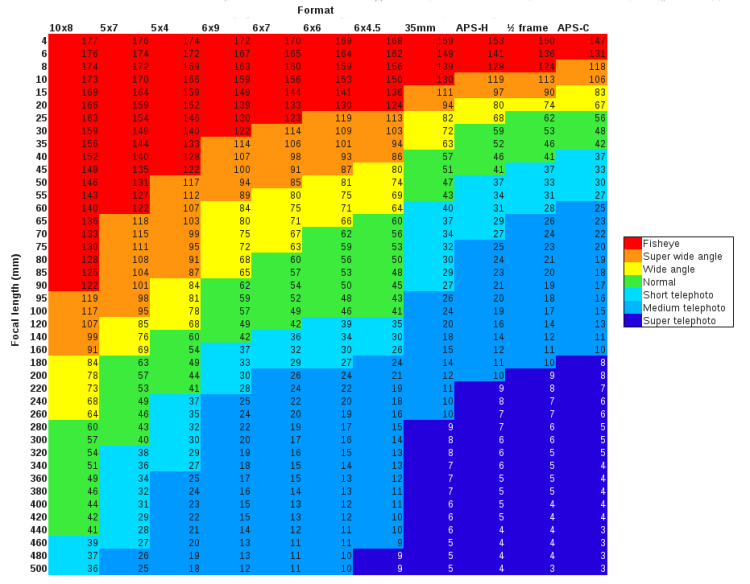
Tintern Abbey et environs

I’ve never been to Tintern Abbey before, but it has been on my list of places to go for architectural photography for a while. This weekend I decided to visit with my friend Nathan.

When we arrived, I was delighted to find that the whole area is picturesque and there were opportunities for photography at various locations. It was late in the afternoon and the light was fading, but with a tripod I was able to take longer exposures and keep the aperture small.

I shot a whole roll of film – that’s just eight frames on the camera I was using. Out of those frames, I liked all of them and I thought six were good enough to publish. That’s a remarkable “keep rate” of 75% – much better than you’d expect with digital!

For me, these pictures may even represent my personal best since I started getting into landscape photography seriously. Some of these will definitely be going on my wall.

I used a Horseman 980 view camera, with 65mm wide-angle and 90mm normal lenses, loaded with Ilford FP4+ film. The negatives are 6×9cm, and after being scanned, gave me images of roughly 70 megapixels.

More from the C220

Not too long ago, I excitedly blogged about obtaining a Mamiya C220 TLR. I’ve now taken it out for a spin with some colour film in it. Most of these pictures were taken weeks ago, but I’ve only just got around to uploading them. There’s nothing groundbreaking, but I like all of them for different reasons – even the one of the wall that is wonky and has a strange colour cast (I probably messed up the development).

Project 35 – Out now!

Project 35 is complete! I went to ASDA this morning as my film scanner is broken, and had my film developed and put onto CD.

I’ve done the bare minimum of editing with these pictures – they are rough and ready, and exactly as they came out of the camera (a 1956 Zorki-4 rangefinder with a Jupiter-12 lens). Unlike most of my blog posts where I pick and choose the best pictures from each outing, for Project 35 I’ve included every single pictures from the roll (so you actually get 36 pictures rather than the 35 I promised!).

I started off enthusiastically which is reflected in the variety of subjects, including experimental shots like days 5 (long exposure) and 6 (indoor flash). After a few interruptions in the project, I lost my swing and didn’t go out every day. There’s a lack of variety and some pretty boring photos. I certainly don’t think I could do a photo a day for a year, like some of my friends have done.

Having said that, there are some here I really like – particularly days 3, 15, 23, 25 and 36. Which are your favourites? I’d be pleased to have some feedback 🙂

Project 35 is complete! (Almost)

Project 35 has been ongoing for a while. For those who’ve forgotten what it is (I don’t blame you, I started it such a long time ago!), this is the project brief:

Project 35 is to shoot 35 pictures over 35 days on 35mm film with a 35mm lens.

Unfortunately the project was beset by poor weather, illness, students and various other evils 😉 Today I shot the last frame on the roll, some 79 days after beginning and 44 days overdue. Can you tell I work in IT? 😛

However, my film scanner gave up the ghost last week and I have no immediate plans to replace it, so I’m not really sure what I’m going to do about the negatives. Perhaps I’ll stick the prints into a scrapbook like in the good old days.

For those of you who haven’t grown old and died while waiting for the conclusion of this project, please continue to watch this space – and perhaps I’ll be able to borrow a film scanner from somebody. Failing all else, I could try to photograph the negatives with my digital camera. We’ll see…

Fireworks

Fireworks, you say? These ones were in the churchyard of All Saints, Fishponds. I managed to add some extra interest to the pictures by using a fisheye lens and including part of the church building.

However I can’t decide if my favourite is one of the firework pictures, or the long exposure of the bonfire.