When you say “medium format” to people*, they probably think of 120 or 620-format roll film. But the definition of “medium format” also includes sheet film larger than 35mm and smaller than 5×4″. Until now I’ve only really used roll film but for my birthday I was given a sheet film camera and I also decided to purchase some sheet film holders for my roll-film cameras such as the Horseman 980 and Mamiya RB67.
* Excludes normal people 😉
It turns out there are lots of very similar sizes of slightly different dimensions, and it’s important to get them right. Here’s my summary.
Roll / sheet?
Known as
Size (mm)
Size (in)
120 roll
6 × 9
56 × 84 mm
2.2 × 3.3 “
Sheet
6.5 × 9
63.5 × 88.9 mm
2.5 × 3.5 “
Sheet
2¼ × 3¼
57 × 82 mm
2.25 × 3.25 “
Now for the notes and caveats.
The dimensions given for sheet film are the actual size of the sheet of film. Depending on the camera and film holder, the image is usually smaller, leaving a margin.
The dimensions given for roll film are the size of the image. 120 roll film is actually 61mm wide, but you lose a few millimetres with the margin. The width of a 6×9 frame varies depending on the camera.
Despite my recent blog post about cutting down 120 roll film to make 6×9 sheets, it seems that this wasn’t the right size and my Ensign Cameo actually takes 6.5×9 sheets. My sheets rattle around in the film holder.
It seems that the 6.5×9 size is predominantly European, while the 2¼ × 3¼ size is predominantly American.
2×3 seems to be commonly used to describe any of these sizes, although more often to describe the roll film size
Thanks to this thread for some of the information (as well as various other web sources) which I have merely summarised and tabulated. I hope the information will be useful to someone. If you spot any errors, please let me know.
I’ve always had a vague interest in film-making. As a child I borrowed my grandad’s VHS camcorder to make various kinds of film, such as this version of Thunderbirds dating from 1995. More recently, I’ve shot videos on my DSLR for the choir. A while back I was given a Super 8 camera but the high cost of film and processing out me off. More recently I was given some Kodachrome 40 in Super 8 format (I wrote about it too!) It can’t be processed at a lab any more, so I devised a way of processing it as black & white at home. That’s all good and well, but does it work in practice?
I’ve been trying to think of something worthy to shoot. A 50-foot roll of Super 8 film lasts for less than three minutes, so it has to count. In the end I decided to take some panning shots around Troopers’ Hill. Today was the first sunny day for ages, so I went for a walk with the camera and a monopod. The rain started towards the end of my shoot but I just about finished.
I mixed up chemicals according to the formulae I posted last time and followed the procedure. The first part (up until the bleaching) has to be done in total darkness but I took photos of the rest. Click on the gallery and use the arrow keys to go through and read the detailed descriptions for each picture.
Six chemicals baths ready for use. Top row goes from left to right, then U-turn and bottom row goes from right to left. Baths are rem-jet removal, first developer, bleach, clearer, second developer, fixer.
After bleaching, it’s safe to expose the film to light again. The bleach is dark purple so we use a clearing solution to get rid of the purple tint.
After clearing, the film is re-exposed to bright light to ensure that all the remaining silver that wasn’t used in the first (negative) development is reduced and used in the second (positive) development
The film has just entered the second developer, still pale from bleaching
Within a minute, a positive image has formed on the film. We continue developing for a few minutes until the image is dark.
The film is fixed as usual to remove any leftover silver halide, although there shouldn’t really be any
The film is untangled
The film is washed carefully and all traces of the rem-jet are removed by hand. The wet film is wound onto a spool.
Once washed, the film is unwound from its temporary spool and hung from the drying rack in loops.
The process was pretty successful. Lots of people online have talked about how to crack open a Super 8 cassette to get the film out. This simply isn’t necessary. If you spin the winding knob in reverse, the clutch will try to stop you. Just force it and the clutch will break. It only took me half a revolution to break it, and I did it with my hands – no tools required! Now you can snip the film, and pull it out freely. Couldn’t be simpler.
I’d also heard horror stories about removing rem-jet, but the bath I used had dissolved almost all of the rem-jet in about 5 minutes with no need for scrubbing etc. Some of the later chemical baths had black grit at the bottom of them. I mixed my chemicals one-shot so I simply discarded it. You could decant the chemicals off too – the black grit was happily sunk at the bottom.
It was a bit of a pain processing 50 feet of film in a 8×10″ tray. Left unattended, the film doesn’t sit submerged so I had to hold it underwater during processing. This isn’t too bad as you have to agitate the film, turn it by hand, and make sure little loops don’t form and stick to themselves.
I’ve more-or-less got the hang of the reversal process now but I need to tweak the times/temperatures of the first and second developers to get the right contrast. The final film has quite a lot of fog and the shadows are not very dense. It’s hard to say whether this was the fault of the developing process, the fact I’m using Kodachrome rather than a B&W film, or whether it was just because the Kodachrome is old.
Of course, the real test is whether the film looks any good when projected…
As expected, the contrast was very poor so I enhanced it digitally (sorry, that’s a dirty word). The camera shoots at 18 fps whereas the projector plays back at 24 fps, so the video appears to be sped-up. Gives it a nice vintage feel 🙂 I could have projected at 18 fps but then it caused a nasty flicker with my DSLR that can only capture at 24, 25, 30, 50 or 60 fps. The projector does have speed adjustment so possibly I could try projecting at 20 fps and recording at 60 fps.
The film is very scratched. This happened when I washed the film by hand and scrubbed off the remaining rem-jet after processing, before winding it onto the reel. In some places the emulsion has come off completely. I’ll need to be a bit more careful about touching the film next time.
The camera’s lens is not great – focus is very soft and for some reason there appears to be lots of ghosting. I’m not sure why this is – I don’t think it’s the projector but tomorrow I’ll get some of the film on my lightbox and inspect it with a loupe to see if it is to blame.
This is definitely a project I’ll be revisiting. I can probably pick up expired Kodachrome quite cheaply now it can’t be processed elsewhere, and I already have all the things I need to process film. Next time there’s something worth filming, I’ll try and get hold of some Kodachrome and see if I can improve on my contrast.
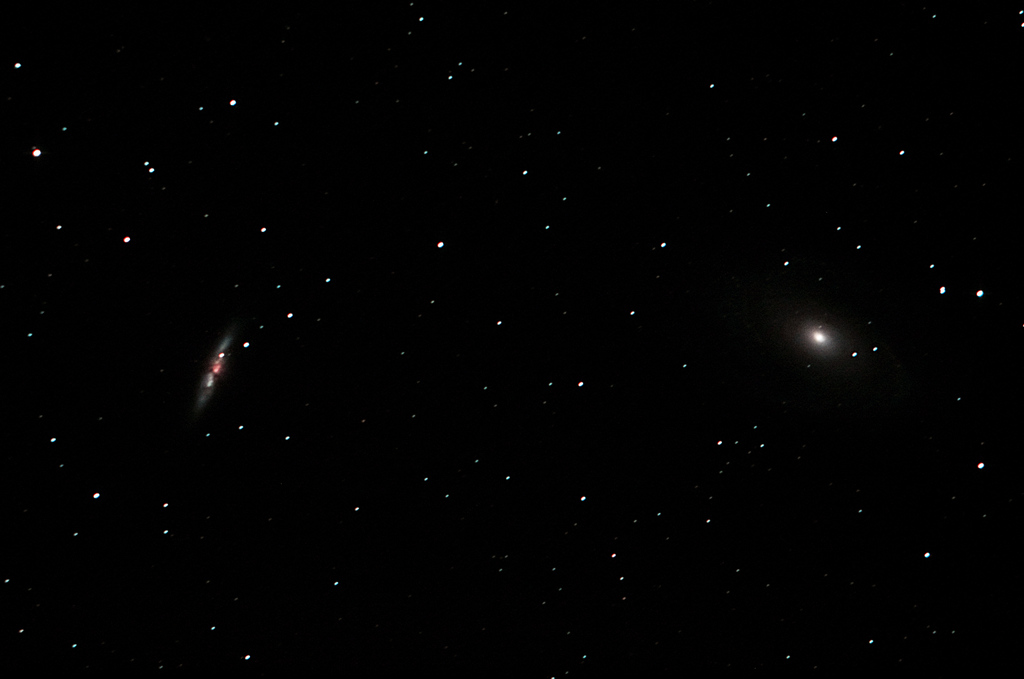
Last week a new type 1asupernova (SN2014J) was spotted in Messier 82 – better known as the Cigar Galaxy. I was desperate to photograph it but the weather was not on my side. Finally last night I stole about half an hour of observing time between clouds and managed to get 9 pictures of the galaxy. That’s not nearly enough for high-quality image processing, so here’s my “quick & dirty” effort. The quality is not great but at least you can see the supernova!
If the skies clear up again, I’ll head out and try and achieve something better than this. In the time I had, I wasn’t able to get my autoguider working, so that limited the length of my exposures to 30 seconds.
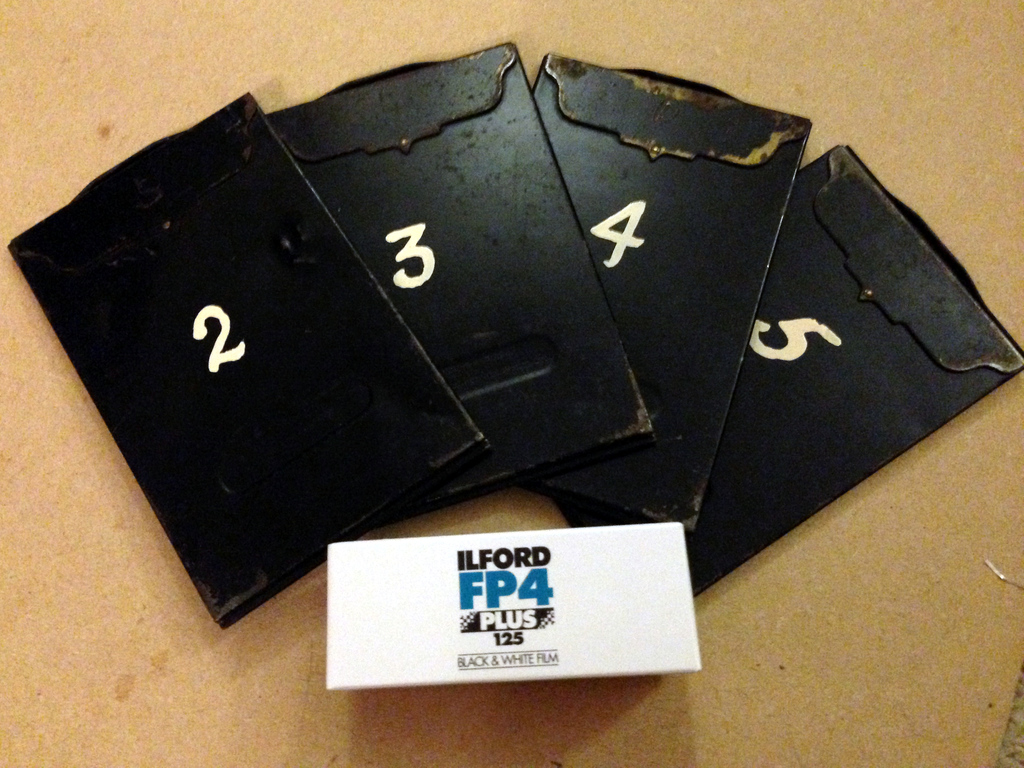
I was given a camera for my birthday which takes sheet film in 6×9 format – or possibly 6.5×9. It’s hard and expensive to get hold of sheet film in this format these days so I thought about cutting 6×9 sections from a roll of 120 film, which is 63mm wide. Roll film is different from sheet film, in that it is thinner and designed to be rolled up. I’m not expecting good film flatness but at least it should work.
Advance apologies for these pictures. Tonight I’m too busy making things to worry about practising the art of photography, so these were shot on my iPhone.
Ilford FP4+ and sheet film holders
In order to be able to cut the film into neat 90mm sections in the dark, I made a little tool out of some wood. It was pretty simple to make, and the only thing that really needs a comment is that I chiselled out a section of the base piece to allow the clothes peg to sit flush with the base.
Film cutting tool
It’s simple to use. In the dark, you unroll a section of 120 film along the base of this tool, between the two outer guides. You push the film up against the end stoppers on the right hand side, and use the peg to hold the film flat(ish). It won’t be perfect, but at least it won’t roll itself back up into a tube. Then you use a knife and cut along the pre-made groove to slice a rectangle of film in the perfect size.
Here are some pictures of my using the tool. I’m just testing it in daylight with the backing paper from 120 film, not the film itself.
Film cutterFilm cutterFilm cutter
Unfortunately, while the tool worked well with backing paper, I ran into problems when using it with real film in the dark. The film is tougher than paper, and the knife pops out of the groove quite easily. Here you can see all the accidental scores that missed the groove.
Bad cutting
Unfortunately, doing that means you end up with a piece of film in the shape of a parallelogram 😦 Here the film is upside-down so it didn’t curl up. The parallelogram is reversed.
Bad cutting
The parallelogram film is useless as it can’t be loaded into the sheet film holders. One roll of 120 film should provide eight sheets of film like this but I only managed three nice square cuts. I have four film holders, so the fourth is filled with a wonky sheet of film that will probably pop out easily. We’ll see!
As soon as I get the chance, I’ll shoot these four (or three) frames and see what I get. If I don’t have luck with cutting my own film from rolls, I might consider buying some 6.5×9 film, although at almost £1 a pop it’s rather expensive. For comparison, I pay £3.50 – £4.00 for a roll of 120 film, which would give eight pictures of this size.
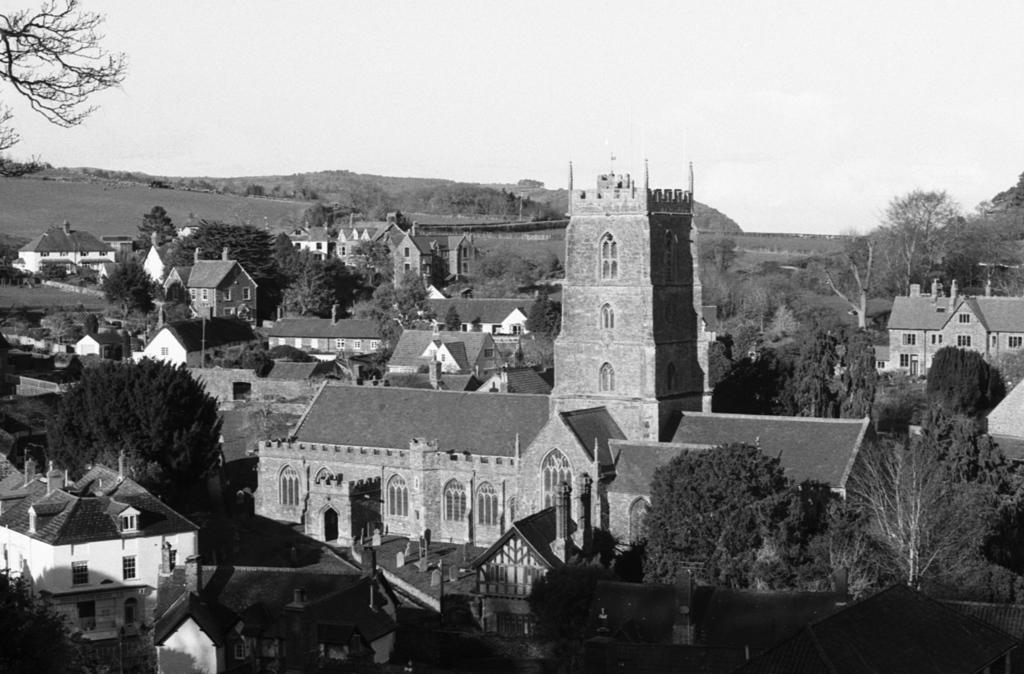
These pictures were taken during a short break to Dunster for my birthday. Dunster is a tiny village near Minehead which has a wonderful castle and also a church that is one of the Somerset Towers. We also called in a Lynmouth, Lynton and Minehead. Driving to Lynmouth and Lynton involved crossing Exmoor. It was beautiful to look at, although with steep slopes and tight bends my eyes were on the road and the camera was safely in its bag!
Dunster Hay Market
Hannah on Exmoor
Lynmouth harbour
East Lyn River at Lynmouth
Dunster Castle
St George’s Priory Church, Dunster
Dunster Castle
Leaf
These pictures were all taken using a Canon T90 and Ilford FP4+, rated at ISO 80. Most were taken using a Canon FD 24mm f/2.8 lens although a couple were shot with a Canon FD 50mm f/1.4 lens. Quite a few of the photos from the 24mm lens seemed a bit soft compared to ones I’ve taken before with a similar 28mm lens. I’m not sure if it has a problem – more testing required!
I also shot another roll of film in a different camera, but unfortunately the film advance went a bit wild and tore the film without me realising – so there are no pictures from that camera.
I’ve got a few photographic things to write about, so I thought I’d do a mini news bulletin.
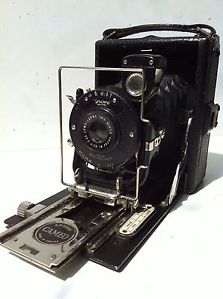
New camera: 1920s Ensign Cameo
Ensign Cameo
For my birthday, my parents-in-law got me an Ensign Cameo view camera. It’s a real beauty with black leather and silver chrome trim, still shiny and bright. I’ve not been able to date it accurately other than to say it was certainly released no earlier than 1927, probably no later than 1931, and by 1933 it had definitely been discontinued, as this specific model no longer appeared in their catalogue. (It’s the 6×9 version with a 100mm Ensar Anastigmat f/4.5 lens and Trichro shutter).
It takes sheet film in 6×9cm format, rather than the more recent roll film (although I think a “modern” roll film back could probably be fitted to this camera too). The camera came with four sheet film holders, each of which contained film! I developed the films in the darkroom just in case they had been exposed – but they had not.
This is an extremely interesting camera so no doubt I’ll write about it in more detail soon. Please note, this picture is not mine. I’ll photograph mine when I’ve had a chance to set up the lighting properly. I’ve got a few cameras I need to photograph.
Photography tuition
I recently decided to take up tuition to help with my darkroom skills. I contacted a local tutor, Chris Waller, and met with him to discuss what I wanted to work on. I showed him some of my negatives and prints and he gave me some tips to get started. The biggest lesson in improving my negatives is that the box speed of the film is measured under dull grey lighting, like a cloudy day in England. On a sunny day, the film should be used at a slower speed, otherwise the contrast won’t be right. The only way to know the exact speed (the “exposure index“) is to perform tests under different lighting conditions. I agreed with Chris to perform some tests and shoot some more negatives, paying careful attention to the speed and contrast – and to meet him again in the future to discuss print-making.
Short break in Minehead
Hannah and I went to Dunster for a short break to celebrate my birthday, also calling in at Minehead, Lynton & Lynmouth. It’s a beautiful part of the country, so I took four cameras and a rucksack of lenses. I decided on three 35mm SLRs (each loaded with a different film speed) and my Horseman view camera, as I wanted to take a picture of St George’s priory church in Dunster for my Somerset Towers project.
When we got to the church, I found that the churchyard was so small that it wasn’t possible to back up far enough to photograph the church with the Horseman – even using a wide angle lens. I also tried with a 35mm SLR with a 17mm lens (that’s ultra wide) and it still wasn’t enough. The picture in the Wikipedia article shows this, too. Later I found an ideal vantage point in the grounds of Dunster Castle, so all was well and I got a decent picture.
One of the SLRs (a Canon T90) was loaded with Ilford FP4+ which is nominally rated at ISO 125, and I decided to experiment and shoot it at ISO 80 as the weather was overcast. The film is currently hanging up to dry and looks good, although you can’t tell for sure until it is fully dry. It looks more contrasty and “meaty” which is reassuring, after Chris thought most of my previous negatives were a bit thin.
Another of the SLRs (a Canon AE-1 Program) was loaded with Ilford HP5+ which is nominally rated at ISO 400. I decided to shoot it at ISO 320 but it wasn’t until I got home I discovered that the overly enthusiastic autowinder had torn the sprocket holes in the film and the film had not advanced through the camera beyond the first frame. All the pictures taken on that camera were lost, but least I managed to untangle the film in the darkroom so in the future I’ll be able to use 34 of the 36 exposures.
I’m not in photography to make money, but recently I have been asked by several people if my work is for sale. In response to demand, I’ve set up an online shop!
You can visit the shop clicking this link, or by clicking Buy at the top of this page.
If there’s a picture in the photography section of this website that’s not listed for sale, don’t worry! Just drop me a message in the comments at the bottom of this page and I’ll add the photo to my portfolio, ready for sale.
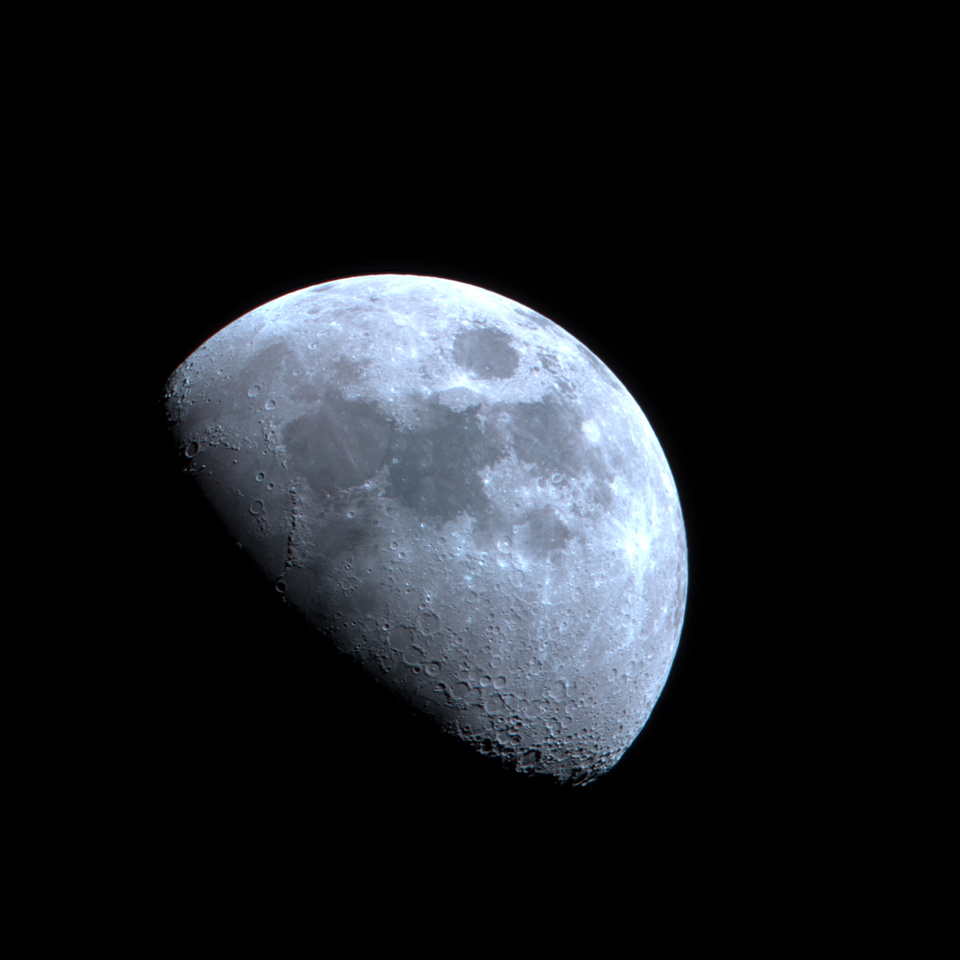
I haven’t managed to do any astronomy for a while because the weather has been so bad. However, last night there was a brief break in the clouds and the moon shone through. It was just enough time to set up my telescope in the front garden and attach a DSLR.
Moon
You might think the full moon would be best for photographing, but when it’s a partial moon some of the craters are lit from the side and they really stand out.
This picture is a stack of 28 exposures, each shot at ISO 200 and 1/100s using a modified Canon EOS 600D. I used a 6″ f/5 Newtonian telescope with a focal length of 750mm. It was a bit hazy so I used a CLS-CCD filter to remove as much of the urban light pollution as possible.
The focus isn’t quite spot-on but it’s still probably the sharpest image of the moon I have ever taken, thanks to now having an awesome telescope 🙂 Hopefully the weather will clear up soon and I’ll be able to get back out to Somerset and shoot some more deep-space objects.
This post is aimed squarely at darkroom aficionados.
I was given a roll of Kodak Kodachrome 40 in Super-8 format. It hasn’t been manufactured for years and conventional colour processing using the K-14 process has not been possible since 2010. Kodachrome does not contain coupled dyes so processing is not possible using C-41 (colour negative) or E-6 (colour reversal) – both of these would yield a blank film. But Kodachrome film does contain silver halide, so it ought to be possible to process it as a black & white negative.
It’s not much use to have a negative film in Super-8 format though, and a little bit of reading indicates that it should be possible to use a black & white reversal process to end up with a positive transparency film that can be projected. I wrote in detail about my motives the other day. This post is about the recipe I have devised from various sources, and that I will use as soon as the chemicals have arrived. The information about rem-jet removal I have cobbled together from various internet forums, while the information about reversal processing was mostly obtained from Ilford’s handy document about reversal processing.
Kodachrome film is coated on the back with a layer of opaque carbon called rem-jet. This needs to be removed before the film can be projected. It can be removed either before or after developing the film and each has its own advantages. Removing the rem-jet before processing means you won’t contaminate your chemicals, although it also means you have to do it in total darkness. Removing the rem-jet after processing means you can see what you are doing with the lights on, but you will probably get black residue in all of your chemicals. This is a decision for you.
First let me just copy out all the recipes needed to make the chemical baths, and then we’ll discuss how to use them. All of these recipes make 1l of each bath – adjust to suit. The baths should probably be used one-shot as the rem-jet may contaminate them even if you remove it first.
Rem-jet removal bath
Start with 1 litre of water
Dissolve 100g sodium sulfate into it
Dissolve 20g borax (sodium borate) into it
Add approx 2g sodium hydroxide to reach a target pH of 9.2. You will find some indicator paper useful.
Use your usual fixer. I recommend Ilford Rapid Fixer 1+4
Most of these chemicals are pretty harmless so long as you don’t eat them. The exception is the concentrated sulfuric acid, which will cause serious burns if it gets on your skin. It is essential to wear nitrile gloves and goggles when handling it. Always add concentrated acid to water, never the other way round. Check in advance what kind of plastic your bottles, measuring cylinders, pipettes and other apparatus is made of, as some plastic will be attacked. Never use metal implements. Glass is fine, but if you store the acid in glass bottles be aware that glass will break if dropped, whereas plastic will probably bounce…
The procedure
Kodachrome comes in so many formats. If you have 35mm format, you can load it onto a reel and process in the usual way. I have a 50-foot Super-8 cartridge so I plan to lay the film out loosely in a large photographic tray, usually used for processing prints. It’s not ideal but it’s the best I’ve got. I’ll need to take care to ensure the film doesn’t stick to itself.
If you’re removing the rem-jet before processing, do this step now. Otherwise, do it after fixing. Dunk the film in the rem-jet removal bath and agitate it vigorously. The rem-jet should be dissolved but chunks of it will probably come off and start floating around. Try to avoid letting these touch the front of the film, because they will stick. You will probably need several minutes in the rem-jet removal bath.
Transfer the film to a container of water. You might like to wipe the film with a sponge or cloth as you transfer it from the rem-jet removal to the water, to remove any bits of rem-jet that weren’t dissolved.
Add the film to the first developer for 12 minutes at 20°C
Wash the film thoroughly in water
Add the film to the bleach bath and agitate continuously. After 30 seconds you should be able to expose the film to room lighting (not daylight). Continue bleaching for about 5 minutes, or as long as it takes to remove the silver image. When all the silver has been removed, the film will be a creamy-yellow colour.
Rinse the film in water
Add the film to the clearing bath for 2 minutes, with intermittent agitation.
Rinse the film in water
Remove the film from its reel. Expose both sides of the film to light for the equivalent of 30-60 seconds at 46cm/18″ from a 100-watt tungsten lamp or 30cm/12″ from a fluorescent light tube.
Add the film to the second developer for 6 minutes at 20°C
Rinse the film in water
Add the film to the fixer for 5 minutes, with intermittent agitation.
Wash the film thoroughly in water
Rinse the film with wetting agent (e.g. Ilfotol), if you like
Hang the film to dry
For 35mm film, you may wish to cut and mount the transparencies in 2″ mounts for projection. For motion picture film, wind it onto an appropriate spool for projection.
The process at a glance
This table was taken wholesale from Ilford’s document Reversal Processing and is recreated here for convenience.
Processing Steps
Time
Comments
First development
12 min
May be adjusted to give optimum time for particular ISO rating. A longer development time will give a lighter image and a shorter development time will give darker image.
Wash
5 min
Preferably running water
Bleach
5 min
Strong acid and therefore stops development immediately: extend time if necessary for full bleaching: continuous agitation
Rinse
1 min
Clearing bath
2 min
Clearing solution removes any yellow staining caused by bleaching
Rinse
30 sec
Second exposure
1 min per side
Second development
6 min
Development as for normal black & white processing
Rinse
30 sec
Fix
5 min
Fixing as normal for black & white processing
Final wash
10 min
Running water
Dry
The test
I haven’t yet found anything worthwhile to shoot with the Kodachrome in Super-8 format, and it seemed worthwhile to do a test of the reversal processing before risking a rare film. I quickly exposed a roll of expired B&W print film, loaded it onto a reel and followed the above procedure from step 4 onwards.
It was pretty successful for a first attempt. The reversal worked, and I got positive images. However, one of my development timings wasn’t quite right and the transparencies are quite thin. Easily correctable on the computer if I were to scan them in, but they’d be disappointing if projected. I guess either my first development was too long or my second was too short – or perhaps the original camera exposure wasn’t quite right.
Reversal film
This picture shows a segment of the film, still hanging up to dry in the darkroom. The shadows are not dense enough but you can clearly see my neighbour’s car on their drive, in all its positive glory.
Positive image
Next time I try this, there’s not much I can do to judge the first development as it has to be done in the dark, but I could check the second development periodically to see how dense the shadows are. I’m looking forward to shooting the Kodachrome now!
With the news of local flooding tonight, I decided to walk down to Netham Weir to see what was going on. The river was noticeably swollen and had burst its banks in some places. The weir was nowhere to be seen.
Compare the black & white image, taken in May 2013, with the colour image taken tonight (January 2014). Apologies for the crap quality of the latter – I’m going for interest rather than photographic quality here.
Netham weir
Netham weir
As the subject might suggest, Netham weir is not the main focus of this blog post. On my way home from the weir I passed Avonview Cemetery. I’ve never been before but I snapped a few photos from the footpath as I passed. I wasn’t really equipped for long-exposure night photography so these are pretty grainy, but I like them anyway. I can’t decide which is my favourite.


