Review – Samyang 8mm f/3.5 aspherical Fisheye lens

The background

For ages I’ve wanted a decent fisheye lens. Back when I was shooting with my Fuji S9600, I bought a filter-thread screw-on fisheye adapter. It was only about £30 and the chromatic aberration was awful, even in the viewfinder. But it opened up a new world of photography to me, and I enjoyed using it, taking pictures like this self portrait and these shots of Bristol.

Fast-forward a couple of years and I upgraded my S9600 to a Canon EOS 450D. Presumably due to the larger sensor size, the fisheye adapter had practically no effect. I never used it again, but I missed it and I kept looking at proper fisheye lenses (as opposed to the fisheye adapters). I rather liked the look of Canon’s 15mm fisheye lens. Trouble is, it has a list price of £880 (although can be had for around £600 on Amazon). For an occasional-use lens, this is just too much.

Recently I had another craving for more fisheye photos and I decided to have a look at third-party options.

The manufacturer options

Of course Nikon and Canon do their own lenses, and most of the “big name” lensmakers such as Sigma and Tamron also have offerings. But there are also some from lesser-known names. Peleng, Samyang and Opteka all offer fisheye lenses for Canon SLRs for around the £200-£250 mark.

It seems that the Samyang and Opteka lenses are virtually the same, although they have different advertised focal lengths – 8mm and 6.5mm respectively. I haven’t quite worked this one out yet, but I think it’s because of the projection that is used. I settled upon the Samyang since it’s available for a few pounds less on eBay and Amazon.
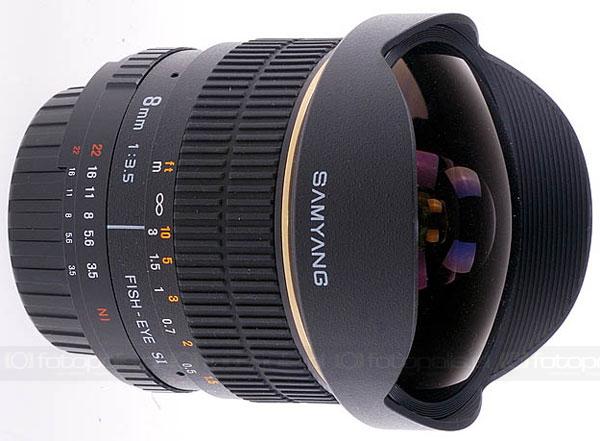
Samyang 8mm

Samyang 8mm

I was a little hesitant about buying a lens from a virtually unknown manufacturer. £200 is in that “danger zone” where it’s too expensive to risk wasting the money, but not quite expensive enough to be sure you’re getting something that’s any good. So I read some reviews, primarily these:

Amazingly, both reviewers gave the Samyang lenses a glowing review. They both noted that there is some chromatic aberration, but for the price, this can’t be argued with.

The thing that’s most likely to throw a spanner in the works is that this lens has no electronics. It can’t communicate with the camera, so there is no autofocus and no automatic aperture. This isn’t a problem for me, since I usually use Canon FD lenses which are also fully mechanical. But be aware, if you don’t like manual focus, think twice before buying this lens.

My thoughts

There’s nothing so formal here as a detailed review. I haven’t taken any measurements, but I can say a few things about using this lens.

  • When mounting or removing the lens from the camera body, it’s really hard to hold and twist the barrel of the lens without also twisting the aperture ring. I know it’s hardly a big deal, but it stands out from all my FD-mount lenses in this respect.
  • Having no electronics, you have to use the camera in aperture-priority or full manual mode. In Av mode, my 450D seems to consistently overexpose the image by about 11/3 stops. This is easily fixed with exposure compensation.
  • Again having no electronics, you have to manually open up the aperture when composing your shot, and then stop it down for taking the photo. If you don’t, the viewfinder can be very dim and difficult to focus.
  • The lens feels heavy and expensive – I guess due to the large glass elements inside. The focus ring is damped and feels much nicer than the manual-focus mode on most of Canon’s newer EF-mount lenses.
  • Despite some warnings about chromatic aberration and flare, I saw very little evidence of this in my photos. I deliberately challenged the lens in unusual lighting conditions by taking silhouettes against the sun and so on, but they all came out nicely.
  • Aside from adding some electronics, there’s not much that can be improved about this lens. For the price, the optics are incredible.
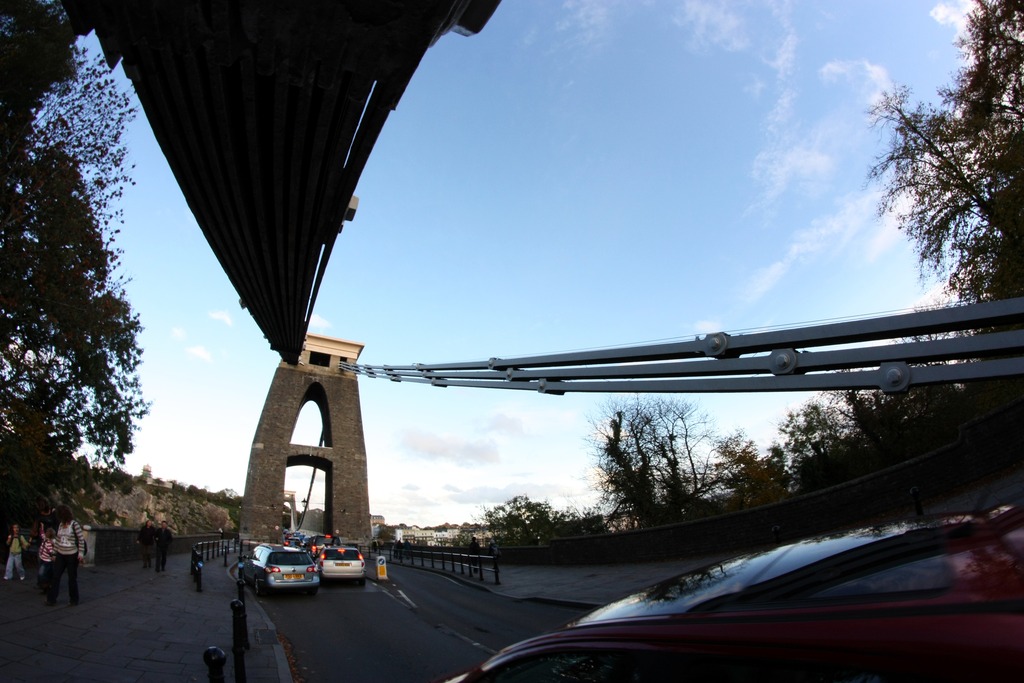
Sample photos

Have a look at the results of my evening photo-walk to the Clifton Suspension Bridge 🙂

Clifton Suspension Bridge from the Observatory
Clifton Suspension Bridge

Guess the year

Oh alright, I’ll tell you the year. It’s not like it was difficult…

These photos were taken in October 2010 on a Kodak Brownie Model I. The primitive camera on its own adds a certain aged effect to the photos, but the thing that really makes these photos look old is the accidental fogging.

While I was loading the film onto the reel for developing, I accidentally left my iPhone on the table, and I received a text. The room lit up like the centre of the sun. I managed to shove the film up my T-shirt and turn the phone face-down, but for a few seconds light was falling on the film, and caused the unevenness you see here.

This is St Paul’s Church, Stockingford, in Nuneaton.

And this is a Clifton villa, near the Suspension Bridge.

And of course, the distinctive view over Brunel’s Clifton Suspension Bridge.

Technically, these are “ruined” photos. But I really like the accidental aged effect. It suits the subjects.

Clifton Suspension Bridge through a fisheye

Today the Autumn sunlight was beautiful, especially in the early evening. I decided to head over to Clifton Suspension Bridge to try out my new Samyang fisheye lens.

First I climbed up the cliff to where the Clifton Observatory is, to get these shots of the bridge as a whole. I’ve been here in the past, and sometimes struggled to get the whole bridge in the frame, so it was a pleasant relief to use a lens with a 170-degree field of view!

Then I ventured down onto the bridge itself.

In the next two photos, I think it looks like the bridge piers are monsters with long arms, trying to grab cars. Perhaps that’s just my 6-year-old’s mind 😀

And finally I snapped this on my way back to where I’d left the car.

I have to say, fisheye lenses are enormous fun!

A strange suggestion

I happened to be looking at the website of a company that offers virtual private servers earlier today. This particular company has a box on their front page with a few questions about what you need your server to do, and it recommends you a suitable server package. But I was slightly surprised at the second-to-last option:

Server sorter

All the other options are sensible, but automated online gambling? I had no idea that there was a legitimate market for such a thing, let alone that a company would risk its reputation by offering a a controversial, although legal service.

Full moon

It’s very clear tonight, and there’s a full moon. I’ve tried photographing the moon many times before, but I think this is the best attempt so far. It’s probably due to bits of experience that I’ve gained, such as:

  • mirror lock-up to ensure a shake-free picture
  • stopping down to increase sharpness
  • spot metering to ensure a well-exposed heavenly body (if you’ll excuse the pun ;))
  • exposure bracketing to cover my back
  • and a better general understanding of the relationship between shutter speed, aperture, and ISO. This helps in finding the optimal combination for a given scene. In this case, low ISO to reduce noise, small aperture to increase sharpness and let the shutter speed sort itself out 🙂

None of the above is particularly complicated on its own, but put together, these assorted pieces of knowledge can produce a fantastic picture. I’ve been using “proper” cameras for about a little over two years now and in many ways I’m still a beginner. But looking back over my older photos, I can see a great progression with time. I recommend that anyone else who wants to take good photos should read about the basics, and in no time you too will have a better understanding of the fundamentals that you can readily apply to every photo you take. It’s good to jump in at the deep end and try going manual!

Incidentally, at some point today I shot my 5000th picture on my 450D. Yay! Not bad going since I bought it in March – it works out at about one photo per hour, on average.

How to make drips

Just now, I posted some pictures of drops of water on my photo blog. I decided to keep it short and pictorial, and to write about the details here, on my geek blog.

I’ve never tried taking photos of drops of water before, but I took advice from the comprehensive water drop photography guide. In particular, I wanted to know how to light the scene. I have two mains-powered flashguns but I didn’t really want to run cables into the bathroom so I used two old battery-powered flashes. Unfortunately they have a rather slow recycle time.

With the drip tray on the toilet lid, I placed one flash behind the tray on the toilet cistern, and the other at 90° on a tripod camera left. No apologies for the quality of these photos – they were taken on my phone since my camera was on its tripod 🙂

Rear flash
Side flash
The setup

It’s important to make the drips fall in the same place each time, so I attached a pipette to a microphone stand which was overhanging the drip tray. Even then it was very hit-and-miss, and in lots of the photos the drip fell outside of the frame.

The pipette

Of course it’s not really possible to use autofocus for this. I released a few drops and noted where they fell, and put a screw in that place. It’s then easy to focus manually, or to use autofocus on the screw and then flick it into manual focus.

I was using a Canon EOS 450D with a Tamron 90mm macro lens. I didn’t move in as close as I could have, because I wanted a slightly larger margin of error. After a few test shots, I put the camera in full manual mode with a shutter speed of 1/200s, an aperture of f/10 and a sensitivity of ISO200.

Even with the pipette sort of held in place, it’s pretty difficult to ensure the drops fall in the same place each time. But it’s even harder to get the timing right. I enabled mirror lock-up, so I would get a quicker response when firing the shutter. I found that the timing was best when I released a drip and pressed the shutter release as the drop appeared to touch the surface of the water. Of course with electronic delays and delays in my reflexes this is no doubt after the drop has hit the surface of the water. The photos seemed to come out OK though.

A water drop

You can see the rest of my water drop photos here.

I tried different timings but I couldn’t get any shapes other than a pillar or a crater. Some sources online say you need a more viscous liquid to get prettier drop shapes. This is probably something I’ll try again in the future.

I was also a bit disappointed that I wasn’t able to get a faster shutter speed than 1/200. Any faster than this and darkness started to creep into the bottom of the frame. I could probably have made shutter speed a stop faster if I wasn’t using cheap wireless triggers, and probably another stop again if I wasn’t using three-decades-old consumer-grade flashes. Next time I will probably use two mains-powered flashes with sync cables.

Drops of water

Today I had hoped to go walking in Cheddar Gorge to try out my new wide-angle lens, but it rained 😦 Instead, I stayed in and had a go at something I’ve been meaning to try for months: water drop photos.

I don’t have an electronic trigger or anything fancy like that, so it was pretty hard work to fire the camera at the right time, while also making drops with a small pipette. It’s also hard to make drops in the same place each time. In the end I took over 200 photos, and deleted over half them because they didn’t even have a drop in them.

A small number of the remainder had pretty drops, and I’ve chosen my favourites.

The timing determines whether you get a “crater” or a “pillar”. I wasn’t able to get any other shapes, which I have seen done elsewhere. People who have tried this properly recommend using liquids other than water which are more viscous, as it is possible to get more interesting shapes.

I will no doubt come back to this another day, and experiment with more viscous liquids, and also coloured liquid and coloured lighting.