These days I don’t always manage to come up with a Photo Challenge entry, Heat. I’m quite pleased with this shot of a match being lit. It did take quite a few goes to get something I liked.
Ignition!
I also shot a high-speed video of the match being lit.
I’m had enough photography for this evening – I guess I’m burned out 😉
Toning a black & white print is a dark art (and one that I’m just beginning to learn). So many different toners exist and can be used to create different coloured tints according to the concentration, temperature, time taken and combination of multiple toners that it is hard to know where to start. To make matters worse, many of the best darkroom textbooks that I usually refer to mention toners that have long since been discontinued. As part of my quest to learn about toning techniques, including split toning, I decided to acquire several modern(-ish) toners and experiment with them.
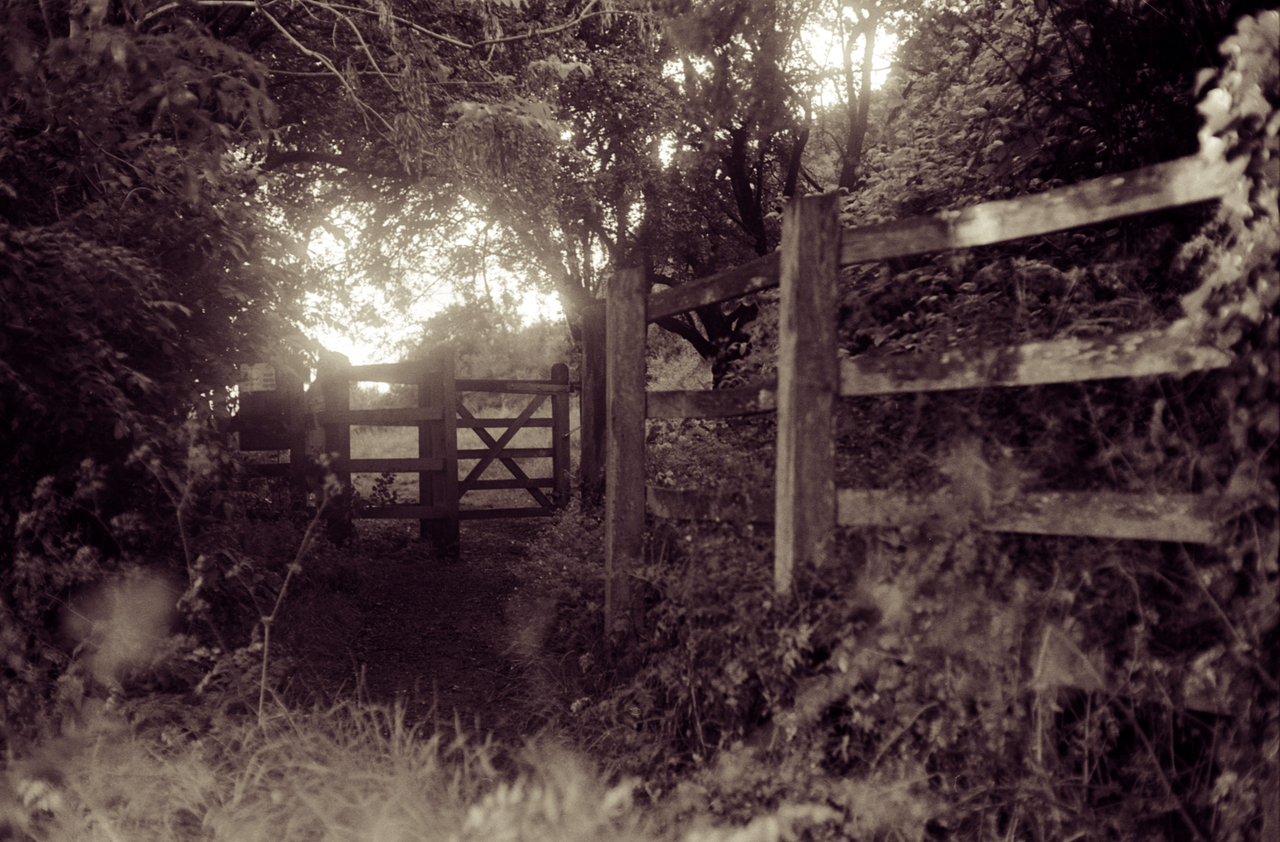
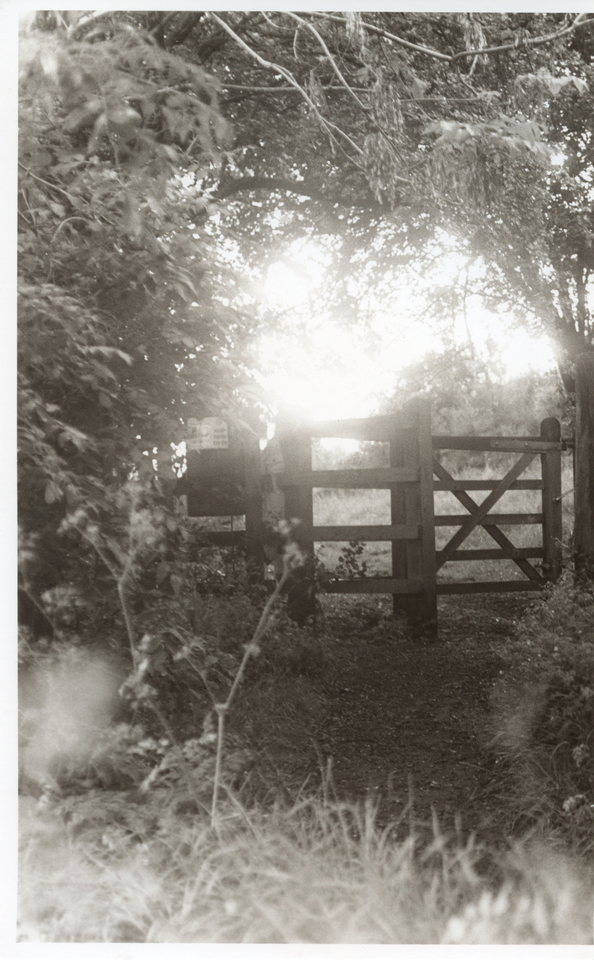
But first, I need a set of near-identical prints to work with. I decided to use this recent picture of a gate I took on Troopers Hill. This version of the image was scanned directly from the negative, and has been given a fake digital selenium tone.
Gate
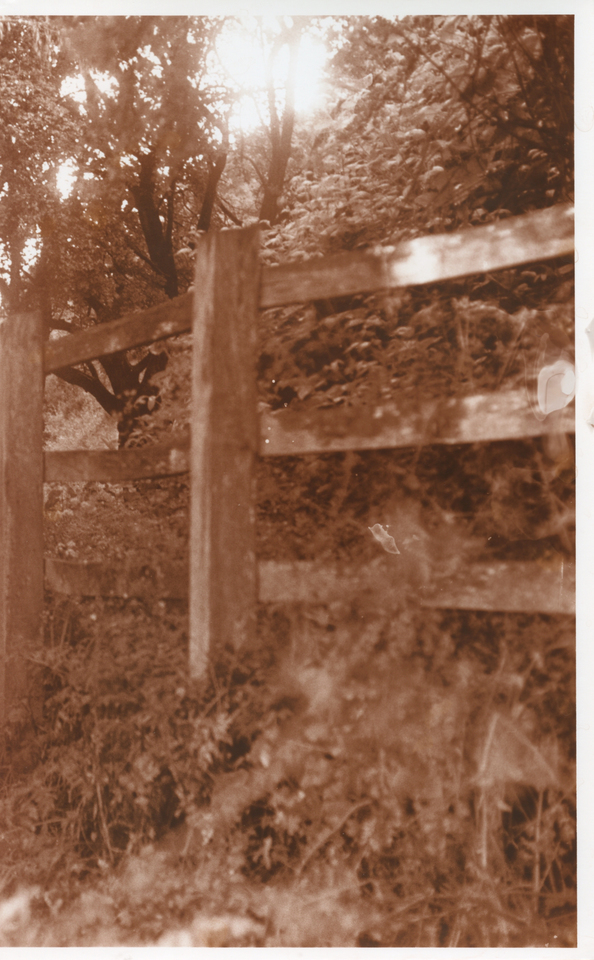
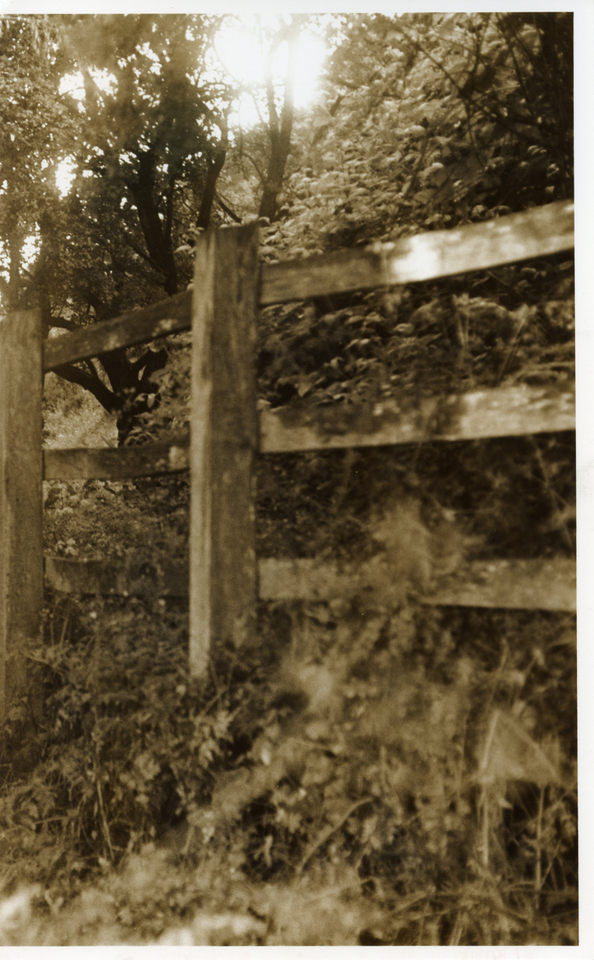
The original negative was shot on 35mm Ilford FP4+ using a Canon Pellix QL and Canon FL 50mm f/1.4 lens. This was actually the first time I used the Pellix and the light meter wasn’t working, so I guessed. The exposure is a bit “off” but the negative shows a wide range of shades so it is suitable for this experiment. The test prints were made on Kentmere VC Select Glossy using a Schneider-Kreuznach Componon-S 50mm f/2.8 lens and my newly-converted LED enlarger. Because of the number of tests I wanted to do, I made seven prints to finish a pack of old paper and decided to cut them all in half to give fourteen tests. These scans of the prints have not been digitally altered, although you can only infer so much from them because they don’t truly reflect the prints.
After making the prints I noticed that some of them have fixer stains. This is nothing to do with the toning process, and serves as a lesson to me to pay more attention to which tongs have been in the fixer!
These pictures are most certainly not a masterclass in toning and are simply the results of my initial experimentation. There is enormous room for improvement with the timings and concentrations of the toners, and in some cases I probably need to adjust the exposure of the initial print.
#
Toners
Times
Notes
1
Untoned
Green cast
2
Selenium
3 min
Blackens shadows, increase contrast.
3
Viradon
10 min
Scan doesn’t really reflect the colour. More purple-brown in reality.
4
Sepia
Bleach 2 min + 5 min
Nice vintage effect but probably too pronounced for most purposes. Should probably be bleached less.
5
Blue
30 sec
Very fast toner that darkens the print.
6
Copper/Red
8 min
Leaves a strange scum on the surface of the print which needs removing with a cloth.
7
Viradon then Selenium
5 min + 9 min
More purple than Viradon on its own
8
Selenium then Viradon
30 sec + 10 min
Too long in selenium means the Viradon was prevented from working
9
Sepia then Blue
Bleach 2 min + 1 min + 20 sec
Has lost some density. Should probably have been bleached for a shorter time (see #14)
10
Copper/Red then Blue
3 min + 20 sec
Split OK but the divide is too obvious. Should probably let the copper work longer to tone the midtones more before unleashing the blue.
11
Sepia then Selenium
Bleach 2 min + 30 sec + 6 min
Almost completely bleached and toned in sepia almost to completion. Selenium doesn’t show.
12
Selenium then Sepia
1 min + Bleach 2 min + 6 min
Barely distinguishable from plain selenium (#2). See #8.
13
Blue then Selenium
10 sec + 2 min
Split-toned well but needs longer in blue. It looks too blue to begin with, but the selenium quickly counteracts the blue.
14
Sepia then Selenium
Bleach 30 sec + 30 sec + 2 min
Similar to #11. Partial bleaching of highlights & midtones which are then restored by sepia, leaving the shadows for the selenium. Split tones well.
1 Untoned
2 Selenium
3 Viradon
4 Sepia
5 Blue
6 Copper/Red
7 Viradon then Selenium
8 Selenium then Viradon
9 Sepia then Blue
10 Copped/Red then Blue
11 Sepia then Selenium
12 Selenium then Sepia
13 Blue then Selenium
14 Sepia then Selenium
I’m very pleased with these results, and I now have leads for further experimentation. Looking forward to making some nice split-tone prints in the future – both refining the times here to get more subtle effects, and trying new combinations. I reckon Copper/Red followed by Selenium would look nice.
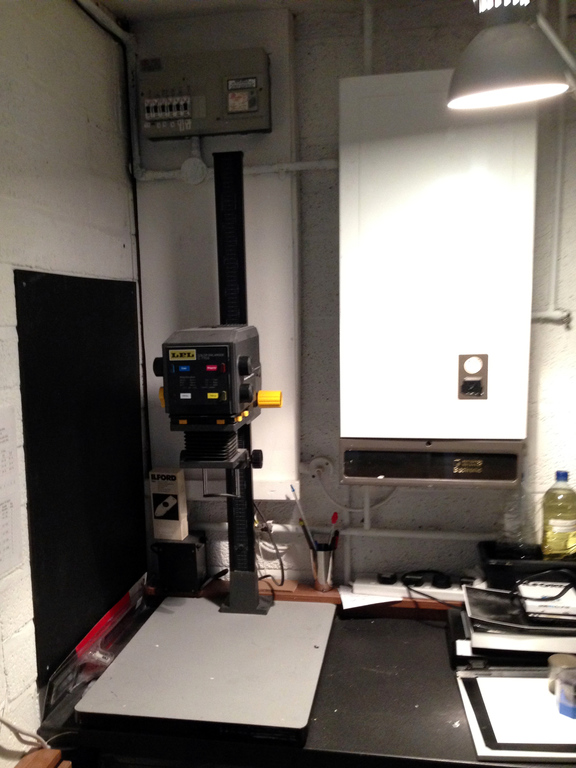
A few weeks ago I made the jump to large format photography, and upgraded my LPL C7700 medium format enlarger to a De Vere 54 large format. The C7700 is a fairly sophisticated machine from the 1970s/80s, while the 54 is a primitive beast, cast in the fires of Mordor back in 1952. It needed a little bit of modernisation to suit my needs.
The 54 came with a condenser head which worked really well with a 135mm large format lens, but was unusable with shorter focal lengths used for smaller film formats. I decided to convert the condenser head to a diffusion head. The project was a reasonable success, although I had problems with evenness of illumination. I was only able to get even illumination with such severe diffusion that I lost three stops of light, and exposure times became very long. And everyone knows I’m impatient.
LPL C7700
De Vere 54 w/ condenser head
De Vere 54 w/ cold cathode head
More recently, I was able lay my hands on a cold cathode head. The heads simply sit on the frame under their own gravity, so swapping is dead easy. It seems to be of original 1950s construction and still working, although the fluorescent tube seems to have developed a flicker and a loud buzz. When I opened the head up, I was shocked (not literally) by the electrical “safety” of the device. The original cabling was insulated with rubber which had long since perished and peeled away, and the wires to supply the two ends of the tube were simply wrapped around it – they could easily have come off. To make matters worse, the metal casing was not earthed. The tube itself was covered with a sheet of old cardboard, presumably not original, but marked with scorches.
Cold cathode head
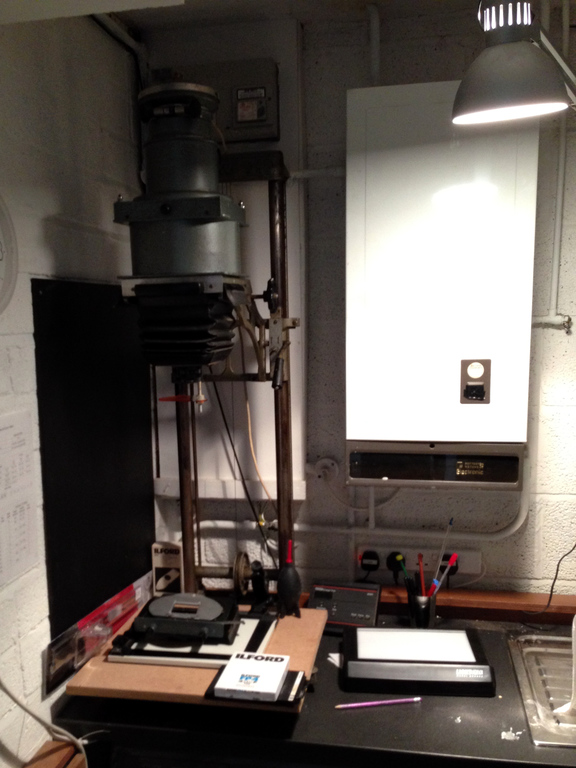
I could have re-cabled the head but given that it’s basically impossible to get new tubes I decided it would be easier to convert the whole lot to run on LEDs. I read about a similar conversion project that was undertaken by someone else whose skills at electronics are far better than mine. Colour LEDs with variable contrast would have been a nice touch but beyond my ability – so I decided to keep it simple and use plain white LEDs. I’ll have to control contrast with coloured filtered instead.
The area covered by the cold cathode is about 15×18cm. Trying to keep the amount of soldering to a minimum, I investigated various LED panels including video lights such as the Yongnuo YN-300. In the end I decided to buy five Rolson work lights and remove the LED panels, each with 72 LEDs in a 3×24 grid. These are designed to run from 4×AA batteries at 6V and a fairly beefy power supply from Maplin.
With hindsight I would probably have done this differently (told you I was no good at electronics) but I wired the five LED panels in parallel, so the whole lot would run from 6V. Each of the 5 individual panels has 24 parallel branches, each with 3 LEDs in series – sharing 6V between them. Testing with batteries and an ammeter I found that the whole panel draws 1.1A. At 6V, that;s about 6.5W steady state. I have no idea if there is a current surge when the LEDs are switched on so I chose a 17W power supply that claims to provide up to 2.5A at 6V – giving me more than double the power I need.
It’s actually a multi-voltage power supply so I decided to run it at 5V rather than 6V to reduce the forward voltage on the LEDs and hopefully increase their lifetime somewhat. Under-volted at 5V they are still much brighter than the original cold cathode tube.
The power supply seems to have a capacitor across the output so when you switch on the panel you don’t get any light for 0.4 seconds. After switching the panel off, you get extra light for 0.1 seconds. This is OK, so long as I remember to compensate for the lost 0.3 seconds of light. It’s probably no worse than using a filament lamp, which takes a bit of time to reach full brightness. Over a typical 15-second exposure it’s only a 2% error anyway.
My fabrication skills are pretty bad, so I cobbled together the five LED panels with a piece of hardboard, some screws and plenty of hot glue gun.
LED panel
I drilled some holes in the cast aluminium case to be able to mount the LED panel and the power supply in the top half of the casing. The original cold cathode head had contained a large ferrite transformer so it was no problem to accommodate a switch mode power supply. The head is therefore run from an external mains supply, just as the original cold cathode and incandescent heads were. This means I can still use my enlarger timer, which is a simple timing circuit with a mains relay.
The lower half of the cold cathode head contains a piece of opal diffusing plastic. It looks like it may once have been filled with water. The single diffuser on its own was not quite enough to fully mask the periodic pattern of the LEDs in a grid, so I added another piece of diffusing plastic a few centimetres above it, also mounted by drilling sideways into the aluminium casing and using machine screws. This was sufficient to disguise the slightly uneven lighting from the LEDs while still allegedly passing 95% of the light.
LED enlarger head open
I also decided to modify the lens mount. This old enlarger takes lenses with a coarse 2½” thread (approx 63mm). It’s quite rare (and therefore expensive) to find lenses with this fitting, or indeed adapters to use modern M39 lenses. I have one lens in this size (an EL-Nikkor 135mm) so I didn’t want to lose the 2½” mount. I planned to add an M39 threaded flange to an aluminium panel and mount it over the original lens mount. The EL-Nikkor lens has a fairly small rear element so the 39mm mount does not obstruct it.
First I had to very carefully cut the leather bellows away from the aluminium lens standard where it had been glued for more than sixty years. I managed to do it using a credit card to get between the leather and the metal and gently ease them apart with minimal damage to the leather.
Then it was a case of drilling some holes to mount the M39 flange on the aluminium panel and the panel to the lens standard. It’s not the prettiest job ever but it works. Here’s the lens standard with the large EL-Nikkor 135mm lens and the more common sized Toshikato 75mm lens. Both types of lens can now be screwed in without using adapters.
Lens standard with lenses
After modifying the lens panel, I reattached the bellows using a gel-type superglue which claimed to be able to bond leather and metal. I held the leather against the aluminium by hand for 30 seconds and it seemed to stick quite well. I then contracted the bellows up as hard as I could, using the focus knob. I kept it there for a couple of hours until the glue had cured, and it seems that the bond is firm.
Other minor improvements were a general clean and lubrication of moving parts, and fixing the brake. The heads on the 54 is very heavy so to counteract the weight, the head is suspended from a wire which goes over a pulley at the top and is fed round a spring-loaded capstan at the bottom. To keep the head in place, it has a lever-operated brake. You can see the wire, pulleys and brake lever in the pictures at the top. I replaced the aged, cracked brake pad with new one, designed for mountain bikes.
Now I just need to find some time to get back to making prints! Thanks to my colleague Paul and my father-in-law Arthur for their help with electronics and metalwork.
This isn’t your usual Canon SLR. The EX EE was a budget model and to keep the cost of the lenses down, the rear half of the lens is permanently attached to the camera. The front half of the lens unscrews and is interchangeable, so you only have to buy half a lens to upgrade.
There is a small range of shutter speeds available and the aperture scale is continuously variable without markings between f/1.8 and f/16. It’s tricky to set the aperture accurately by hand, but it works OK if you use the match-needle metering.
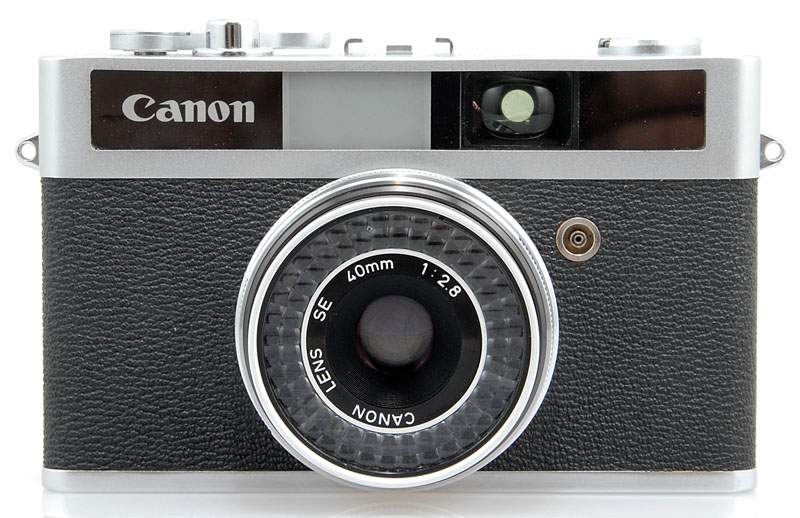
I’m not normally too interested in 35mm compacts but I picked up this Canonet Junior for a bargain price. I like the 40mm lens which is a little bit wider than normal. Unfortunately this camera is designed to work either in aperture priority or full auto, but the selenium light meter has died of old age and the shutter is now stuck at 1/30. It’s still usable but you have to be careful to hold it steady.
I had a busy bank holiday weekend. I travelled around and shot three rolls and two sheets of film. I’ll try and break these photos down into distinct events. First there were a couple of test shots using my new Canon FD 200mm f/2.8 lens. The cranes stand in Bristol’s floating harbour and the other view is across Clifton on a misty morning.
Bristol harbour cranes
Clifton on a misty morning
On Saturday we visited Exeter for the day. Hannah was singing at evensong and spent all day in rehearsals, so I occupied myself by spending several hours photographing the interior and exterior of Exeter cathedral.
Exeter cathedral
Exeter cathedral angel
Exeter cathedral facade
Exeter cathedral
Gate
Flowers
Couple in Exeter cathedral
Exeter cathedral procession
Exeter cathedral
Exeter cathedral tomb
Exeter cathedral chapel
Exeter cathedral sculpture
Exeter cathedral golden eagle
Exeter cathedral
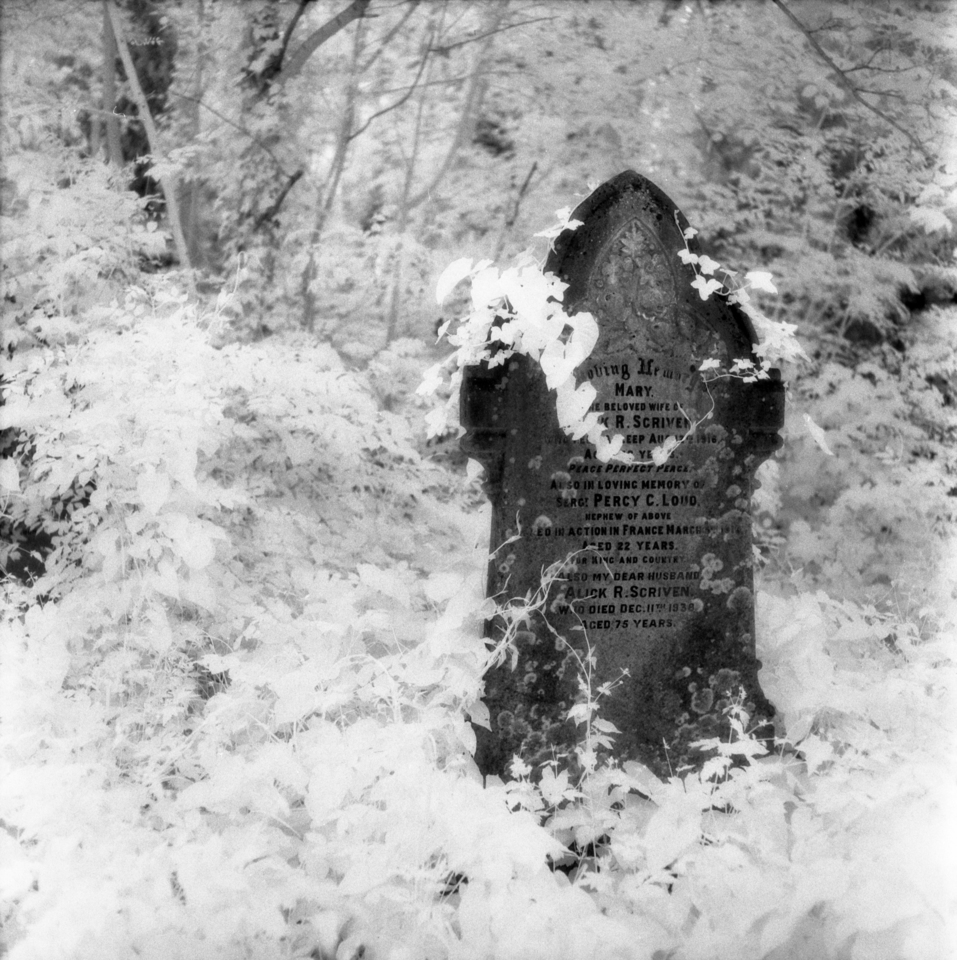
On Monday, I went out looking for pictures for the natural movement photo challenge. First I visited a weir near my house, and decided to shoot some infrared film to allow a long exposure. Then I called in at Arnos Vale cemetery. The photos of the headstones are quite striking – the infrared filter renders foliage as white and stone as black.
Netham weir
Arnos Vale cemetery
Arnos Vale cemetery
Arnos Vale anglican chapel
I also took some pictures at Arnos Vale with regular black & white film.
Cross
War graves
A word on my equipment. Each film was shot on a different camera and using a variety of lenses.
The pictures which appear sepia tinted were digitally split-toned to mimic selenium toning. I decided to keep the infrared pictures as straight black & white.
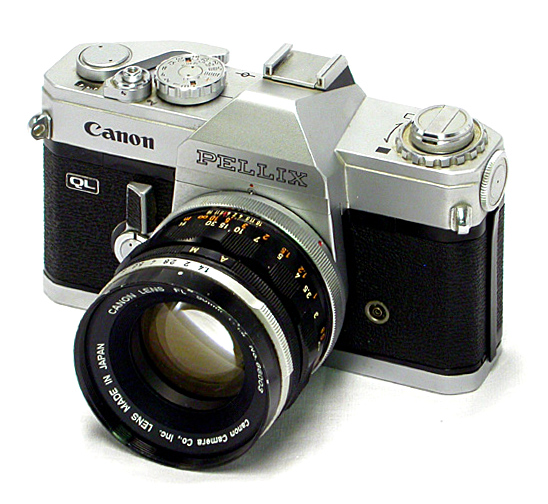
I finally laid my hands on a camera I’ve wanted for ages – a Canon Pellix from the mid-1960s. Mine is the QL edition from 1966. It’s like most other manual focus Canon SLRs except that it has a fixed pellicle mirror, rather than a moving mirror. It diverts 1/3 of the light to the viewfinder and 2/3 to the film, so overall you lose about half a stop of exposure. To compensate for this, the standard lens for the Pellix is an FL-mount 50mm f/1.4 rather than the slightly slower f/1.8 you might usually expect.
The light meter in my Pellix doesn’t work reliably so I avoided using it at all, and used an iPhone app and my intuition for rough metering. There were a couple of glorious evenings last week so I made these exposures shortly before sunset in the nature reserve near my house, using Ilford FP4+ film.
I love the dreamy image quality from the FL 50mm f/1.4 lens. It flares easily when shooting into the sun (I deliberately was, as the sun was low in the sky) and it produces lovely bokeh when shooting wide open – for example in the picture of the hat. I love this camera and lens 🙂
Unlike moving-mirror SLRs, the mirror in the Pellix is in the optical path when taking a picture. The mirror in my Pellix has some scratches from where I presume a previous owner was a bit over-zealous in their cleaning. This could probably be contributing to the flare and haze too.
The Canon Pellix looks like any other Canon SLR of the 1960s or 70s, but it has an important difference. The mirror in the Pellix is fixed and always directs light to the viewfinder and to the film simultaneously. You avoid mirror vibration, but lose some light. If you’re using the built-in TTL meter then this is accounted for but if you are using a handheld meter remember to add an extra half-stop.
My sample works nicely but the leatherette from the stop-down lever is missing, the film counter doesn’t advance and the film advance lever doesn’t automatically return when winding on.
Over a week ago now I had an intense astronomy evening with my tame scientist. There weren’t many hours between sunset and moonrise so we worked fast to try and prove that we had a reliable autoguiding setup, having been plagued by various failures and obstacles the last few times we’d tried (see below)
We did a lot of testing, a lot of calibration and photographed several of the Messier objects. We didn’t have enough time to take many frames of each, or to capture many dark frames. As a result, these stacks are very noisy but are a good proof of concept that finally we have a satisfactory autoguiding technique. All of these pictures seem to have slightly reddish white balance but it’s not really obvious what colour the galaxies should be, and using a CLS-CCD filter doesn’t help because only certain wavelengths are permitted through.
This is Messier 104, the Sombrero Galaxy – so-named because of its dark brim. This is a stack of 6 frames and 3 dark frames, all shot with an exposure of 150 seconds at ISO 6400. In a future attempt when I have more frames I may try to drizzle the image to increase the apparent resolution.
M104
This is Messier 64, the Black Eye Galaxy. This is a bit brighter than the Sombrero Galaxy so I cut the exposure down to 100 seconds at ISO 6400 to avoid over-exposing the nucleus too much. As before, there are 6 light frames and 3 dark frames.
M64
This photo of M81 (Bode’s Galaxy, left) and M82 (the Cigar Galaxy, right) is edited slightly differently from the two shots above. Above, I clipped the darker areas of noise to black to make the background appear plainer. Here, doing that would have caused loss of detail in the faint spiral arms of the M81 galaxy so I decided to leave the background noisy. The right way of solving the problem is to take more light frames, and some dark frames.
This pair of galaxies was brighter again, so the exposure was 90 seconds at ISO 6400. There are just 5 light frames in this stack, and no dark frames. These galaxies were also relatively low in the sky over luminous Bristol on a somewhat hazy night, so the image was degraded by less-than-optimal atmospheric conditions.
M81 and M82
In the past, I’ve had various problems trying to get autoguiding to work. In no particular order:
Laptop power supply catching fire
Forgetting to install the driver to allow the laptop to control the telescope (and no internet in rural Somerset!)
Forgetting to account for daylight savings time after it changed in Spring
Netbook having insufficient power to control two cameras and the telescope simultaneously
Having a crap guide camera (a home-modified webcam glued into a film canister)
For those who are interested, my equipment this time:
At the weekend I was out enjoying the sun in Somerset, and collecting more churches for my Somerset Towers project. I wasn’t specifically looking for other photo opportunities but when I saw this scene in Compton Martin I thought it was worthy of a picture.
Compton Martin
Picture was taken with Horseman 45HD using a Schneider-Kreuznach Symmar-S 150mm f/5.6 lens and Ilford FP4+ film rated at EI 50. Exposure was 1/8″ at f/16 with plenty of front tilt down to keep the flowers in focus. This image was scanned directly from the negative and fake-toned in selenium digitally. Next time I’m in the darkroom there will be real selenium prints!
I’m still getting the hang of using my large format camera. Mostly I’m annoyed at myself for not noticing the massive pentagonal lens flare in the middle of the photo while I was setting up. This could easily have been avoided by shading the lens from the sun with my hand.
I’m also not 100% convinced about the composition. Ideally I would have liked the cottages to be more prominent by using a longer focal length, but 150mm is the longest I currently have. Maybe I’ll pick up a 210mm lens one of these days. Suppose I could always crop it!