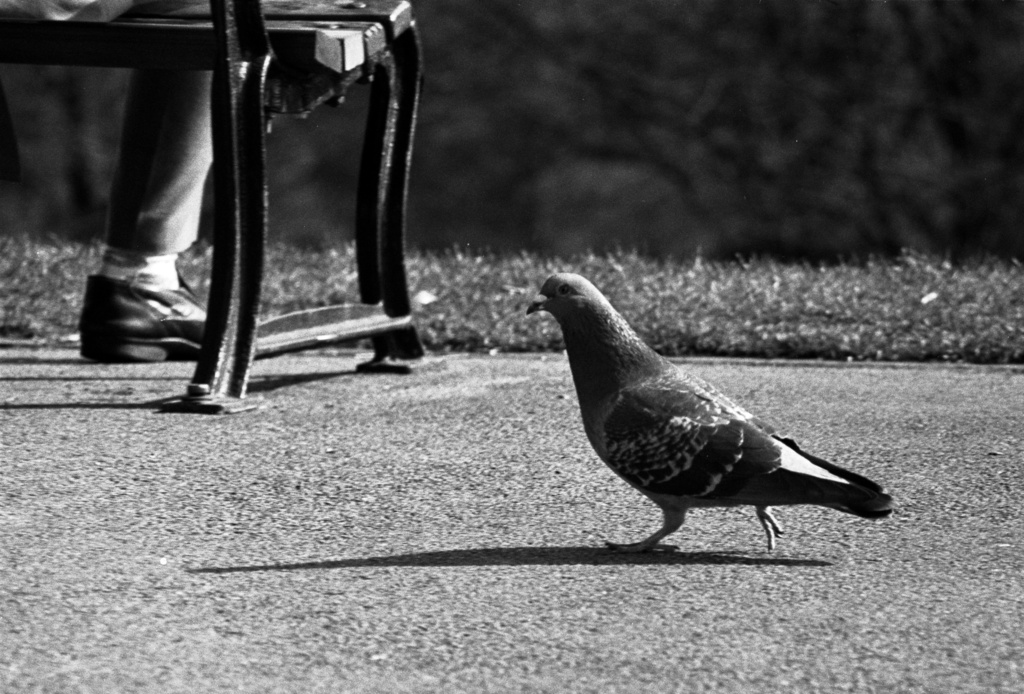
Some say that it’s not wildlife if it’s urban vermin. I don’t care, and here are my pictures of seagulls and pigeons.
This is the first time I’ve tried using fast film (Ilford HP5+) in my camera, and I coupled it with an 80-200mm lens. This photo of a seagull was an exercise to practise panning to follow a moving object, and manually focussing at the same time. Pretty tricky, but I like this photo.
My car was due its MOT and service today, so a couple of weeks ago I booked it into the a Ford dealership in north Bristol.
Since then, there’s been a funny rattling sound from somewhere under the car. I guessed it might be the rear suspension or something like that. When I dropped the car off this morning, I asked them to make a note that there was a rattle, and to check it out. The conversation went something like this:
Me: My car has been rattling. (I give details) Can you please make a note for one of your mechanics to check it while it’s being serviced?
Woman: Certainly, but please be aware that there is a £44.99 fee for any diagnostic tests.
Me: What? You mean making sure the wheels stay on isn’t part of a service?!
Woman: I’m afraid not.
Me: In that case, don’t worry. Just do the service as normal, and if the mechanics happen to notice something then I’ll have it fixed. If not, I’ll take it to a different garage tomorrow.
Woman: No problem.
Me: Out of interest, if I pay £44.99 to have the suspension checked and it’s not that, will the mechanics be able to check other things, such as the steering?
Woman: I’m afraid not. You’ll have to pay the fee again if you want a different test doing.
I don’t think I will be using this dealership again. Initially I only started using an official Ford dealer because it was necessary to maintain the car’s warranty. Now that has expired anyway, I might as well go to my local garage which is cheaper, nearer and friendlier. Most importantly, they don’t play Battleships, charging fifty quid each time I make a guess.
Today my new 50mm f/1.8 lens arrived. It’s hailing outside and there isn’t much to point a camera at indoors, but Hana sat thinking so I snapped one of her.
I shot this with the aperture wide open, and I’m pleased with the result. It’s my fastest lens by a long way, and I think I will be using it a lot.
Before I spent ages finding a decent location, I thought it would be wise to figure out how exposure lock works, and to make sure I could use the stitching software properly. So I took a really boring set of photos from my balcony. Again.
However, I’m quite pleased with the results. The joins are hard to find (except for the broken balcony railing[1]) and the effect is good.
Anyway, now that I have a grasp on what I’m doing, I will definitely have a go at taking a panorama in a more picturesque location. Watch this space!
This is because the point from which the photo is taken (the end of the lens) is not the same as the point where the camera rotated (where it joins the tripod). The end of the lens is probably three or four inches in front of the rotational point, which is bound to give some parallax effect when comparing near and distant objects.
I’ve decided to start tagging all of my new posts from now with the camera and lens they were taken with. At some point I will probably work back through the archive (250 posts!) and tag those too.
This probably won’t interest most people, but it’s a handy reference for me. Anyone who is interested in cameras and lenses might also want to see my Cameras page, or the photography posts on my geek blog.
Recently I bought a Canon EOS 450D from Jessops. They were running a bundle deal, and it came with a Canon 18-55mm lens and a Tamron 70-300mm lens.
The long zoom was quite an important aspect to me, since I had upgraded from a Fuji S9600, with a huge range in focal lengths.
I’ve now owned the camera for a couple of weeks and I’ve had a chance to play with it a bit. Of course a fortnight isn’t nearly enough time to fully understand everything about a complicated device such as a DSLR, but I’ve tried a few things with it.
This review in particular is about the Tamron lens.
Obviously you don’t expect wonders from the cheapest lens in its class, but I am still quite disappointed. The S9600 was a jack of all trades (and master of none) and showed weaknesses at both ends of its range of focal lengths. That said, the whole camera cost around £200 and can now be bought for significantly less than £200. I think that represents fantastic value for money. During my 23-month ownership of it, I’ve taken about 10,000 photos. On average, that’s more than one every two hours!
Given that the Tamron lens on its own costs almost as much as the entire Fuji camera, I had hoped for significantly better images. Never mind.
At the shorter focal lengths, it’s OK. Nothing to write home about, but it’s fine. I took these self portraits at a focal length of 70mm and they seem OK.
But when you start to zoom in, the problems get worse. Some of this should have been obvious from reading the box – its largest aperture at 300mm is f/5.6, which is pretty slow. To make matters worse, there is no image stabilisation. You can’t complain about this – it says it on the box and if you want a fast lens, you have to pay more for it.
But I wasn’t at all pleased with the optical quality at 300mm. Take, for example, this photo of some distant horses. The first photo is the full image, and the second one has been cropped to show detail. Neither photo has had any other editing.
Horses in HartshillHorses in Hartshill
The first thing you might see is that the focus is very soft. It wasn’t camera shake because the sun was out and I used a tripod. The autofocus just seems to struggle at long focal lengths.
But then look at the chromatic aberration around the white horses. It makes the image look pretty terrible.
I also tried taking some photos of the moon last night, also at 300mm. As before with the horses, it couldn’t autofocus properly. The low light conditions made it much worse and the image was so blurry that there was no definiton on the surface of the moon.
I flipped the lens into manual focus mode where I was able to hugely improve the focussing. Unfortunately it seems in manual focus, as you approach infinite focus, the moon becomes sharper, but for the last little bit of the travel the lens goes beyond infinite focus and makes a garbage image. Not good at all.
In the end, this is the best I could manage. Here I used manual focus, spot metering and I’ve cropped the image afterwards.
I’m not sure if my lens in particular is faulty, or if these lenses are all equally bad. But I am very unimpressed with the results, even for a budget lens. Given how much more the 450D and this lens cost than the S9600, there is no excuse.
Tamron’s own website says:
Perfect 2nd lens for your DSLR kit
So they are certainly admitting that it shouldn’t be your primary lens. However I would also hesitate to say it’s “perfect” for anything.
My advice would be to avoid this lens, unless you’re on a particularly tight budget, or you don’t plan to use the higher end of the zoom range. Be prepared to switch off the autofocus, and focus manually if sharpness matters. Get a Canon telephoto lens if you can.
Update
I may have been a bit hasty in my critical review. As I said in my comment below, I had another go today at taking a few photos with the lens.
First here’s a chimney stack at full zoom, and a cropped version below.
Chimney stack at 300mmChimney stack at 300mm (crop)
As you can see, the focus is very sharp. There is a little aberration, but that’s expected from a cheap lens.
This photo of the seagull was also taken at full zoom. The autofocus can be pretty slow going from one end of the focus to the other, but if you focus on a similar object first, it’s much faster. In this case, fast enough to get a lock on a swooping seagull.
Seagull
Yes, it’s not perfect – but it’s acceptable for the price. I’m going to keep this lens and see what I can achieve with it 🙂
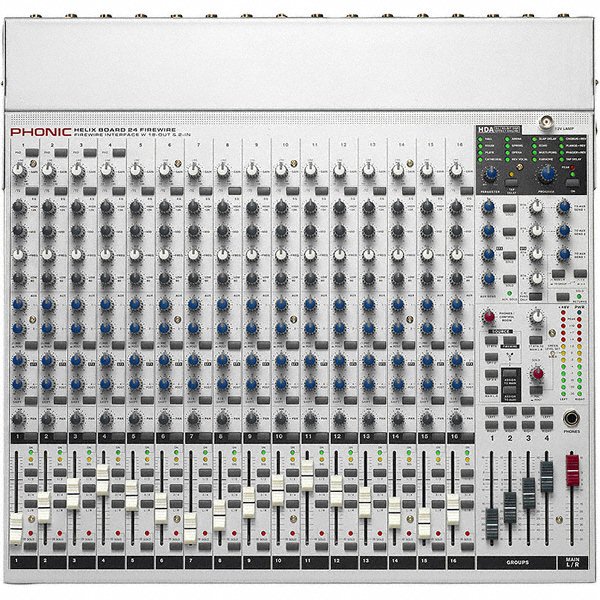
I own a lot of recording kit, and in the past I attempted to set up a home recording business. It never took off, and in the end I only used it a handful of times, and to record some music with my then flatmate.
Since then, it’s sadly sat around gathering dust.
But this weekend I was asked to record the Passiontide Sequence evening choral service at St Mary’s church, Fishponds, based on an order of service called The Way of the Cross. It was pretty short notice and I was fairly disorganised (such as remembering on the afternoon that all but two of my microphone stands are in my parents’ attic!).
In the end, I thoroughly enjoyed tinkering and playing with the kit, and I’m extremely pleased with the outcome. Click the icon below to hear a sample – Trisagion VII from The Way of the Cross.
Trisagion VII
I haven’t recorded this choir or organ before, or done any work in the church itself. In the end I decided to use an XY crossed pair of small-diaphragm condensers in front of the choir stalls, and a single large-diaphragm condenser on a tall stand a few metres away from the organ pipes (above the door at the opposite end of the church).
Lessons learnt:
Small-diaphragm condensers can be quite sibilant
Small-diaphragm condensers are not great at picking up the lower frequencies (bass and tenor singers). Next time I will probably use a crossed pair of small-diaphragm condensers and a crossed pair of dynamic microphones to pick up the full range of frequencies and worry about blending the signals later.
The organist suggested that the microphone was a bit too close to the organ and would probably be swamped by the high sound pressure level. As it turns out, SPL wasn’t a problem, but in future I will place the microphone a few feet further back to collect a more even and colourful image of the organ. Of course, pipe organ’s aren’t supposed to be listened to at five metres’ range, or your head will explode.
I may try replacing the single large-diaphragm condenser for the organ with a pair of dynamic mics, to get the organ recorded in stereo too.
Pipe organs make a lot of hissing from air leaks, which shows up in the recording as background hiss. Be prepared to do a some kind of intelligent noise reduction (rather than just cutting out all high frequencies, which also removes the letter S).
Buildings like churches are always bigger than you think. I thought that a 10m cable would reach to the organ microphone, but I had to join 2 x 10m cables together. I will buy some 20m cables for next time!