I bought the Canon Demi partly for interest – it is a “half-frame” camera. It takes normal 35mm film but instead of the usual landscape-format negative, it takes two half-size portrait-format negatives in the same space. This means you can get twice as many pictures on a film – there is room for 72 on a normal 36-exposure film.
I also think its smooth, curved looks are well ahead of its time, and due to its small size, it could almost be a digital compact!
Living in Bristol and aspiring to be a landscape photographer, it was inevitable I would one day visit Clevedon pier. When I visited in June, it started to rain just as I got there. I was initially disappointed (and wet) but now I’ve come to inspect the negatives, I think the inclement weather adds a lot of atmosphere to the scene.
I’ve dabbled in infrared photography a few times, originally using Maco 820c. The results were varied and I didn’t shoot it often enough to get a good feel for it. More recently, I bought some Efke IR820. If you’re reading this post, you presumably know vaguely about the film already, so I won’t go on about it.
I decided to make a renewed attempt to understand how to expose the film reliably so I can start taking decent shots with it. I don’t have a proper light meter. If I can be bothered to carry my DSLR, it makes an excellent spot and average meter. If not, I use an iPhone app called Pocket Light Meter, which is surprisingly good.
There are various methods of metering for infrared film. The light meters in some SLRs can meter infrared accurately through the filter; unfortunately the one in my Canon AE-1 Program doesn’t. Some photographers work out an “effective ISO speed” for their combination of film and filter, and use this with an unfiltered light meter. Different forums recommend different effective speeds and it’s hard to compare filters. The only way to work out what’s best for you is to sacrifice a couple of rolls to trial and error.
Filters
I am using a generic 720nm filter, which is a little stronger than a Hoya R72. The most comparable branded filter is a Wratten #88A. Refer to this comparison of infrared filters if you need to work out which type you’ve got.
Using Efke IR820 with an #88A filter, I decided to start with a speed of roughly 1.5 ISO. If using my DSLR’s light meter, this means metering at 100 ISO and then adding 6 stops of exposure. If using my iPhone light meter, I can meter as low as 6 ISO and then add 2 stops. I bracketed my exposures by varying amounts, and recorded the exposure information, and the way I arrived at it.
Procedure
I decided not to “waste” the film by risking taking badly-exposed artistic shots, but instead to take technically interesting shots that included foliage, sky, clouds, concrete, water, and other materials as a learning exercise. Once I’ve learnt the right effective film speed and the right amount of compensation for my meter readings, it’ll be easy to go out and take well-exposed shots almost every time. Then I can focus on taking artistic photos for publication.
My procedure was like this:
Take one frame without the IR filter, using the camera’s meter set to ISO100. This is to rule out development errors later on.
With the filter on, take infrared photos using any method you like for metering. This might include using the camera’s meter, a handheld meter, intuition, the sunny-16 rule, or something else.
Bracket the exposures by ±2 stops, so you have a choice of exposures to study later.
Record what each exposure was of, the aperture, the shutter speed, and importantly, how you arrived at the exposure. I kept a table like the one below (and these examples are a selection of my actual data).
After developing, and making sure the unfiltered exposure is correctly exposed and developed, I inspected each negative and decided which were under- or over-exposed, and which ones were OK. Then I have a handy reference of which metering methods gave the best results.
From studying the data I gained from these 39 exposures, the best-exposed images were achieved with a handheld meter set to ISO6, and then adding 2 or occasionally 3 extra stops of exposure. This indicates that the effective film speed of Efke IR180 with an #88A filter is ISO1.5 – ISO0.75.
The reason that the exposure compensation varied between 2-3 stops is probably due to the makeup of the composition of each scene. Foliage comes out near-white in the infrared region, but is relatively dull in the visible spectrum. The handheld light meter wouldn’t take account of this, so scenes with a lot of foliage probably need +2 stops added. Scenes that include a lot of sky, which is rendered black in infrared, will probably need +3 stops.
I got my hands on some Efke IR820 infrared film recently, and put it to good use at various locations around Bristol. See my geek blog for a discussion of metering and exposure in infrared photography, or just read on for the pictures. Foliage is rendered white, while open water and the sky are rendered almost black. 🙂
The first two shots are of the footbridge and the weir at Snuff Mills, Bristol.
This derelict building is in Oldbury Court Estate, but I don’t know what it is. Looks pretty cool with a wide-angle lens, though.
Once again, my favourite tree – this time as you’ve never seen it before: in infrared.
Using infrared has rendered these pond plants white, and the water black.
This is the view from Brandon Hill nature reserve, looking south over Bristol. Here, infrared photography demonstrates its ability to cut through haze/smog in a city and give crisp images on the horizon, several miles away.
This shot was taken on the dockside, and includes the SS Great Britain.
I love photography, and I have an interest in astrophysics and astronomy. It only makes sense to combine them, and have fun with astrophotography. But which equipment is best for the beginner without breaking the bank? Let’s explore the options.
Some interesting photographs can be captured using a wide-angle lens to view the whole sky, but here I am specifically talking about long, telescope-like lenses. There are three solutions that I have at my disposal:
Meade 60AZ 700mm f/11 telescope, with T-mount adapter for 35mm SLR or DSLR
Tamron 70-300mm f/4-5.6 telephoto lens, native mount on DSLR with 2× teleconverter to make it a 600mm f/11
Tokina 400mm f/5.6 telephoto lens, native mount on 35mm SLR with adpater for DSLR and 2× teleconverter to make it a 800mm f/11
So the “zoomiest” lens is the Tokina but that isn’t the only factor. Which lens is sharpest? What about chromatic aberration? What about other things affecting practical use for astrophotography?
First let me say a few words about each lens (and offer my apologies for the quality of the photos of the lenses – as you can see, my DSLR is in each picture so I was using my phone).
Meade 60AZ
The Meade 60AZ is an inexpensive 700mm telescope. The front element is 60mm in diameter, making it an f/11.7. There’s no variable aperture. It has the usual 1.25″ eyepiece fitting, so it’s easy to get hold of an adapter to turn this into a T-mount fitting. Once you’ve got T-mount, well, Bob’s your uncle, and you can adapt T-mount to anything else – including 35mm and digital SLR cameras, such as my AE-1P, EOS 450D and EOS 300. I bought mine from a car boot sale for £15, and then paid about £20 for the adapter to mount the camera.
Meade 60AZ on Canon 450D
It has an optically simple design with few elements, so chromatic, comatic and spherical aberrations may not be so well corrected for. This isn’t important for viewing by eye with an eyepiece, but aberrations show up more significantly in photographs that can be studied. Technically it is not a telephoto lens, since it does not have a telephoto group, and is correctly known as a long-focus lens.
Being a telescope, it comes with its own tripod which is a little flimsy, but easily capable of taking the weight of a camera.
Tamron 70-300mm
The Tamron 70-300mm is an inexpensive autofocus SLR zoom lens, offering a maximum aperture at 300mm of f/5.6. It mounts natively to the Canon EF mount, for use with 35mm and digital SLR cameras, including my EOS 450D and EOS 300. The 13 elements are coated to reduce flare and correct for various aberrations. My sample was bundled with my 450D at Jessops, but it costs around £100 new at the time of writing. I bought a Kenko Teleplus teleconverter for £30, second hand.
Tamron 70-300mm on Canon 450D
Autofocus is practically useless for astrophotography since there isn’t enough available light. On this lens, the focus ring is quite sensitive, undamped, and hard to use accurately. This will count against it in practical use.
Using a 2× teleconverter will double the effective focal length to almost match the Meade telescope, at the cost of a couple of stops of light and some sharpness – but still faster than the telescope.
This lens does not come with a tripod mounting collar but should be used with one, since the fully-extended lens with teleconverter is quite heavy, and unstable when the tripod attaches to the camera.
Tokina 400mm
The Tokina 400mm is a fixed focal length prime lens, with a maximum aperture of f/5.6. With a 2× teleconverter this gives me the longest effective focal length at 800mm while still being faster than the Meade telescope. It’s a manual focus lens with a large and well-damped focus ring which actually makes it easier to use than its contemporary rival, the Tamron. I paid £50 for this lens, second hand, and the Super Paragon teleconverter was about a fiver, I think.
Tokina 400mm on Canon 450D
It mounts natively to Canon FD-mount manual focus cameras like my AE-1P, but will work with Canon EF-mount EOS cameras with an adapter, which I wrote about recently. This adapter has the effect of making the lens a bit zoomier. I haven’t exactly measured the amount, but it could make this 800mm lens produce an image like a 900mm. We shall see.
This lens also does not come with a tripod mounting collar but should be used with one for best effect, because it is long, metal and heavy. They sure don’t make lenses like they used to.
Sample images
This article is about astrophotography really, but taking test photos of the moon or other celestial objects means carrying equipment to a dark place. I’m not sure I can be bothered to carry these three heavy lenses and two tripods and other accessories out at night, so for now you’ll have to make do with these images of the chimney at Frenchay Hospital, which is about one mile away. This is a city, so the atmosphere is quite hazy.
These pictures were taken with a Canon EOS 450D. The main images are exactly as they came out of the camera – no editing. The second images are cropped around the top of the chimney to show fine detail.
Meade 60AZMeade 60AZ
It’s immediately obvious that the image from the Meade telescope suffers from very poor contrast and colour saturation. This is perhaps obvious given its inexpensive and crudely coated elements. It might be possible to improve the contrast by using filters and shooting in black & white, since colour isn’t always important in astrophotography.
In its defence, the sharpness is good and I’m frankly shocked at how small the chromatic aberration is, given that this is a cheap 2-element lens.
Tamron 70-300mmTamron 70-300mm
The Tamron 70-300mm, a modern multi-coated lens, has no such problems with colour and contrast. The colours are vibrant and bold. However, it suffers badly from chromatic aberration. We might expect this from a cheap zoom lens – the effect will be less prominent with a fixed focal length prime lens.
As before, it might be possible to reduce the effect of chromatic aberration by using a coloured filter and shooting in black & white.
Tokina 400mmTokina 400mm
It’s immediately obvious that the Tokina 400mm is the zoomiest lens, with its teleconverter and FD-EF converter to mount it on the 450D. The colours and contrast are good, especially for a lens manufactured in the 1970-1980s.
The effect of chromatic aberration is also extremely small, presumably because it is a fixed focal length prime lens. I think the overall image quality is best out of the three lenses tested here.
Summary
The Tokina 400mm definitely seems to be the most useful for astrophotography and lunar photography. It has the longest effective focal length, the best sharpness, the best chromatic aberration and reasonably good contrast. Its manual focus ring is easy to use
Don’t forget that these images aren’t the best that each lens can produce – they are the lowest common denominator of what each lens can do. With careful processing, the images could be sharpened and have their contrast boosted. For some subjects, it might be appropriate to stack the images. For certain images, coloured or other filters could be used to work around the effect of chromatic aberration and atmospheric haze.
In the past, I experimented with a catadioptic mirror lens but the results were not great. In theory, mirror lenses should be well suited to astrophotography, so perhaps I had a bad sample. I also wrote some thoughts on other types of long-focus lenses for general use, and some of it might be relevant to astrophotography.
That’s enough discussion of lenses. I’m now waiting for a clear summer’s night when I can go for a short drive out of the city and hopefully capture some great images of the moon, and maybe other things in the sky. I should probably read up on astronomy so I know what to point the camera at! 🙂
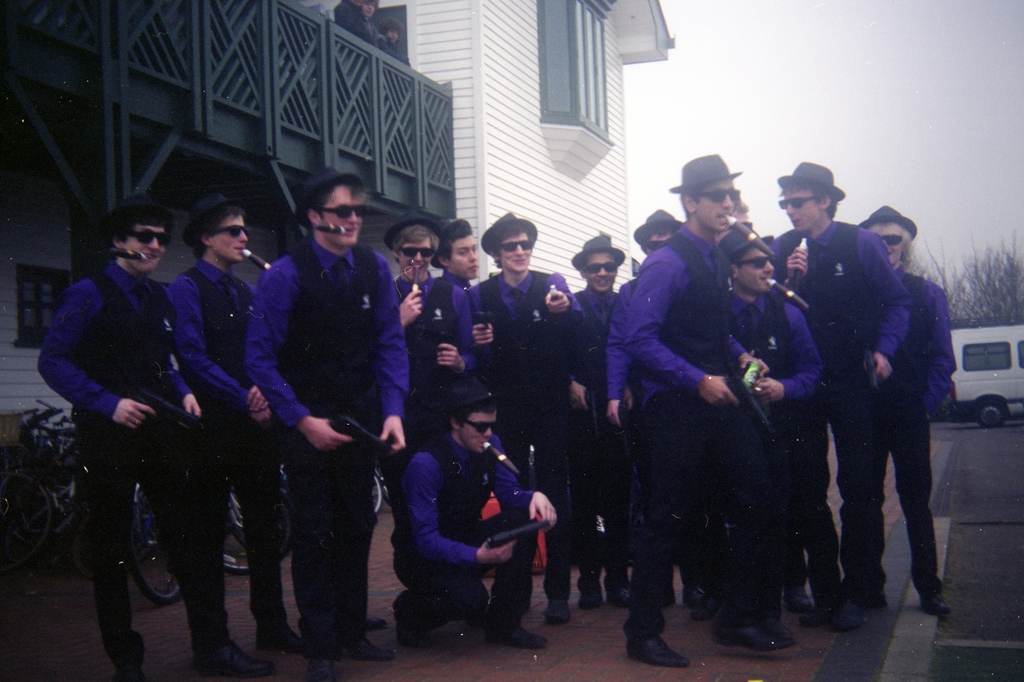
I shot a roll of colour film in my Conway box camera. It’s interesting because being a 1950s model, it wasn’t designed for colour use. You might think it wouldn’t make much difference, but the lens is neither coated nor corrected for chromatic aberration, so you end up with a low-contrast, soft and dreamy image. These are my favourites from the roll.
And these young men are the Squanderers – Cambridge University’s men’s hockey third team. They’re in fancy dress after their 2011 Varsity match against Oxford’s Infrequents.
And finally, here’s a picture of the second Severn crossing. This really hasn’t been edited at all – it really is that soft, yellow, faded and vignetted. And this is why I love analogue photography.
You might think that colour photography has been mainstream for decades, and you’d be right. But for me, I rarely shoot in colour because I only have the equipment at home to process black & white film. Once in a while, I treat myself and have a few colour films developed at a lab, and scan them at home.
These two images were taken back in April on a walk around Cheddar Gorge. Both the colour and B&W films were shot on the same day, but it’s taken me this long to have the colour one developed. As I said in the other post, it was the first time I had used my Mamiya RB67 and it was tricky getting to grips with how to use it effectively. Here, I accidentally double-exposed one of the negatives, but I quite like the effect.
And as you can tell, this frame was shot at Stonehenge, on the same day as the B&W ones.
Just last week, I sat out in Oldbury Court to watch sunset. The clouds were streaked across the sky, and I was hoping for a vividly-coloured and dramatic sunset. It wasn’t particularly red/orange in the end, but I managed this shot.
More interestingly, I managed to take this shot of my own hand, grasping at the last few rays of sunlight before the sun sank below the horizon.
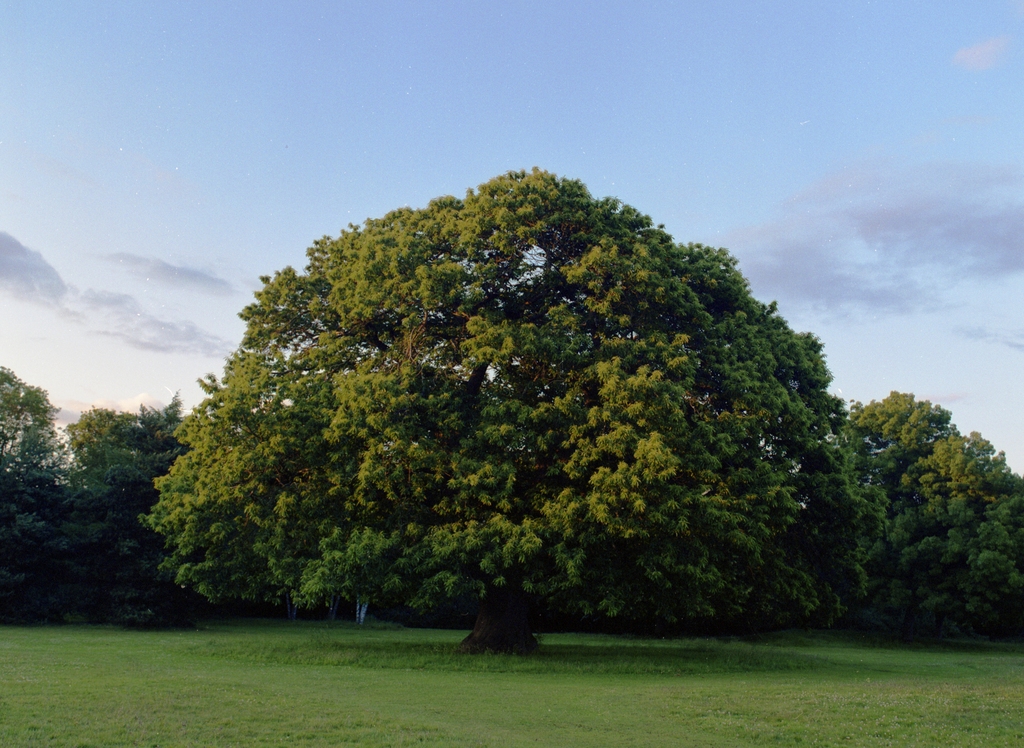
And, of course, I revisited my favourite tree to see it glow in the golden evening light.
Some of these photos are good, but given the inconvenience and expense of shooting medium-format colour film, I think it will remain an occasional treat.
Everyone on Facebook seems to be taking part in the 30 Day Song Challenge recently. I can’t be bothered to publish one item a day on Facebook, so I’ve just compiled the list here instead. Enjoy!
Your favourite song – Awaken by Yes
Your least favourite song – Friday by Rebecca Black
A song that makes you happy – Paris by Apathy Point
A song that makes you sad – Nimrod by Edward Elgar
A song that reminds you of someone – Think of Me from Phantom of the Opera
A song that reminds you of somewhere – Millennium by Robbie Williams
I wrote a while back about software to generate star trails from a series of images of the sky. They are pretty and a fun and interesting form of art, but I wanted to have a go at taking photos of the night sky as it actually appears: still, and without trails.
It’s pretty hard to achieve good photos with a consumer DSLR. You have to keep the shutter speed faster than 4-5 seconds, otherwise you start to see motion blur creeping in. This means you have to turn up the ISO sensitivity of your sensor, which in turn leads to noise. As soon as you start to examine these photos closely, the noise is so distracting and it ruins the picture.
There are some ways to alleviate this – buying a faster lens, or a lower noise, higher sensitivity sensor – but these will cost you money. Lots of money.
I’ve been playing with the concept of stacking – where you take multiple images and later combine them to remove the noise. “Adding” the photos is the easy bit, but the stars will have moved slightly in between each photo, so they will need to be aligned by rotation and translation.
Some crazy people have attempted to do this by hand in Photoshop, but I’m far too impatient for that. There are some apps for Windows (both commercial and free) that will automatically align and stack photos. However, I wasn’t able to get any of them to work reliably under Wine on Linux, so I set about finding a native Linux stacking app.
The best I found was ale, which is command-line only but very easy to use. Both Fedora and Ubuntu package ale by default. To use it with default settings, it’s just a case of doing this:
ale image1.jpg image2.jpg image3.jpg image4.jpg output.jpg
This picture of The Plough was taken using a Canon 450D with 50mm f/1.8 lens. I took 12 exposures at ISO1600, 1″, f/5.0 and stacked them with ale. On my PC, a Core 2 Quad 8200 with 8GB RAM, it took about 53 minutes to stack 12 photos.
The stars are very small so you will probably need to click to see the larger version. You’ll notice that the background is very dark as ale has removed sensor noise, cosmic ray strikes and light pollution (I’m shooting in a city).