A few weeks ago I wrote about converting an old 116 format folding camera to accept 120 film, and using it to take (almost) 6×12 format panoramas. My modification with card strips moved the film plane too far back and caused focus problems. And then the glue came unstuck and the film gate came loose.
Troopers Hill
Since then I’ve redesigned the masking to fit inside the film gate, not over it, and the plane of focus is restored to its original position.
View from Trenchard Street
Or so I thought. These pictures are still very soft and clearly suffering from some misalignment. The view from Trenchard Street was shot at f/16 and should be pretty sharp. The foreground is much sharper than the background, which is consistent with misalignment where the film is too far back or the lens is too far forward. This 100% crop from the background (the white houses just to the left of the cathedral tower) shows just how soft it is. This lens is from 1925 but it should easily resolve the houses quite sharply – especially at f/16.
100% crop
My guess is that this camera has been dropped at some point and the front standard is out of alignment. Hopefully it’s something I can fix (with hammer and pliers). I’ll need to use something like tracing paper as a makeshift focus screen across the film gate when doing this – I wrote about a similar technique for calibrating focus in 2010. More on this when I get some time…
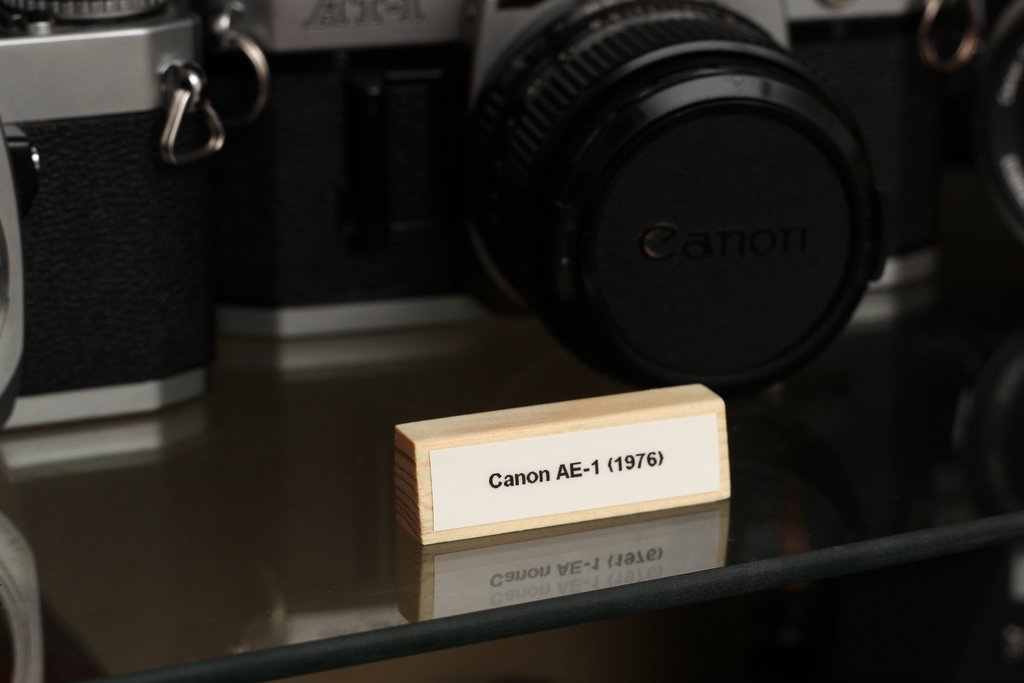
I display my collection of cameras in a glass cabinet, laid out roughly by type. Some time ago I added small signs with the camera’s make, model and date. Originally these were on small tent-fold cards, printed on the computer.
Camera sign on card
After a while, this annoyed me because the cards were too easy to disturb when reaching in to take out a camera. I decided to attach them to the edge of the shelves with BluTack.
Camera sign on card
This annoyed me too, because it’s a pain to relocate all the labels every time I buy a new camera. So decided to try something a bit different.
I found a strip of pine with a sloped face, cut it into segments, varnished them and labelled them with a labelmaker. The typeface is not as nice, but the effect is smart. The signs are easy to move but hard to knock over.
Camera sign on wood
Finally, here is how the whole cabinet looks with the new wooden labels. For more details on the collection, have a look at my Cameras page.
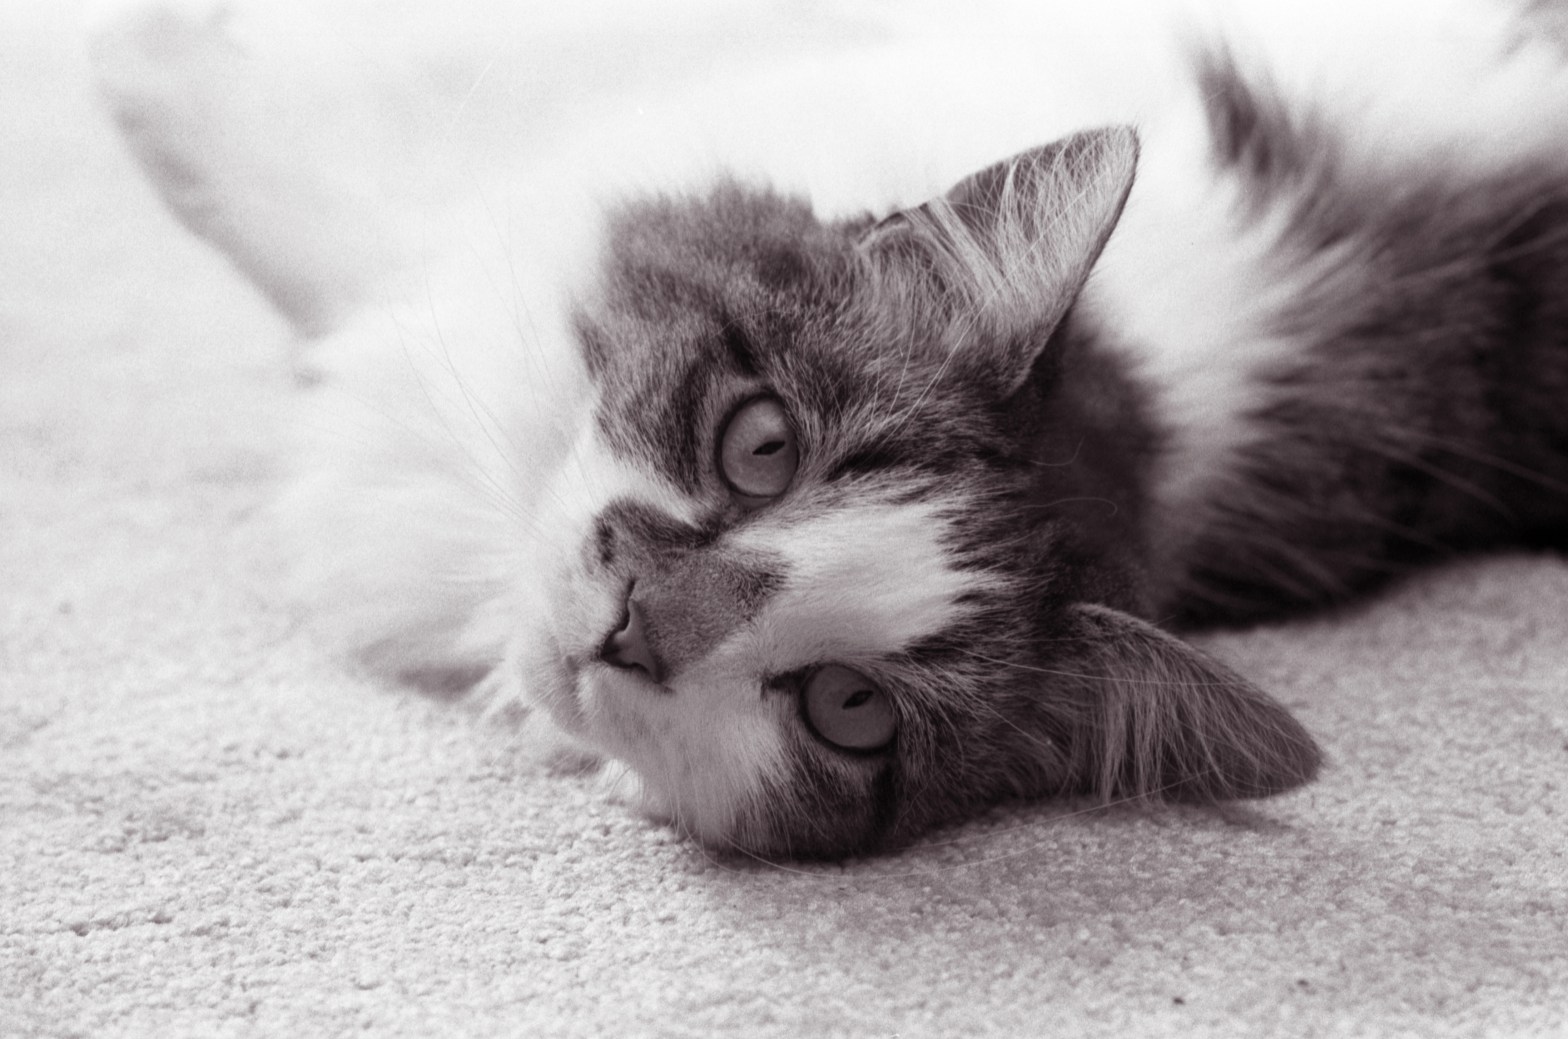
Last week I visited some friends to take some photos of their new baby. I was distracted by their friendly cat, Daisy. She’s extremely friendly and wanted attention, so of course I took a picture!
I was looking for easy methods of burning several CD or DVD images across several drives simultaneously on Linux, since burning 20+ CDs on one burner is pretty tedious. It’s possible to use some bash magic to loop cdrecord in parallel but I wanted a GUI app as an alternative to using Nero or Alcohol on Windows.
I found an old project called TurboJet which hasn’t been maintained for a while. It gets quite a few mentions on various forums but some people are having difficulty getting it to work. I migrated the project to GitHub and made a few improvements to the packaging and documentation. I managed to build it successfully on Fedora 22, CentOS 6 and CentOS 7.
It’s early days but I have a few improvements planned, including support for Debian/Ubuntu, auto-configuration of CD/DVD drives and better documentation. Take a look at the issue tracker if you have any further suggestions. I don’t actually know C++ and I haven’t worked on a GUI app since Visual Basic at school so progress may be slow. Please volunteer your skills if you fancy helping 🙂
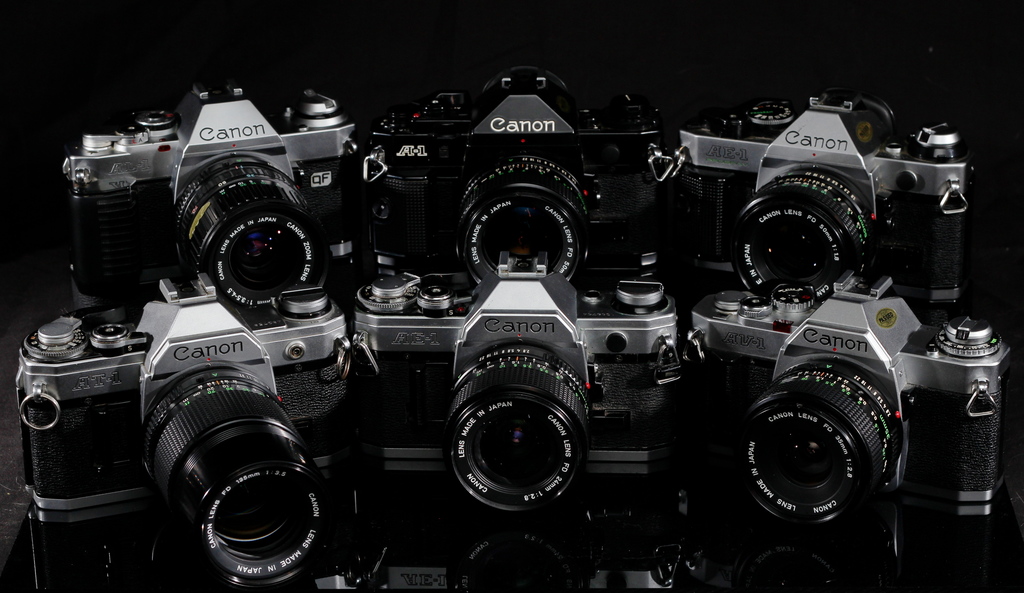
I collect film photography equipment and I also use it to take photographs and make prints. I’m also a massive nerd so there’s a database to help me record every aspect of the kit I own and the pictures made with it. I thought I’d try and produce a blog post with some facts, figures and graphs about my hobby – hopefully this will be interesting to other camera collectors!
At the time of writing, my database contains 63 cameras and 114 lenses (cameras with fixed lenses count as one camera and one lens). This equipment has been used to shoot 5357 negatives.
The total weight of the collection of cameras and lenses is 58.5kg although it fits in one IKEA cabinet. If laid out end to end, I would get in trouble with my wife 😉
Age of the cameras
Let’s get started by checking the age of these cameras and specifically, how many from each decade. This is the date that each model of camera was introduced, not the exact date each of my samples was manufactured.
Decades
This graph shows I have more cameras from the 1970s than any other decade. This is probably not a surprise – they are very affordable (looking at you, Canon FD) and I prefer using them. I have some newer cameras mostly for ease of use (e.g. Canon EOS when I need autofocus) and some older ones because they are the truly interesting ones. Clearly I need to invest in more cameras from the end of the Victorian era, though!
The heaviest camera and lens combination in my collection is the Mamiya RB67 Professional with the Mamiya Sekor 250mm f/4.5, weighing in at 3.42 kg according to the database. In reality, it’s even heavier because the database weight of the RB67 body excludes the prism and film back. When fully kitted out and ready to shoot, it’s a hefty 4.21 kg.
Mamiya RB67 with Sekor 250mm f/4.5
Negatives per camera
An obvious and easy graph to draw is how many pictures have been taken with each camera in the collection.
Negatives per camera
This makes it pretty clear that the runaway favourite is the Canon AE-1 Program. But wait – that was my first film camera so it has an unfair advantage. What if we draw the number of pictures each camera has taken per day that I have owned it?
Canon AE-1 ProgramNegatives per camera per day
Well, the AE-1 Program is still the most popular but the margin is slimmer. A new entrant into the top 15 by this metric is the Mamiya M645J which I’ve not owned for many months, but have used a lot.
Mamiya M645 J
Film area
The total amount of film exposed in all my cameras is 7.94 m² which is more than enough to cover the floor of an average UK bathroom. This graph shows which cameras have chewed their way through the most film.
Area of film exposed
The Mamiya RB67 was at #3 in the graph of total negatives shot but here it comes soaring into the lead for total film used, because a 6×7 negative is 5x larger in area than a 35mm negative. Several other medium format cameras are creeping up the ranks for this graph too, such as the very pretty Mamiya C220.
Mamiya C220
Formats
In the total area graph above, we touched on the RB67 having an advantage through shooting larger negatives. So which is the most popular negative size (in terms of number of negatives shot) in my database?
Frame sizes
Predictably, 35mm is the most common frame size. I have more 35mm cameras than any other type, it is relatively inexpensive to use them and of course you get 36 pictures on a roll compared with 8-16 on a medium format roll so you naturally take more pictures. Medium and large format cameras are also heavier and more expensive to shoot with so you tend to shoot less and take better pictures.
We’ve already discussed 35mm cameras and a lot about the RB67 which accounts for the second-most-shot format, 6×7, so here’s a picture of the Horseman 980 which takes lovely 6×9 negatives.
Horseman 980
If you’re not sure what the film sizes in the pie chart look like, here’s a handy comparison.
Negative areas
Focal lengths
Going back to our most popular format, 35mm, it’s possible to query the database and see which focal lengths were used. This includes all photos taken with prime lenses and most photos taken with zoom lenses, where I remembered to note down the focal length it was set to.
Focal lengths
There is an obvious spike at 50mm, which is available for most every 35mm camera. There are also spikes at 28mm, 35mm and 135mm, all of which are common prime focal lengths and also covered by the common 28-80mm zoom lens.
Canon FD equipment
The upward slope of the graph between 300-400mm is misleading. It just means I have taken some photos at 300mm (prime) and some more at 400mm (also prime).
Quickfire lens facts
Longest lens: Tokina RMC 400mm f/5.6
Widest lens: Samyang 8mm f/3.5 fisheye
Heaviest lens: Mamiya Sekor 250mm f/4.5 (1.51kg)
Lightest lens: Jupiter-12 35mm f/2.8 (130g)
Fastest lens: Canon New FD 50mm f/1.4
Slowest lens: Schneider-Kreuznach Super Angulon 90mm f/8
Most aperture blades: Pentacon 135mm f/2.8 (15 blades)
Film
Last but not least, a quick look at the films I’ve been shooting.
Films
I shoot primarily in black & white, and my go-to film is Ilford FP4+. When I need more speed, I reach first for Ilford HP5+ and then Ilford Delta 3200. Most of the other black & white films here were small-quantity experiments.
When I do shoot colour, I tend to shoot very cheap colour film. Until recently, Poundland stocked either Agfa Vista Plus or Kodak Kodacolour, which explains why they feature so strongly. The only colour film I enjoy shooting is Kodak Ektar.
The others category is mostly one-off experiments with various other films that I was given with cameras or otherwise obtained – often expired. There are a few rolls of slide film in there too.
I’ve fancied a 6×12 camera for a while, but they are expensive. Right now I don’t have the spare cash to buy either a dedicated 6×12 camera or a 6×12 back for my Horseman 45HD, so I shelved the project for “the future”.
… Until I saw a 1925 Zeiss Ikon Icarette 500/15 for about the price of a beer. The body is in pretty poor condition but the bellows are good and the lens and shutter work like the day they were made. It’s a 12cm 1:4.5 Tessar in a Compur shutter with speeds from 1s to 1/250, which is remarkably good for the day.
Zeiss Ikon Icarette 500/15
The Icarette takes now-obsolete 116 film which was discontinued in 1984 but a quick search reveals these can be converted to accept 120 film and can take 6×11 negatives. I’m not particularly good at making things so I attempted to convert the camera to accept 120 film in the simplest way possible while spending no money. I got lots of detailed information from the document Convert a Six-16 Folding Camera for Use with 120 Film and this is what I decided to do.
Spool adapters
First things first – the 120 film has to fit properly. I’m lucky enough to own one 116 spool which I will use as the take-up spool, since it fits properly with the winding knob. However this does mean I’ll need to unload the camera in the darkroom, as the 120 film won’t be tightly pressed against the end cap of the spool to keep the light out.
To pad out the 120 supply spool, popular options include making a pair of shims out of metal, or making them from plastic using a 3D printer. These are both good, robust options but I don’t have a 3D printer and I’m terrible at metalwork. I cut up two wallplugs and used them to pad out the 120 spool. It rotates freely and seems to be quite strong.
Cutting wallplugs120 roll in 116 camera with wallplugs
Film mask
The film gate on a 116 camera is approximately 62mm tall, while the total width of 120 film is 61mm. This means when the 120 film is held across the film gate, is it unsupported at the edges and prone to curling. To fix this, I made a mask that makes the film gate a bit narrower and will support the 120 film. Black craft card would be ideal but I used some strips of card taken from food packaging, blackened with a permanent marker. It is strong enough without being too thick. I reckon it is about 0.3mm thick so hopefully won’t affect the focal plane too much. I glued it in place using a small amount of PVA glue and a paintbrush. If I decide to reverse the modification, this will be easy to peel off.
Cardboard film mask for top & bottomFilm gate with cardboard mask
The new height of my film gate is 56mm, the same as most standard 120-format negatives. I retained the width of the original 116 film gate at 108mm, although I did also glue some strips of card at the left and right edges to make the new film gate all the same height and ensure the best film flatness.
Film advance
120 film has three sets of frame markings on the backing paper (6×4.5, 6×6 and 6×9). The position of the red window on 116 cameras reveals the 6×4.5 markings of 120, which isn’t useful. Elsewhere online I found a guide which explains how to use these markings to expose 120 film in a 116 camera.
Exposure
120 frame number
1
3
2
5½
3
8
4
10½
5
13
6
15½
It is helpful to look at the backing paper of a used film in advance to work out what half a frame looks like through the red window. I have scanned part of a strip of Ilford 120 backing paper and marked in green where the frames for 116 cameras should be. Approximately, it is just after the second circle has passed the red window.
As we look at this strip, the top row of numbers is for 6×4.5, the middle row is 6×6 and the bottom row is 6×9. Remember in a 116 camera, this strip of film would be upside-down with the film passing the red window from left to right, with the numbers increasing.
120 backing paper
First test
I shot a roll of Ilford FP4+ in the nature reserve near my home to test this camera, and my conversion work. Let’s start with the good points:
The shutter works well at all speeds
The lens glass is clean and clear
The bellows and film door are light-tight
The alternative method of counting frame numbers works
Now the bad.
One of the film masks I glued in place came loose and obscured every frame
The extra spacing of the film mask (about 0.3mm) was sufficient to make the images very soft
The sports finder is missing so I was using the tiny waist-level brilliant finder. It’s very hard to get the camera level so all but one of my test photos have a wonky horizon.
Troopers Hill
Troopers Hill
To-do list
It’s clear my method of making a film mask by sticking cardboard on top of the metal spoils the focus. I’m going to look into doing as the original article suggested, and suspend some plastic strips inside the film gate, level with the metal. I’ll also glue it properly so it doesn’t come loose during film advance!
I may consider adding a cold shoe (aka accessory shoe) to the camera so I can use an auxiliary viewfinder or even a bubble level to keep the camera straight.
I’ve long fancied a 6×12 good-quality panoramic camera. The best option seems to be a 6×12 roll film back for a large format camera (such as my Horseman 45HD) but these are very expensive. Even more expensive are most of the dedicated 6×12 cameras from the likes of Fuji, Horseman and Linhof.
I managed to pick up this camera which takes obsolete 116 film for the price of two beers. It should be a fairly straightforward conversation to make it use 120 film and then I can start shooting 6×11, which is almost as good! The 12cm Tessar is not particularly wide on this format but it should be fun anyway.
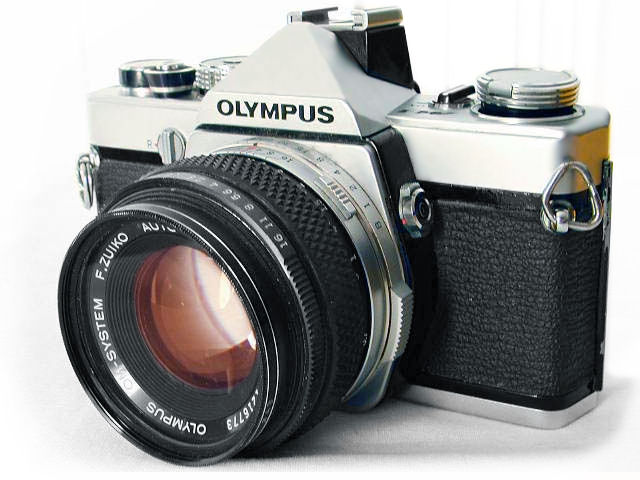
While my favourite 35mm camera series is the Canon FD range, it is undeniable that the Olympus OM-1 is also an iconic model. This camera was given to me by a friend.
It takes a mercury battery which is now impossible to obtain, but fortunately the battery is only used for metering. Without the battery, the OM-1 can still be used as a fully manual SLR.
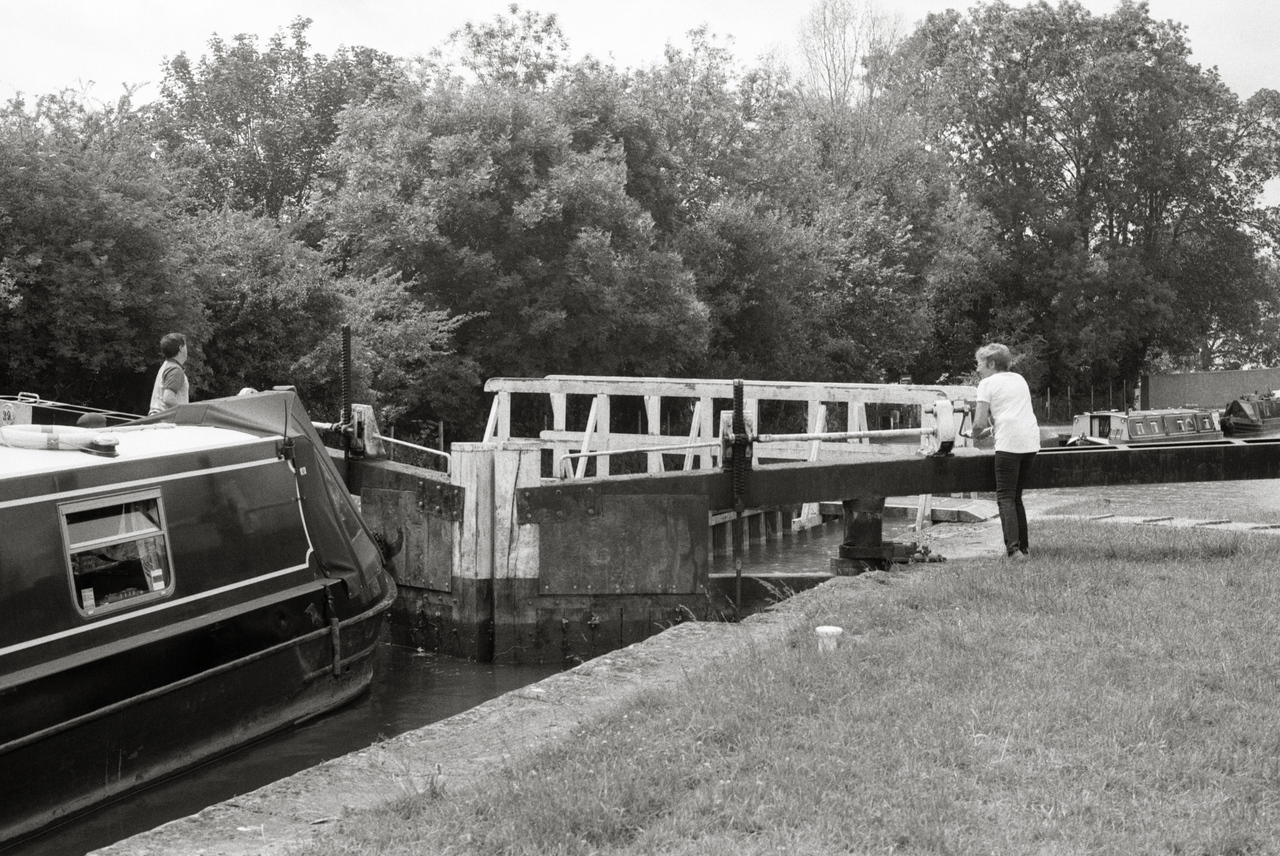
A few years ago, I visited Caen Hill locks near Devizes for the first time. The steep flight of locks is one of the iconic sights of Wiltshire, so when I heard that my friend Matt’s parents were bringing their narrowboat down the flight, I volunteered as a deck hand. I’ve never operated a lock before and to bring a boat down a flight of 29 locks in one day was a baptism of fire. Lots of winding (the sluices) and pushing/pulling (the gates). Still, there was plenty of tea on hand and we traversed the flight in a few hours.
Inside a lock
Leaving a lock
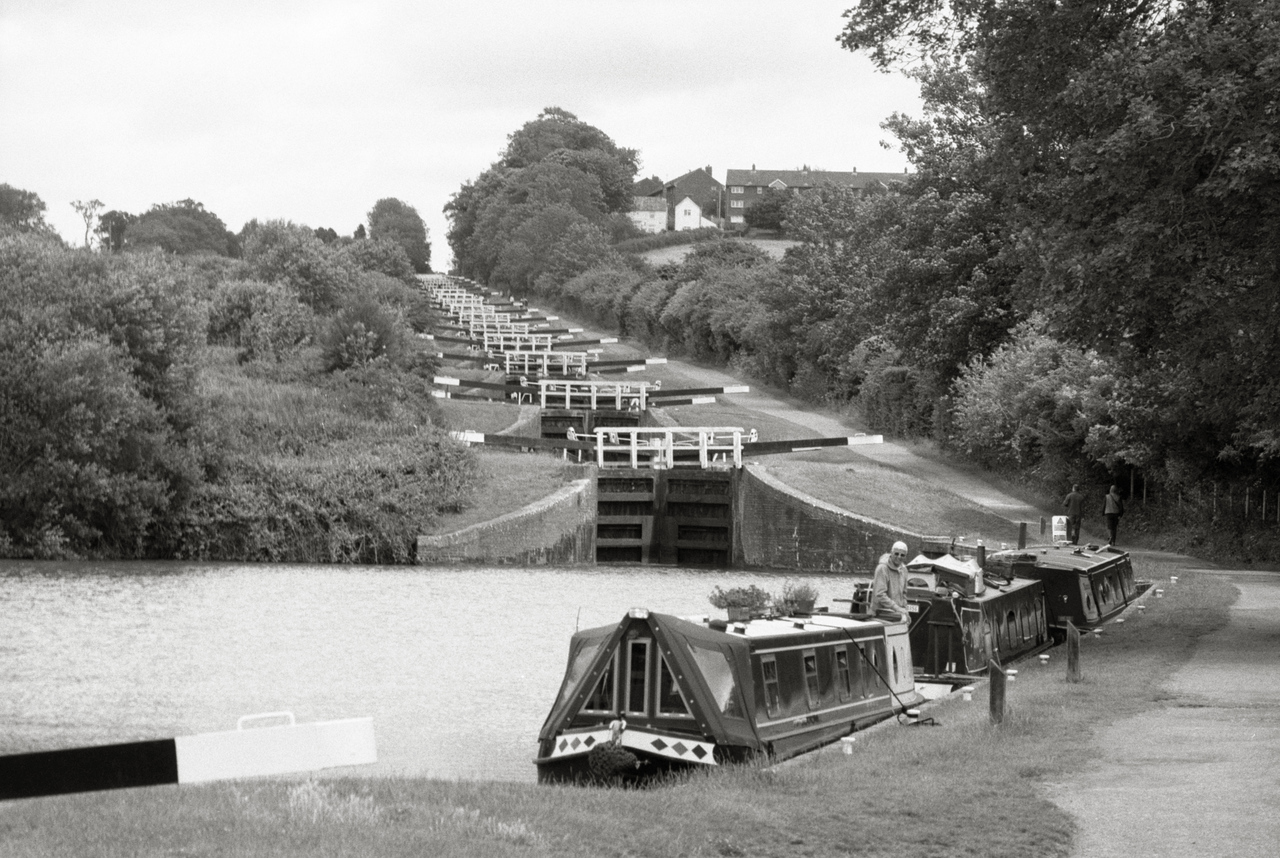
Crossing one of the larger pounds
Caen Hill locks
These pictures were taken on Ilford FP4+ film using a Canon AV-1 camera. All were taken with the Canon FD 50mm f/1.4 lens except the final pictures of the flight, which was taken with the Canon FD 135mm f/2.8.
It seems an age ago now (June) that a group of us visited the Severn Valley Railway for Fraser’s stag do. It basically consisted of a group of overgrown man-boys drinking beer (responsibly) and riding trains all day. We did some sightseeing at some of the stations and the following day we took a walk to Iron Bridge.
Bridgnorth station
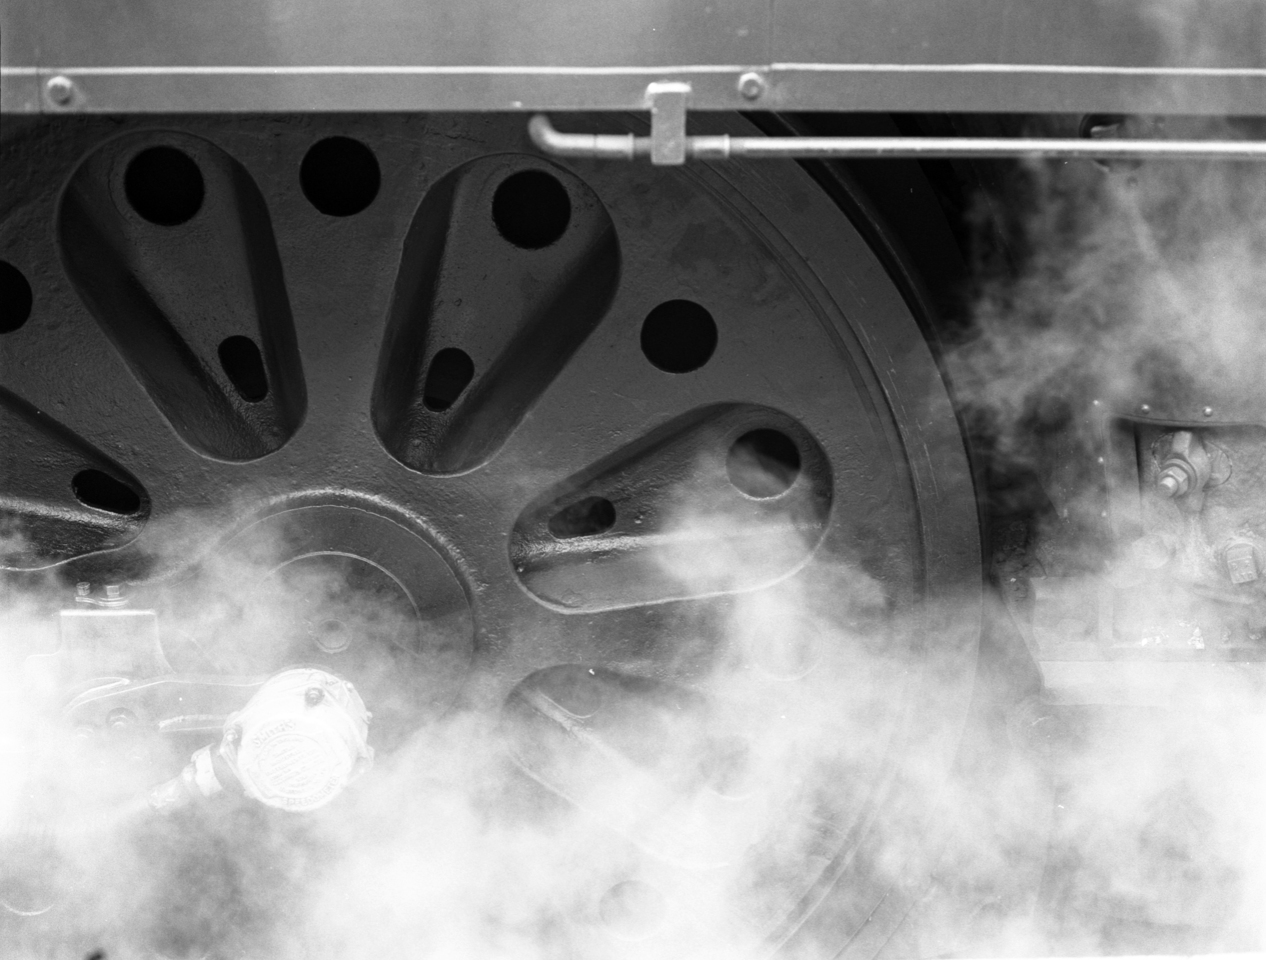
Locomotive taking on water at Bridgnorth
Locomotive wheel detail
Ridley’s, Bridgnorth
Mail coach
Steam train at Bewdley station
Fraser with steam train at Kidderminster station
Iron Bridge
All of these pictures were taken with a Mamiya M645J on Ilford HP5+ film. They were all taken with the Sekor C 80mm f/2.8 lens, except for the interior of the mail coach which was taken with the Sekor C 35mm f/3.5 N wide angle.


 I found an old project called