I’ve tried infrared photography a few times in the past with varying success. But one thing that I’ve always found is that infrared film is a lot grainier than regular black & white film, so you end up with a relatively low resolution picture. To work around this, I’ve tried using medium-format infrared film in my Mamiya RB67 for that bit more real estate. These were shot at 6×4.5 rather than the full 6×7, otherwise I’d have to remortgage my house to pay for it.
They are still very grainy but the higher resolution helps work around it. Now I know this can be done with the RB67 and I have an idea of the exposure needed, I’ll revisit the idea in Summer when the sunlight shows off infrared photography at its best.
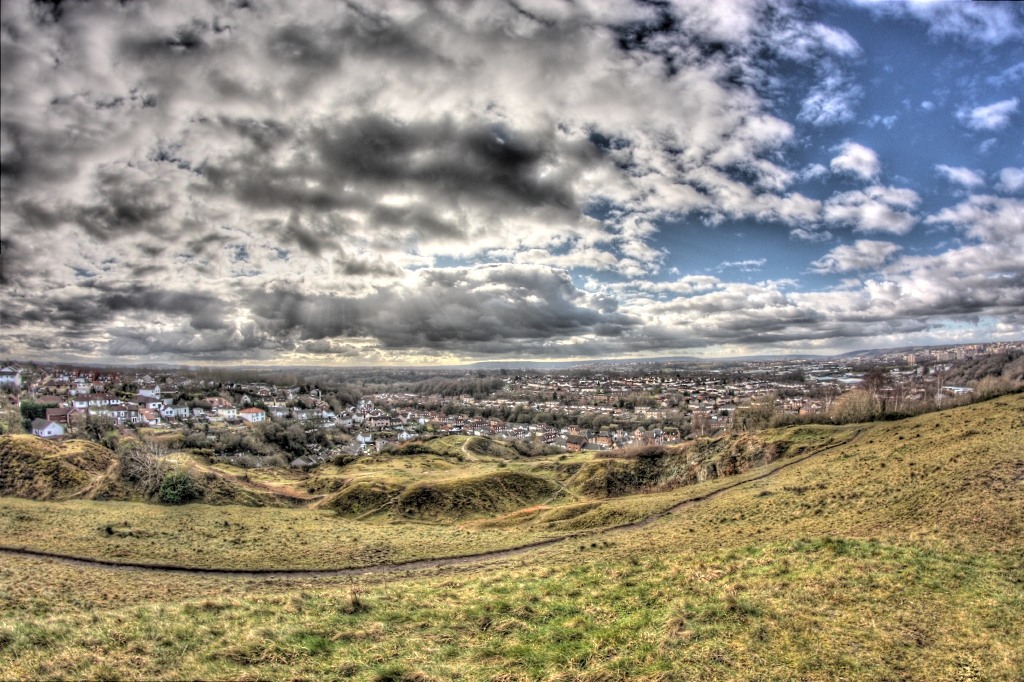
This week the Photo Challenge is Leap, inspired by the leap year. There’s a lot of superstition around February 29th, but I’m going back to the astronomical basics. Leap years occur to nudge the Gregorian calendar back in sync with the solar year, and I’ve taken a picture of the sun setting over Bristol on the eve of leap day.
Recently I wrote about making a solar filter for my camera but it’s taken a while to get round to using it. I had a quick go today, using my Canon 450D and a Tokina 400mm f/5.6 lens.
The finished filter
The results are a bit iffy – there were massive problems with internal reflections in the lens tube. The filter itself consists of two plates of glass with a thin layer of nichrome between them. This on its own gives several surfaces for reflection problems.
Common wisdom says that stopping down a lens increases sharpness (to a point) but in this case, the smaller the aperture, the more area there is of the aperture blades to reflect light back up to the mirrored filter. All of the photos have lots of flare, which I was able to reduce somewhat. Perhaps with practice I will learn techniques to work around this.
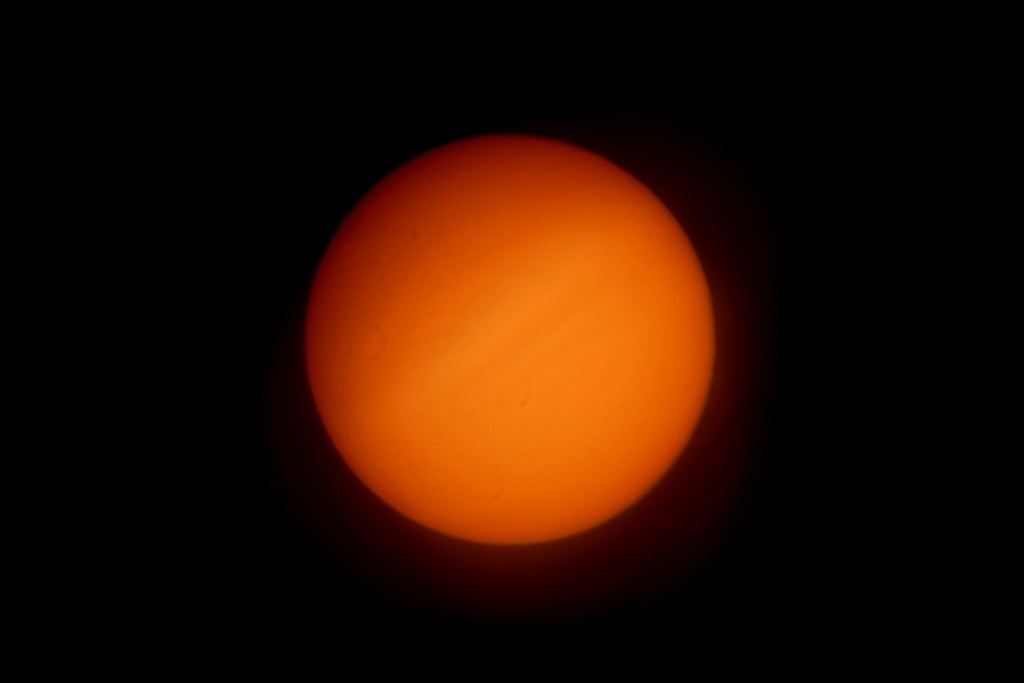
This first picture is a straightforward picture of the sun. The red “corona” around the bottom-right hand side is actually lens flare.
The Sun
The second picture is made from the source data as the first picture, but is only showing the green channel in monochrome. It has less flare, since most of the flare was red. It also seems to show off more detail of a band-like structure across the centre of the sun (although this could be down to lens flare, Newton’s rings, or some other kind of defect).
This week’s Photo Challenge is “running away from the camera”. It’s simple – just put the camera on a tripod, set the self-timer to 2 seconds, press the button, and run away.
I wanted a solar filter for my camera, for safe observation and photography of the sun. Typically these filters have an optical density of OD 5.0, which for photographers is ND 100,000. This means that only 0.001% of light is allowed through the filter.
You can buy pre-made solar filters, but they are expensive and relatively hard to find. You can also buy solar film and then mount it onto your camera lens or telescope yourself, but it is relatively fragile. If it gets a scratch, you could potentially blind yourself. Crinkled foil could also spoil the image quality.
I wanted a solution that was effective, durable and wouldn’t break the bank. Fortunately, one of my friends works in a chemistry lab and has access to a really cool machine that can coat glass filters with various kinds of metal. (This is the same chap who has the frickin’ laser that I wrote about not long ago).
Choosing a donor filter
I needed a 72mm filter for the telephoto lens I planned to use. I bought two cheap UV filters, although plain glass blanks would have been equally good.
What’s important is that the glass can be removed from the frame. Cheap filters often have the glass glued into the frame. Semi-decent ones have the glass dropped into the outer ring, and then the inner retaining ring is screwed in to hold it. Usually these screw-mounted filters have a screw thread on each side of the filter so you can stack two or more on the same lens.
The filter in this picture is the wrong type, where the glass is glued into the metal frame.
Glued filter
And here’s a close up of the kind with a screw-in retaining ring inside. This makes disassembly really easy with a pair of screwdrivers (be careful!).
Filter with retaining ring
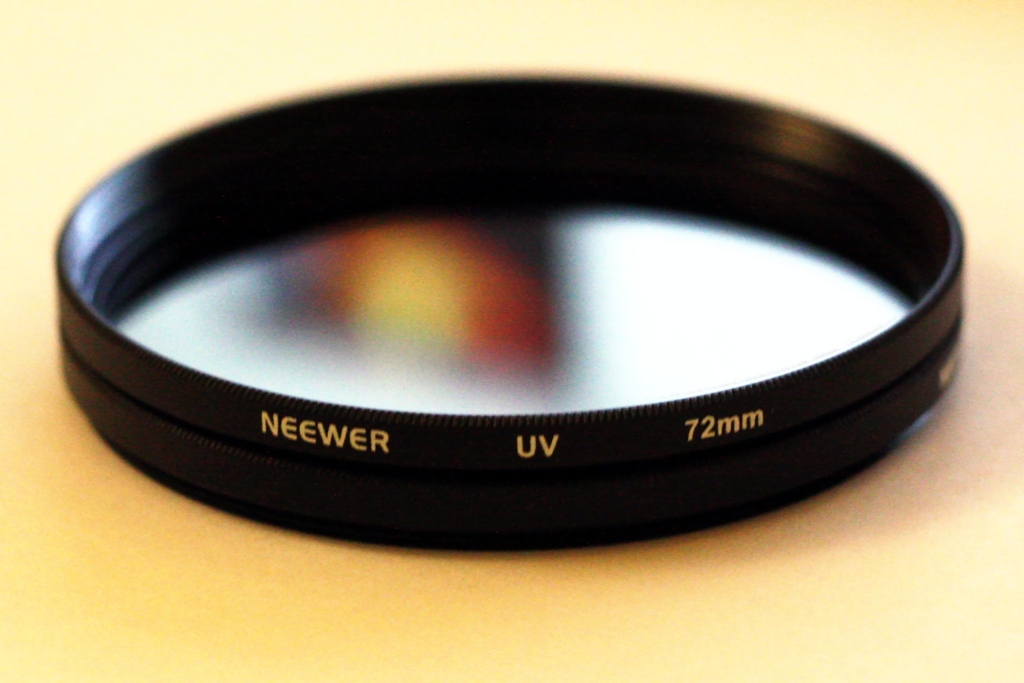
I bought two UV filters made by Neewer, who are a relatively well-respected budget filter maker. Ordering from China, I paid less than £2 for each filter. It was then easy to remove the glass from the frame.
Coating
In order to achieve an optical density of approximately 5, you need a total metal coating thickness of around 80nm. Trouble is, these metal coatings are very easily scratched – a fingernail would easily remove them. So I decided to coat each of the two filters with 40nm of metal and assemble the filter with the two metal coatings sandwiched together between the two pieces of glass.
The coating process is interesting. It’s done by boiling your chosen metal using an electric filament until it becomes a gas. At this stage, it will float around and stick to everything. However, you have to do this in a sealed bell jar that contains a vacuum.
First I cleaned the filters using a jet of compressed air, followed by a wiping with butanol and acetone. Any dust or grease on the filters will prevent the coating from sticking properly.
Then with the clean filters placed on the coating platform, I loaded a filament made of tungsten, wound with nichrome wire, and placed the bell jar over the whole lot. The small lump to the upper-right of the filters is a thickness sensor.
With the equipment set up, I started pumping the air out of the chamber. There’s a conventional rotary pump that can get the pressure down to a thousandth of an atmosphere, but after that you have to use a diffusion pump. For the coating to work properly, you need a pressure of just 10-6 millibars – that’s a billionth of an atmosphere. This takes about 20 minutes.
When the pressure is low enough, the chamber is sealed, and we can turn the filament on to gently begin heating the nichrome. You can’t heat it too fast, or it will all melt and drip off the filament and be wasted.
When the nichrome starts to evaporate, we crank up the current in the filament to some 50 amps. Now the whole filament acts like a light bulb, and is too bright to look at. No photos of the filament in this state, I’m afraid. I was too busy shielding my eyes.
There’s an instrument on the desk that’s hooked up to the thickness sensor I mentioned earlier. This tells me how thick the coating is, in nanometres. Here the readout is showing almost 25nm, over halfway to my 40nm target. I didn’t time how long it took to build up 40nm but it was something like 20-30 minutes.
After a while we can once again look at the bell jar, since the inside of it is partially coated with metal and quite dim. You can see how the filters now appear to be mirrors.
When the thickness meter reckons we’ve got the right amount of metal on the glass surface, we turn off the filament and gently let the air back into the bell jar. Cautiously we remove the filters from the platform using gloves (because they are hot, and because we don’t want to get dust on them).
Assembly
Now it’s just a simple matter of placing the two filters with their coated faces together, and screwing them back into the metal filter mount. Try to avoid the two filters sliding or rotating against each other. If you have dust between them, it could easily cause a scratch. Scratching one of the coated surfaces isn’t a huge problem, but if you scratch both faces then you’ll get a pinhole which allows unfiltered sunlight through, and will do a pretty good job of zapping you in the eye.
The coating is not exposed to the outside world, so this filter is no more fragile than a normal filter. The outer glass surfaces are just regular UV filters and can be cleaned in the usual way.
I found that with two pieces of glass together in one filter frame, the thin retaining ring didn’t seem that secure, so I simply used the spare frame to hold the glass in place. This means my filter is twice as thick as a normal filter, but that’s no problem.
The finished filter
And here is the filter in situ, mounted on my Tokina RMC 400mm f/5.6.
The filter in place
Testing
Unfortunately as it’s winter, it hasn’t yet been daylight during any of my free time, so I haven’t been able to use this filter with the sun. However, by comparing photos of a lightbulb in my house with and without the filter, I was able to estimate the optical density.
Without the filter, I shot the lightbulb at ISO1600, f/5.6 and a shutter speed of 1/4000s. To achieve the same exposure with the filter (keeping the ISO and aperture the same) needed about 120 seconds. That’s 200,000 times more exposure.
Transmittance: 0.0005%
Neutral density: ND 200,000
Optical density: OD 5.3
Given that I was aiming for an OD of 5.0, I’m pleased with OD 5.3. If my measurements are correct, that will be totally safe for viewing by eye through the camera’s viewfinder. Anyone fancy a sweepstake? 😀
Soon, I hope to be able to publish some pictures of the sun taken with this filter – obviously depending on there being sun during the day at the weekend while I’m free. Cross referencing my personal calendar with the forecast for Bristol, it might be a few weeks…
Anyone who has come to this page either from photos.jonathangazeley.com or blog.jonathangazeley.com will notice I’ve now merged the two blogs in a single site called http://www.jonathangazeley.com.
For now there are automatic redirects in place, and my RSS feed and all historic links will continue to work. But please do change your bookmarks, and if you followed both of my old blogs, you now only need to follow this one.
Some time ago, Paul challenged me to do the numbers challenge. (This isn’t related to the Photo Challenge, by the way).
The numbers challenge is simple. You put a film in your favourite camera, and take photos of numbers in order. On a 36-exposure film, you’d take pictures of the numbers 1-36 in order, as shown on your film counter.
Then, when you’ve finished the film, develop it and make a contact print of the whole lot, rather than scanning each frame individually. The final result is a unique piece of art.
I managed to squeeze an extra frame out of my film, and shot the numbers 0-36. But I could only fit 30 negatives on a sheet of 10×8″ photographic paper, so I had to make do with that. Some time soon I hope to get round to printing the whole series on a larger piece of paper.
Unfortunately the exposure is a bit “off” in some of these. Individually, they are not nearly as over- or under-exposed as they look. It’s just that some are below average and some are above average exposure, and this doesn’t turn out well in the printing process. If I scanned or printed them individually, they’d all come out fine
If you’re interested in the subject matter, here are the notes I’ve been keeping since September.
Road sign in BS1, Bristol
Lamppost
No 3A, Christmas Steps
No 4, Christmas Steps
No 5, Christmas Steps
Business plaque
Can of 7-up
No 8, Osborne Villas
No 9, Tottenham Place
Price tag in Wilkos
Graffiti on the wall
Multipack of Hula Hoops
Petrol price at Tesco
Computer screen
Coins
Multipack of Twix
Glowsticks
Car park space at Durdham Hall
No 19, Woodland Rd
20mph speed limit
Birthday card
Number on whiteboard
Birthday candles
24-hour sign at ASDA
25% off poster
Steamy mirror
Chart show countdown
Calendar
Alarm clock LCD
30mph speed limit
Lessons learnt
Use fast film
Choose high-contrast subjects (the steamy mirror at #26 didn’t work out at all)
Be extremely careful with your exposure
Use a macro lens, if you have one. Most numbers you find are quite small!
This camera was a gift. It’s a fairly standard folding camera which prefers to be in the portrait orientation. Its main interesting feature is the built-in mask which allows the photographer to choose 6×9 or 6×6 exposures.