I wanted a solar filter for my camera, for safe observation and photography of the sun. Typically these filters have an optical density of OD 5.0, which for photographers is ND 100,000. This means that only 0.001% of light is allowed through the filter.
You can buy pre-made solar filters, but they are expensive and relatively hard to find. You can also buy solar film and then mount it onto your camera lens or telescope yourself, but it is relatively fragile. If it gets a scratch, you could potentially blind yourself. Crinkled foil could also spoil the image quality.
I wanted a solution that was effective, durable and wouldn’t break the bank. Fortunately, one of my friends works in a chemistry lab and has access to a really cool machine that can coat glass filters with various kinds of metal. (This is the same chap who has the frickin’ laser that I wrote about not long ago).
Choosing a donor filter
I needed a 72mm filter for the telephoto lens I planned to use. I bought two cheap UV filters, although plain glass blanks would have been equally good.
What’s important is that the glass can be removed from the frame. Cheap filters often have the glass glued into the frame. Semi-decent ones have the glass dropped into the outer ring, and then the inner retaining ring is screwed in to hold it. Usually these screw-mounted filters have a screw thread on each side of the filter so you can stack two or more on the same lens.
The filter in this picture is the wrong type, where the glass is glued into the metal frame.

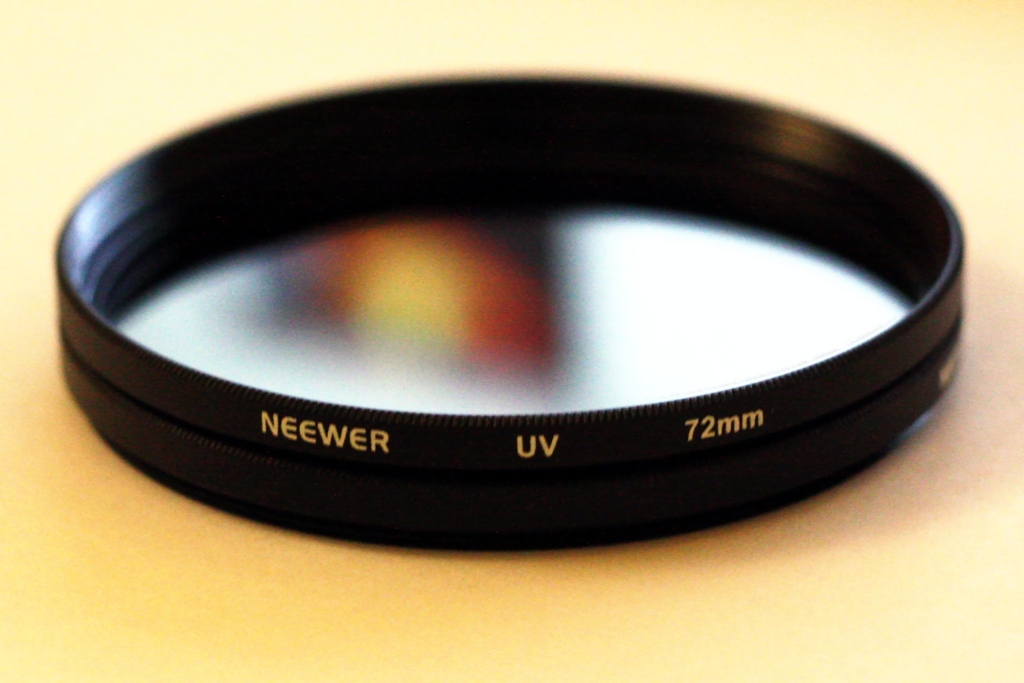
And here’s a close up of the kind with a screw-in retaining ring inside. This makes disassembly really easy with a pair of screwdrivers (be careful!).

I bought two UV filters made by Neewer, who are a relatively well-respected budget filter maker. Ordering from China, I paid less than £2 for each filter. It was then easy to remove the glass from the frame.
Coating
In order to achieve an optical density of approximately 5, you need a total metal coating thickness of around 80nm. Trouble is, these metal coatings are very easily scratched – a fingernail would easily remove them. So I decided to coat each of the two filters with 40nm of metal and assemble the filter with the two metal coatings sandwiched together between the two pieces of glass.
The coating process is interesting. It’s done by boiling your chosen metal using an electric filament until it becomes a gas. At this stage, it will float around and stick to everything. However, you have to do this in a sealed bell jar that contains a vacuum.
First I cleaned the filters using a jet of compressed air, followed by a wiping with butanol and acetone. Any dust or grease on the filters will prevent the coating from sticking properly.
Then with the clean filters placed on the coating platform, I loaded a filament made of tungsten, wound with nichrome wire, and placed the bell jar over the whole lot. The small lump to the upper-right of the filters is a thickness sensor.

With the equipment set up, I started pumping the air out of the chamber. There’s a conventional rotary pump that can get the pressure down to a thousandth of an atmosphere, but after that you have to use a diffusion pump. For the coating to work properly, you need a pressure of just 10-6 millibars – that’s a billionth of an atmosphere. This takes about 20 minutes.

When the pressure is low enough, the chamber is sealed, and we can turn the filament on to gently begin heating the nichrome. You can’t heat it too fast, or it will all melt and drip off the filament and be wasted.

When the nichrome starts to evaporate, we crank up the current in the filament to some 50 amps. Now the whole filament acts like a light bulb, and is too bright to look at. No photos of the filament in this state, I’m afraid. I was too busy shielding my eyes.
There’s an instrument on the desk that’s hooked up to the thickness sensor I mentioned earlier. This tells me how thick the coating is, in nanometres. Here the readout is showing almost 25nm, over halfway to my 40nm target. I didn’t time how long it took to build up 40nm but it was something like 20-30 minutes.

After a while we can once again look at the bell jar, since the inside of it is partially coated with metal and quite dim. You can see how the filters now appear to be mirrors.

When the thickness meter reckons we’ve got the right amount of metal on the glass surface, we turn off the filament and gently let the air back into the bell jar. Cautiously we remove the filters from the platform using gloves (because they are hot, and because we don’t want to get dust on them).
Assembly
Now it’s just a simple matter of placing the two filters with their coated faces together, and screwing them back into the metal filter mount. Try to avoid the two filters sliding or rotating against each other. If you have dust between them, it could easily cause a scratch. Scratching one of the coated surfaces isn’t a huge problem, but if you scratch both faces then you’ll get a pinhole which allows unfiltered sunlight through, and will do a pretty good job of zapping you in the eye.
The coating is not exposed to the outside world, so this filter is no more fragile than a normal filter. The outer glass surfaces are just regular UV filters and can be cleaned in the usual way.
I found that with two pieces of glass together in one filter frame, the thin retaining ring didn’t seem that secure, so I simply used the spare frame to hold the glass in place. This means my filter is twice as thick as a normal filter, but that’s no problem.

And here is the filter in situ, mounted on my Tokina RMC 400mm f/5.6.

Testing
Unfortunately as it’s winter, it hasn’t yet been daylight during any of my free time, so I haven’t been able to use this filter with the sun. However, by comparing photos of a lightbulb in my house with and without the filter, I was able to estimate the optical density.
Without the filter, I shot the lightbulb at ISO1600, f/5.6 and a shutter speed of 1/4000s. To achieve the same exposure with the filter (keeping the ISO and aperture the same) needed about 120 seconds. That’s 200,000 times more exposure.
- Transmittance: 0.0005%
- Neutral density: ND 200,000
- Optical density: OD 5.3
Given that I was aiming for an OD of 5.0, I’m pleased with OD 5.3. If my measurements are correct, that will be totally safe for viewing by eye through the camera’s viewfinder. Anyone fancy a sweepstake? 😀
Soon, I hope to be able to publish some pictures of the sun taken with this filter – obviously depending on there being sun during the day at the weekend while I’m free. Cross referencing my personal calendar with the forecast for Bristol, it might be a few weeks…

One thought on “Making a solar filter”