After excitedly writing about my new project, the Somerset Towers, I got off to a few weekends ago by visiting five churches. I chose some of the easiest ones to begin with, and started near Bristol. One of my first visits was the Church of St Mary and St Peter, Winford.
I was lucky enough to be able to speak to a couple of the members of the congregation in the churchyard who shared some of the local history with me, and then I met the rector who kindly showed me round the inside of the church. As I was leaving the churchyard, an elderly gentleman stopped me in the street for a chat. I’m not sure what’s in the water at Winford, but everyone is very friendly!
Churchof St Mary & St Peter, Winford
Photo geek info: Horseman 980 camera with Topcor Press 65mm f/5.6 lens and Ilford FP4+ film. Exposure was 1/60s with aperture f/16 using an orange filter.
This article is about exploring the world of light our eyes cannot see, using a modified digital SLR camera. I have a physics degree but I’m still finding my way with the practical applications of infrared and ultraviolet, so this article is mostly written from a theoretical point of view. Take everything I say with a pinch of salt! 😉
Our eyes can detect only a small portion of the electromagnetic radiation that’s floating around out there. It various from person to person, but the average human can see wavelengths from violet at 400 nanometres (nm) up to red at 700 nm. The human eye is most sensitive to green light, right in the middle of the visible part of the spectrum. However, the silicon sensors used in almost every single (digital) camera are natively sensitive to wavelengths from ultra-violet (UV) at 300 nm up to infra-red (IR) at 1200 nm. If these wavelengths were included in everyday photographs, they’d look extremely odd because that’s not what our eyes expect to see. To prevent this, camera manufacturers install a filter over the camera sensor that prevents UV and IR light from reaching the sensor. Now, the photos you take will look the same as you can see with your eyes. The red line on this graph shows what the built-in UV and IR reduction filter will allow to pass. It’s not very much, bearing in mind the camera is sensitive to almost the whole width of the graph. From an astronomy point of view, a lot of distant nebulae emit or reflect light, including UV and IR. These objects are quite faint so it is useful to collect as much light as possible when photographing them. You’re cheating the nebula if you allow the UV and IR light to travel across the universe for thousands of years, simply to discard it less than one millimetre before you could have captured it. A lot of astronomers modify their camera to remove the filter to allow all this extra UV and IR light to reach their sensor. They benefit by collecting more light, and by recording more information about a world the eye cannot see.
It’s usually not ideal to capture the whole range of wavelengths at the same time, otherwise soft images are likely to occur as different wavelengths are brought into sharp focus in different places. Most photographers overcome this by using additional filters over the lens of their camera which limit the wavelengths of light entering to only UV, only visible, only IR or possibly combinations of these, depending on the application.
For instance, the blue line on the graph above shows the transmission of a Baader ACF filter. You might wonder why someone would bother with a filter that doesn’t permit many more wavelengths to reach the camera, but the reason is because many nebulae emit strongly on the H-alpha emission line, which is at 656 nm and appears deep red to our eyes. As you can see, the built-in camera filter would block at least 75% of this valuable light. Removing the standard filter and replacing with the ACF filter suddenly means you can collect 4 or 5 times more of the H-alpha radiation. This is the real benefit and there are other filters available that permit only H-alpha and not the rest of the visible spectrum.
I decided to have my camera converted to “full spectrum” sensitivity, primarily for astrophotography but also for occasional use with infrared landscape photography. I normally use black & white infrared film but it is quite expensive and difficult to handle reliably. Using an IR-converted DSLR allows false colour infrared as well as black & white infrared, which is a bit different. I nosed around online for a while before deciding to employ the services of DSLR AstroMod and I am extremely pleased with the results. The chap behind DSLR AstroMod is an experienced astronomer and photographer himself, and was keen to share his first-hand experience, help me choose the right conversion package and give advice on how to get the best out of the camera – all for a reasonable price. If anyone else is considering a DSLR conversion to IR or full spectrum, I heartily recommend DSLR AstroMod.
At the moment it’s cloudy in this part of the UK so I haven’t actually been able to use the newly-converted camera for any astronomy – only a few test photos in the garden. I’ve got a lot of experimenting to do before I figure out what works best for astronomy, but this is exactly where I wanted to be. Before, my astronomy equipment was the limiting factor and a source of frustration. Now, with a good telescope, a good mount and a good camera, my equipment no longer limits me. I am the limiting factor, and this is my incentive to learn 🙂
After a successful first attempt with my new telescope, I decided to book a day off work, spent all night in Somerset and all day sleeping it off. I had lots of fun and I learnt an enormous amount – even if it did get quite chilly by 2am.
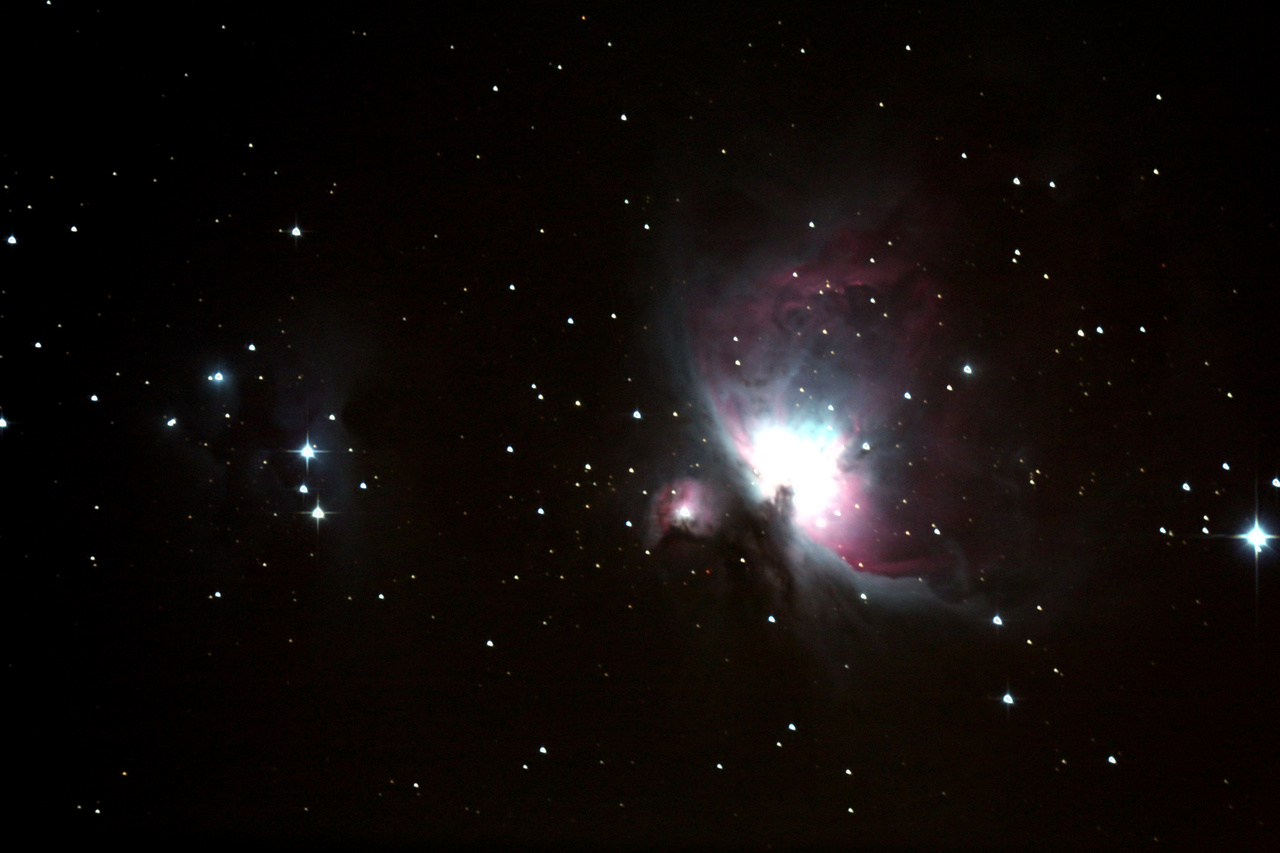
M42 Orion nebula
Milky Way
M45 Pleiades cluster
M31 Andromeda galaxy
I was paying more attention to the lessons learnt from my previous attempts from astrophotography. Unfortunately I forgot to take dark frames so these images are quite noisy.
All these pictures were taken with a 6″ f/5 Newtonian telescope attached to a Canon EOS 600D camera and processed with RegiStax, DeepSkyStacker, ale and GIMP.
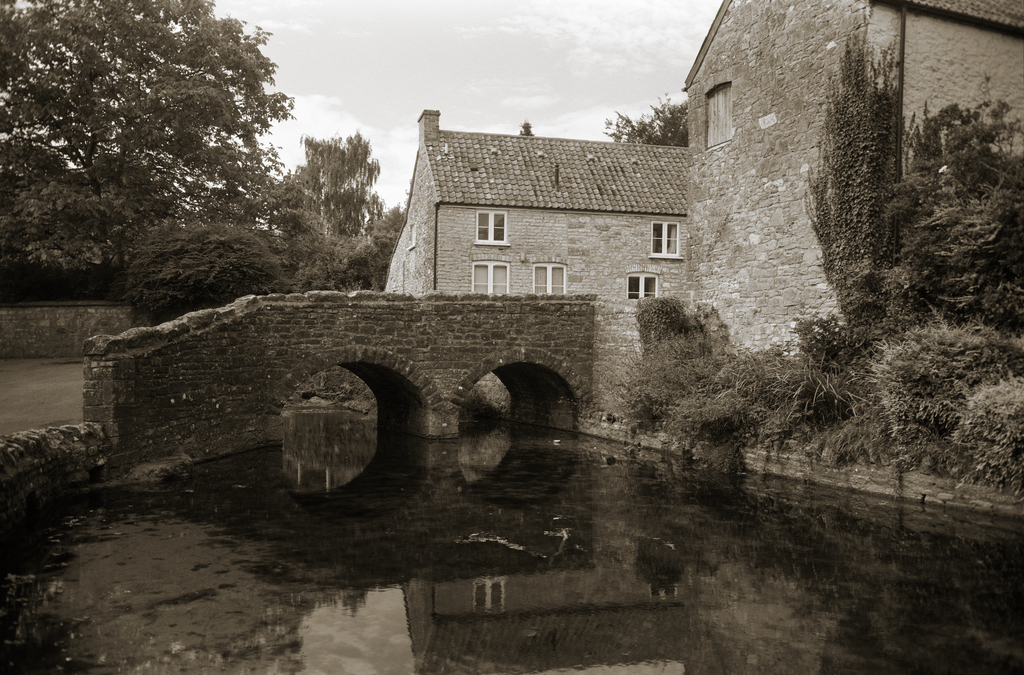
Last weekend, while I was out and about in Somerset photographing churches for my project, I saw this arched bridge over a ford in Chew Stoke. No further explanation necessary; it’s a pretty scene!
Chew Stoke
Horseman 980 camera with 65mm f/5.6 lens. Exposure 1/15 at f/11 on Ilford FP4+ with orange filter.
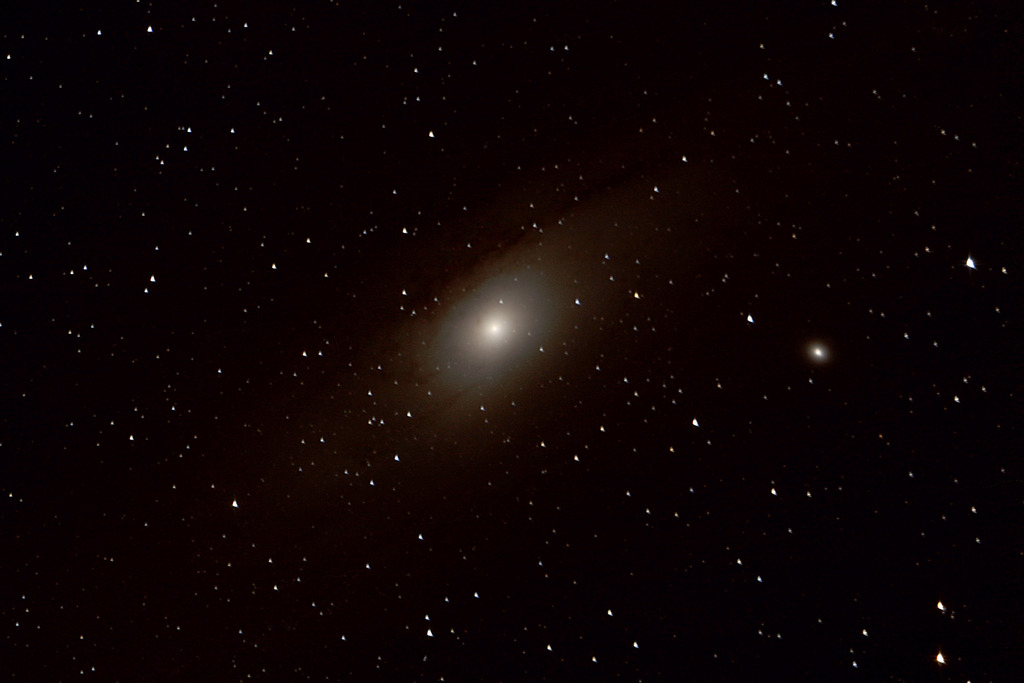
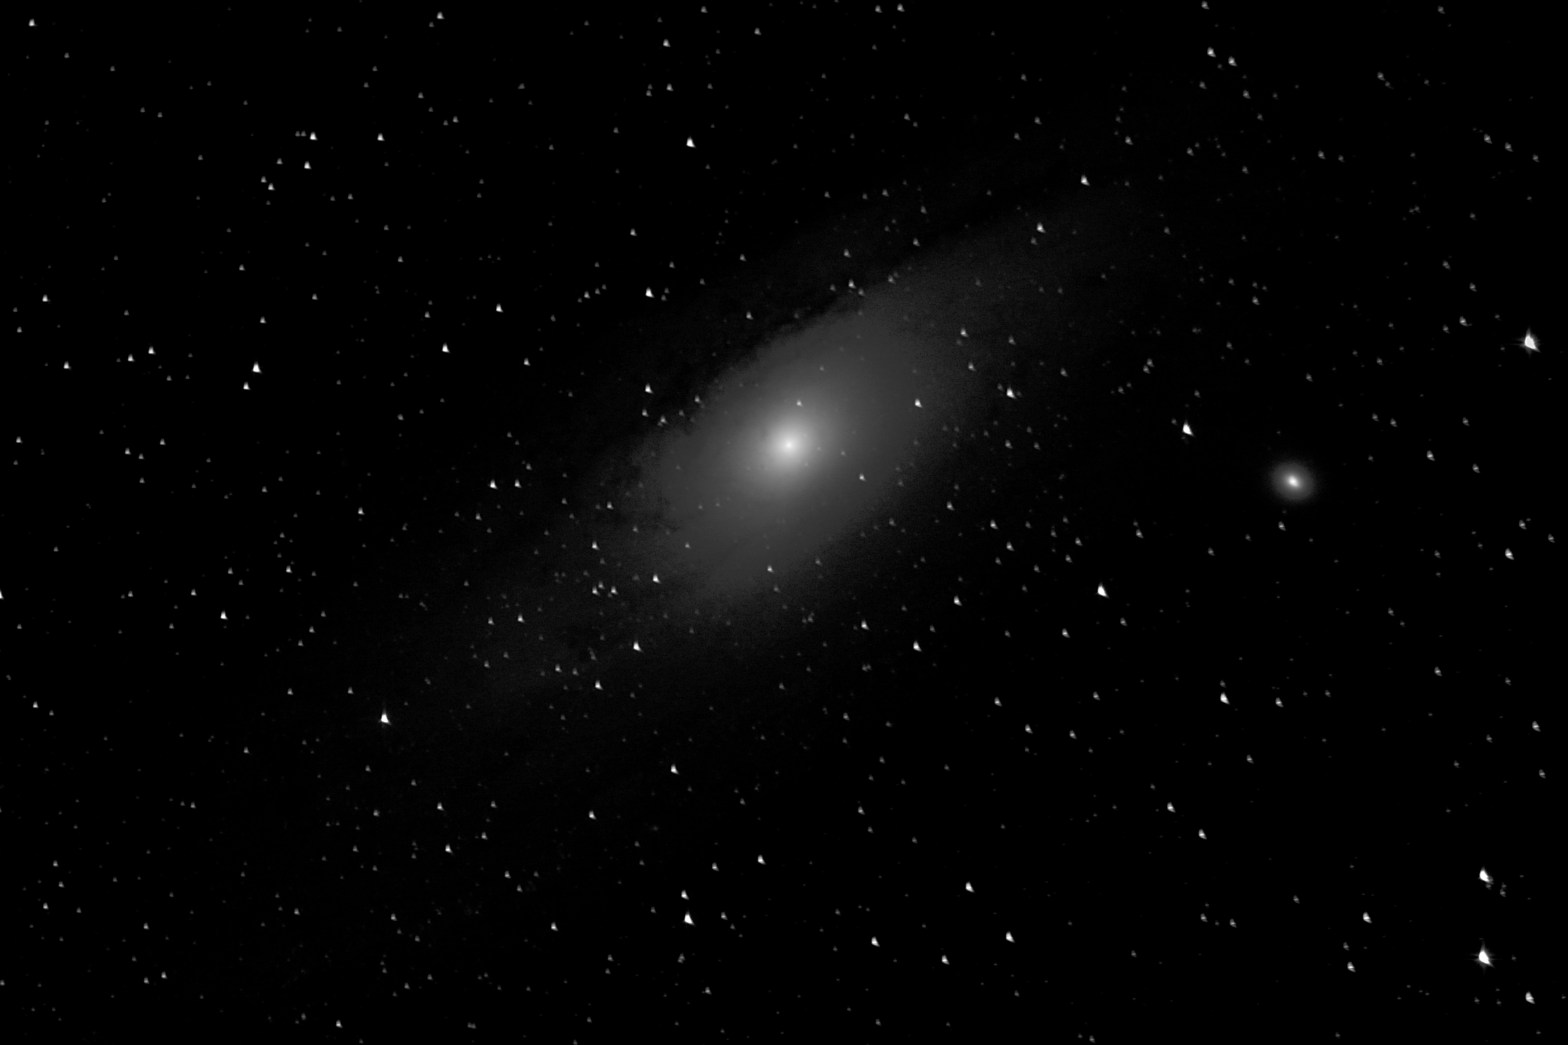
This morning I published a picture of the Andromeda galaxy, with some notes about my method a vow to improve my technique. I pondered the image processing and decided to have another go this afternoon. This is the same dataset, but different processing. It’s a colour image and unfortunately shows some light pollution, although I tried to minimise the redness. I think it’s an improvement!
Hot on the heels of my recent post about telescopes for imaging, in this post I’d like to share with you the very first image taken with my new GSO 6″ f/5 imaging Newtonian – which was funded by selling my two previous telescopes and a couple of camera lenses.
Tonight was the first clear night since buying the telescope so I headed to my dark site in Somerset. It was a bit hazy but good enough to test out the new telescope. The Advanced VX mount is rock steady and makes my previous entry-level mounts feel like mere toys. The telescope itself feels like a proper scientific instrument.
This image is a stack of 35 frames, each exposed for 30 seconds – which is the longest my camera can do automatically without an intervalometer. I do have an intervalometer but for testing, 30 seconds exposure is sufficient and is already an order of magnitude longer than my previous tripod could do without being affecting by motion blur. In future I will try unguided exposures of a minute or longer which should reveal even more detail. I also included one dark frame to help with the noise.
I’m still finding my way with astronomy image processing. These pictures were aligned and stacked with DeepSkyStacker and then I used the just green channel as a monochrome image in an attempt to avoid light pollution.
It also looks like the telescope needs collimation as stars which should render as points of light are appearing as small triangles. However, image quality otherwise blows me away compared to any telescope I’ve used before. The coma corrector in particular plays a useful role in ensuring sharp images all the way to the corners.
I was ready for more photography, but it started to get a bit misty so I called it a night. In summary, I am extremely pleased with this image as a very first attempt using this telescope and mount. With practice I hope to improve my skills with the telescope and my skills with processing software. Watch this space for my future attempts 🙂
Well, “perfect” is a strong word. No matter what you’ve got, there’s always something better. This article is about my hunt for some suitable equipment for deep-space astro-imaging, inspired by the recent purchase of a new telescope for imaging. Ideally I’d be out using it right now, but it’s forecast to be cloudy until further notice 😦
Meade TeleStar 60AZ-A2
I’ve always had a vague interest in astronomy since childhood but I picked up more of a serious interest a couple of years ago when my interest was rekindled after finding a basic telescope – a Meade 60AZ – at a car boot sale for a giveaway price. It wasn’t very good optically and the tripod was made mostly of cocktail sticks and coat-hangers, but it showed detail on the moon and even some of the bands on Jupiter. I was hooked.
Meade 60AZ on Canon 450D
As I was already well into photography and owned a DSLR, it was inevitable the two would mate. Using a T-mount adapter and no astronomical knowledge, I roughly pointed the telescope at bright objects that could be seen with the naked eye. Using this setup and taking just one frame, I managed this picture of Jupiter.
Jupiter
Not bad for a cheap telescope, but not suitable for long exposures or for any photography of anything dimmer than Jupiter. It was time for an upgrade.
Celestron NexStar 127 SLT
The Celestron NexStar 127 SLT was my first proper telescope. I was attracted to the go-to mount and the Maksutov-Cassegrain optical system, which is durable and low maintenance.
Celestron NexStar 127 SLT
It is an excellent telescope for visual observation, especially of planets due to its long focal length. It also does a reasonable job of the brighter Messier objects. I had a lot of fun with it and I took pictures of planets and some deep space objects, such as these pictures of Jupiter and the Orion nebula (Messier 42).
JupiterOrion Nebula (M42)
However, despite my promising results, the I soon ran into the limitations of the NexStar 127. Maksutov telescopes are not ideal for astrophotography due to their slow focal ratio (this one is f/12), and the alt-azimuth mount is also not appropriate for tracking objects for long exposures. Not only does it use the wrong co-ordinate system but the coarse stepper motors also jerk the image every 10 seconds or so.
On paper, it is a much more appropriate telescope for astrophotography than the NexStar 127. I haven’t owned it for very long, but I did take this photography of the Andromeda galaxy (Messier 31).
Andromeda Galaxy
While the optical tube was pretty good for astronomy (although I did have to modify the focuser to allow infinity focus, and the 1.25″ eyepiece holder causes vignetting, as you can see), the mount wasn’t great. In theory with careful alignment and with the motor running it would allow much longer exposures of dim objects. However, the mount was a bit flimsy and the camera was a bit heavy, so it was hard to keep it all stable. In the end I mostly used the Newtonian telescope on the NexStar goto mount, which was the best compromise (this is how I photographed Andromeda, above). Using an equatorial mount and a Newtonian telescope really opened my eyes to the possibilities. I just needed higher quality components.
GSO 6″ f/5 imaging Newtonian
Now I know my way round a telescope a bit better, I felt more confident mixing and matching components. I liked the look of the Celestron Advanced VX mount, which is designed for astrophotography, and combines the benefits of a German equatorial mount with the convenience of a goto system. But I wasn’t keen on the 6″ Newtonian that Celestron recommend to go with it – it had a pretty poor focuser and mediocre reviews for imaging purposes.
Advanced VX mount
I had assumed that a faster focal ratio would be extremely important for astrophotography as the camera can gather more light, but after consulting with some extremely helpful people at AstronomyForum one of the most important things they said to me was
In visual, aperture is king. In astrophotography, the quality of the optics and mount are king.
The take-home lesson is that a 6″ Newtonian is likely to provide better photographs than an 8″, simply because it is lighter and will be more stable on its mount and easier to guide. With this in mind, I put thoughts of a cheaper 8″ or even 10″ telescope out of my head, and concentrated on a high quality 6″. I decided to pair the VX mount with a lesser-known brand called Guan Sheng Optical (GSO) who get excellent reviews, but seem to offer significantly more telescope for the same price as other manufacturers. The tube I chose is a 6″ f/5 Newtonian, designed for imaging, and equipped with a coma corrector and a 2″ Crayford 1:10 focuser.
GSO 6″ f/5 Newtonian
These toys only arrived yesterday and it has been cloudy since, so I haven’t had a chance to test it out yet. However, first impressions are excellent. The mount and the telescope feel solid and make all my previous telescopes feel like mere toys. The site I bought the GSO telescope from included a sample picture of Andromeda (M31) taken by one of its customers – Ingo Klever – using this telescope. Ingo is obviously an experienced astrophotographer, but this demonstrates to me that my equipment is now capable of making images like this. If I am still not able to achieve this quality after practice, then the fault lies with me and not my equipment!
M31 by Ingo Klever
Keep your eyes peeled for astrophotographs appearing on this blog using my new toys. Don’t expect anything up to the standard of Ingo’s work just yet, but I’ll do my best to practice and improve.
Facts & figures
Here are the facts & figures relating to all the telescopes mentioned here.
For the second part of our honeymoon, Hannah and I went to Longleat Safari Park, where we had booked a VIP Tour. We’ve been to the safari park before, for the traditional bus tour but this time we wanted to get up close with the animals in a 4×4 and have a private guide to show us round. We also wanted to go behind the scenes, feed the animals and enjoy some experiences you don’t get on a normal visit.
As always, I enjoy taking photographs but the main aim of our visit was not photography – so there are not photographs of everything that we did together.
First we were taken into the tiger house where we were just arms’ length from the creatures. We fed them chunks of meat on a stick, which the tigers always take standing up on their hind legs. Very intimidating creatures, and much larger than they look when they’re far away.
Then we were taken out in a Land Rover to see the two prides of lions, the cheetahs and the timberwolves. After this, we visited the smaller animals, got licked by some anteaters, tickled by some meerkats and splashed by some penguins. Finally, after lunch we rounded out the day by returning to the 4×4 to visit the other animals that we hadn’t seen before – including the monkeys and the tigers, which had been released from their house since we fed them. All in all, a fantastic day! Be sure to view these photos in full-size, as you get the captions too.
Tiger
Tiger
Tiger
Tarantula
Lion
Lion cub
Lion
Lion
Lioness
Lion
Lion
Cheetah
Cheetah
Cheetah
Cheetah
Meerkats
Penguin
Lorikeets
Royal python
Tarantula
Giraffe & zebra
Lions
Lion
Lion
Cheetah
Timberwolf
Bird
Penguin
Lemurs
Baby monkey
Rhesus macaque
Baby monkey
Rhesus macaque
Wild heron
Tigers
Tigers
Photo geek info: most of these photos were taken with a Canon EOS 600D using a Sigma 100-300mm f/4 for the distant animals, and a Canon EF-S 17-85mm f/4-5.6 for the animals that were sufficiently close to the 4×4. I used two 600D bodies to avoid swapping lenses. For most of the day it was cloudy so I had to crank up the ISO to keep the shutter speed fast enough. Unfortunately the noise shows in some places, but better than not having the photos at all. Some of the pictures were taken with Hannah’s Fuji Finepix F60fd compact.
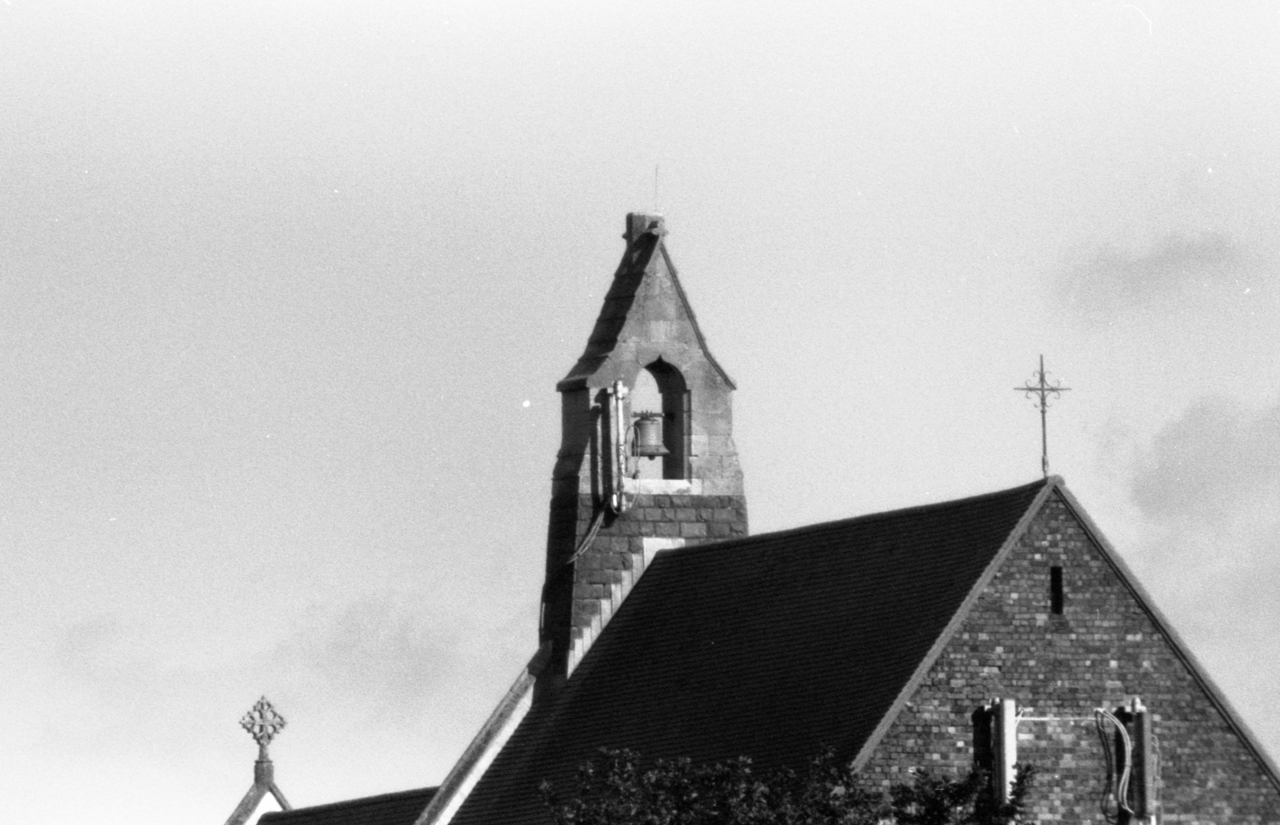
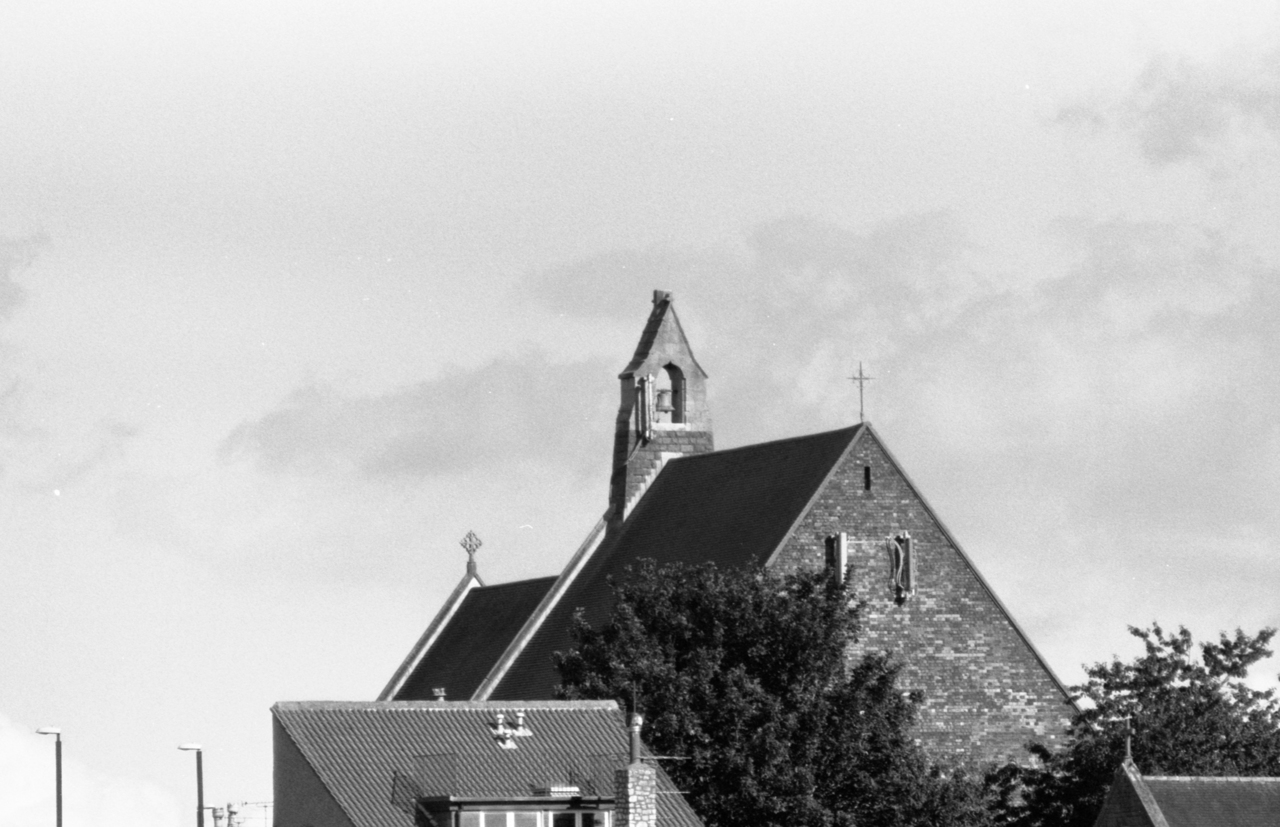
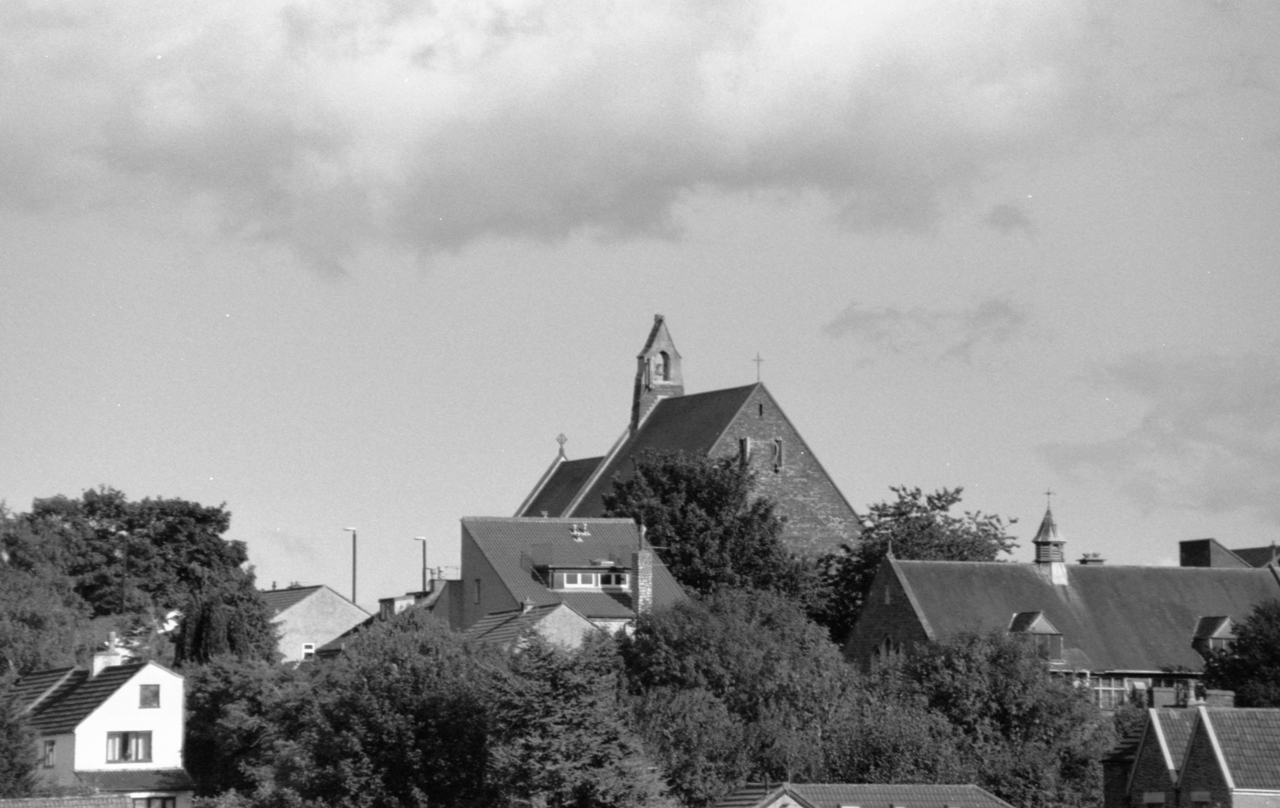
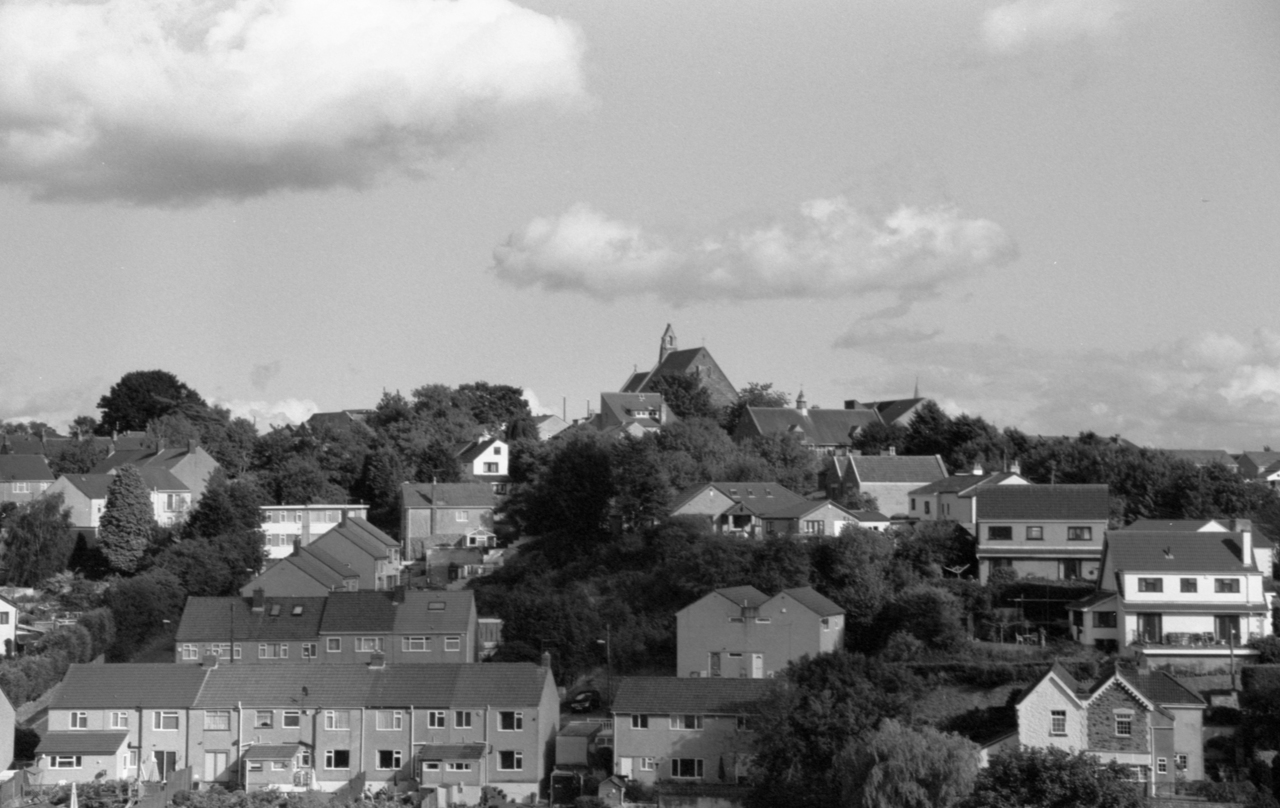
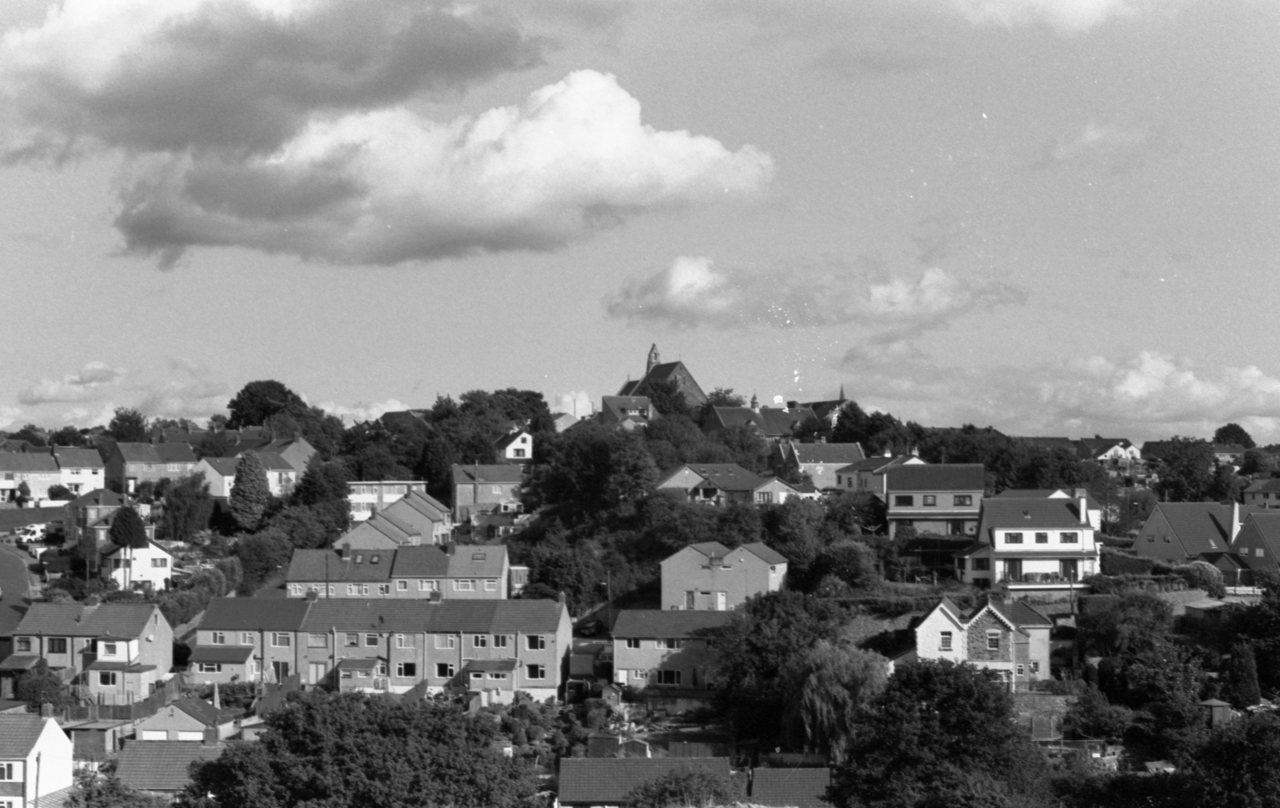
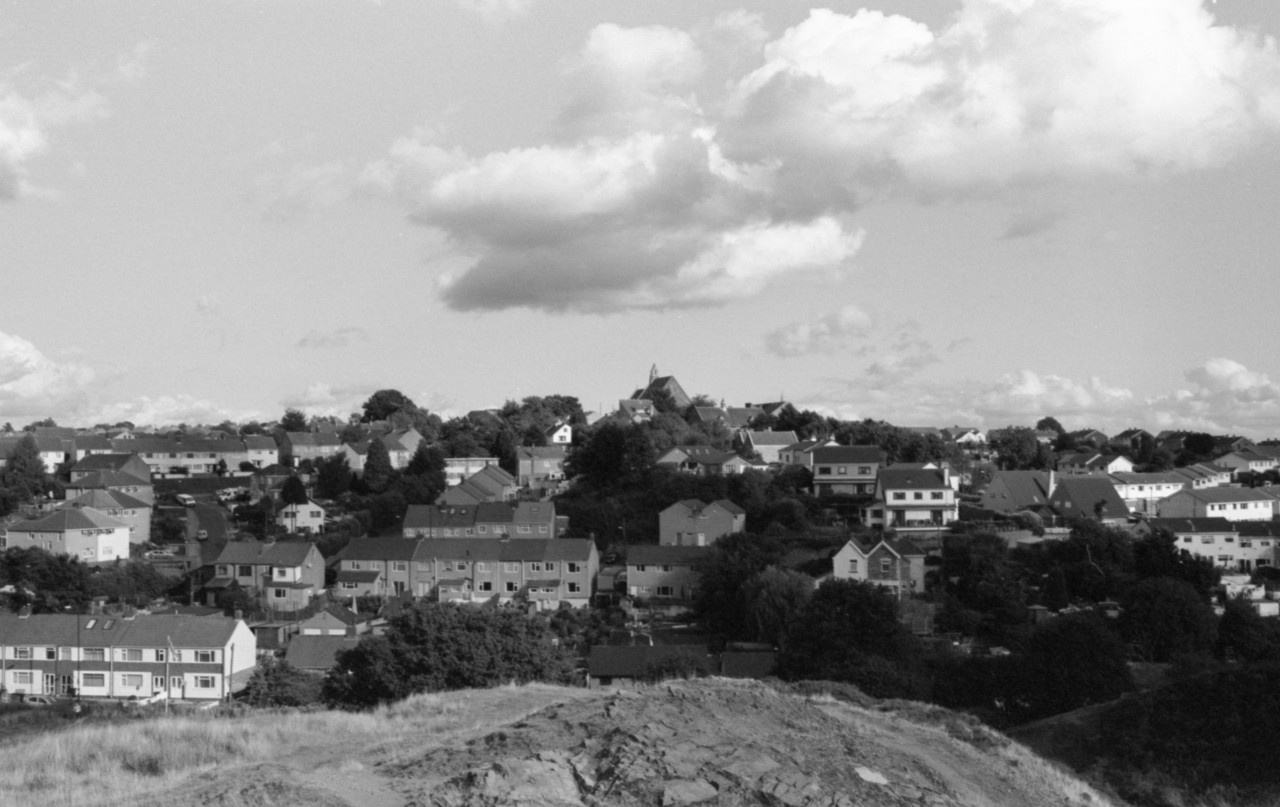
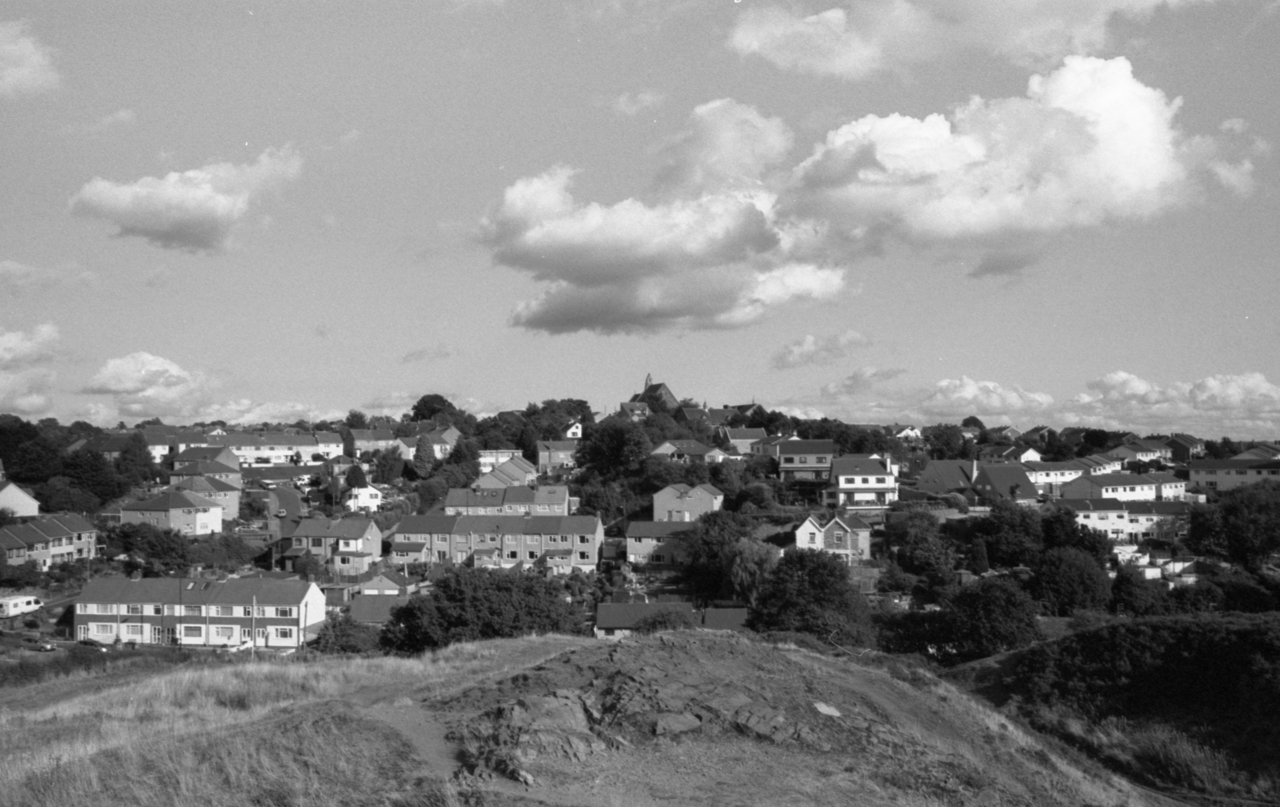
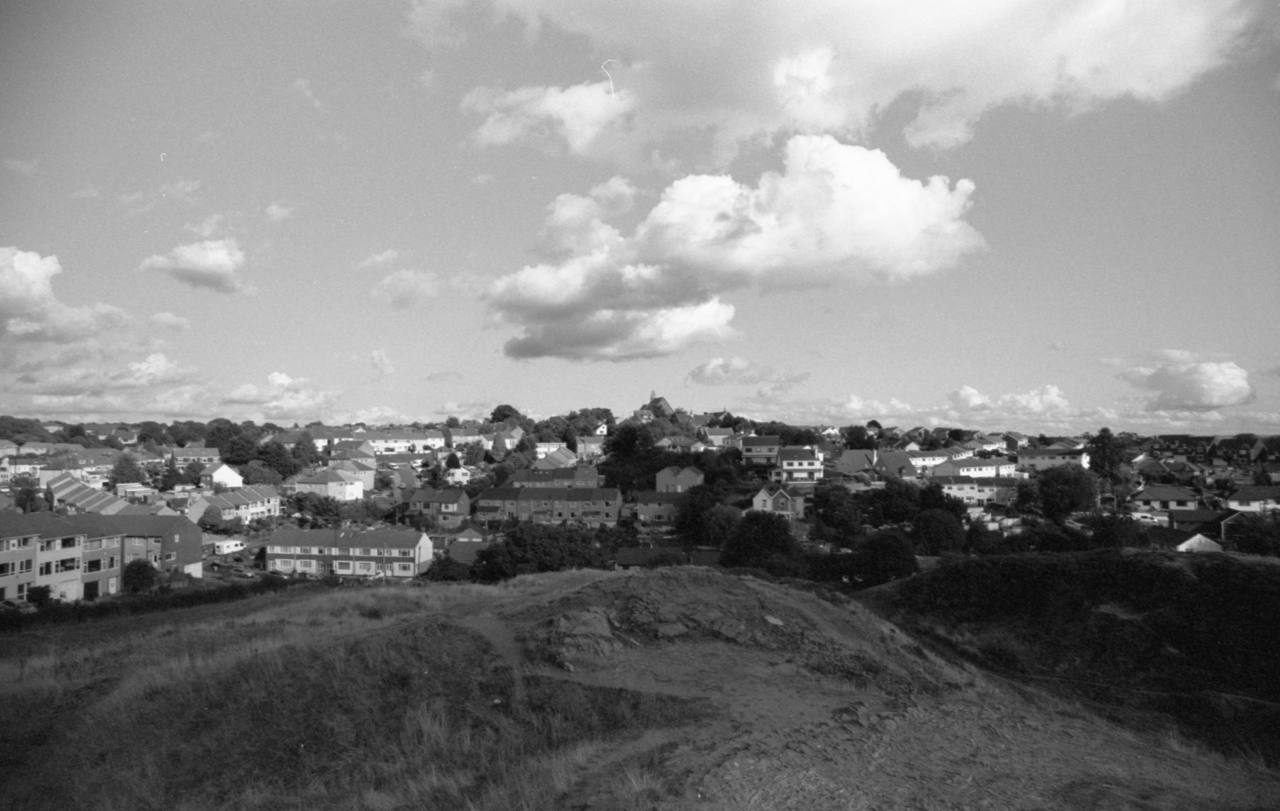
I know everyone who has several lenses for their camera does a comparison, but that isn’t going to stop me from having a go too. Here is the same view, seen through every compatible lens in my collection. I decided to use my Canon FD manual focus gear as I have most lenses for that, and they span the widest range. If you want to use digital camera marketing language, this is 70× optical zoom, all the way from super telephoto to ultra wide angle. As this is shot on 35mm film, the same angles of view apply for full-frame DSLRs, but you will need to apply the crop factor if you are using a crop-sensor DSLR.
I wasn’t able to include my nice Canon 135mm prime or the Canon 70-210mm telephoto zoom as they are currently on loan to a friend, so I made do with using a Makinon 80-200mm telephoto zoom.
The view is looking towards St Aidan’s Church from Troopers Hill, Bristol. I think the pictures would have been better in colour but I needed to use up a black & white film 😛 Perhaps when I’ve got my other lenses back I’ll try this again in colour.
I used Program mode on my Canon T90 to take these pictures so I don’t know exactly what settings were used. On most of the sunny pictures, the camera chose an aperture of around f/11 although as you can see from the pictures, the lighting was changing considerably. The exceptions are the pictures using teleconverters, which had to be shot wide open. Even then, the 1200mm picture is a bit underexposed.
I’ve always enjoyed photographing old churches, especially rural ones that I’ve stumbled across in Somerset (St Etheldreda in West Quantoxhead is my favourite so far). For a little while I’ve been meaning to get round to seeking out more churches and having a series of outings.
St Etheldreda, West Quantoxhead
A couple of weeks ago I happened to learn about the Somerset Towers, which is a collection of medieval church towers in Somerset that are noted for their beauty. Having read about them and done a little homework, I’m interested in visiting and photographing every one of these towers. It’s quite an ambitious project – there are over 70 of these church towers and someone even made a map of them! I’ve certainly got my work cut out.
St Etheldreda is not one of the Somerset Towers but when I checked my archive of negatives I was delighted to find that I’ve already photographed one or two of the Towers.
I’m not even making it easy for myself photographically. I will take all the pictures using black & white film – preferably using my Horseman 980 view camera, and possibly a Mamiya RB67 medium format SLR where the view camera can’t go wide enough. In a real pinch, I could use a 35mm SLR.
Horseman 980
Mamiya RB67
It is likely to take months to take all the photographs but when I am done I plan to prepare a book. In the meantime, you can follow my progress on this blog using the tag Somerset Towers. No doubt I’ll post some of the pictures in due course! 🙂