For this week’s Photo Challenge, crowds, I took this composite picture of students coming and going from the chemistry department at the University of Bristol.

For this week’s Photo Challenge, crowds, I took this composite picture of students coming and going from the chemistry department at the University of Bristol.
This week, I was contacted by Dutch producer Matt Pop who asked if he could use some of my photographs of Stockholm in the video for his remix of ABBA‘s The Day Before You Came.
Who am I to say no? I like ABBA and I like dance remixes. See if you can spot my pictures in the video.
If you like club-style remixes of pop music, be sure to check out Matt Pop’s YouTube channel.
Last year I wrote about the darkroom I had set up in my loft. Since then I’ve moved house, so I need to build the darkroom again. This time I have a windowless utility room on the ground floor, with running water and a worktop, so it’s already better than what I had before. Here’s how I’ve set it up.
Click for a larger version, and see below for a bit more explanation. Apologies for the poor quality of this picture – I used my phone as my DSLR is currently tied up in a laser lab at Bristol university’s chemistry department. Hopefully photos to follow!

Not pictured:
Most of the photography-specific equipment was purchased either from FirstCall Photographic or second-hand from eBay. Most of the more generic fixtures and fittings were bought from Ikea or other DIY shops.
If you are a darkroom enthusiast, buy Ilford film, paper and chemistry! It might not be the cheapest brand but it’s probably the best and it’s good to support a British company. Too many traditional photographic companies have discontinued products, changed focus or shut down entirely. Support traditional photography, and buy more film! 😀
I recently tried out my newest camera, a 1963 Canon Demi. For those who don’t know, this is a half-frame camera, meaning that the negatives are half the usual size and you get twice as many negatives on a film. This was significant when the camera was new in the 1960s: colour photography was just coming out and was expensive, so half frame cameras reduced the price somewhat. This isn’t why I bought it – I wanted it because of its tiny negatives (meaning you get more grain), cheap lens (for that lo-fi look) and its unusual default portrait orientation.
The camera has a sort of semi automatic metering system. It’s tiny and easy to carry around and the emphasis is on convenient picture-taking rather than technical details. I noticed that this carried over into my photography, and most of the pictures I took on the Demi’s first outing were far from technically perfect, but more “free and easy” and probably more interesting as a result.
All of these shots are taken in different areas around Bristol.


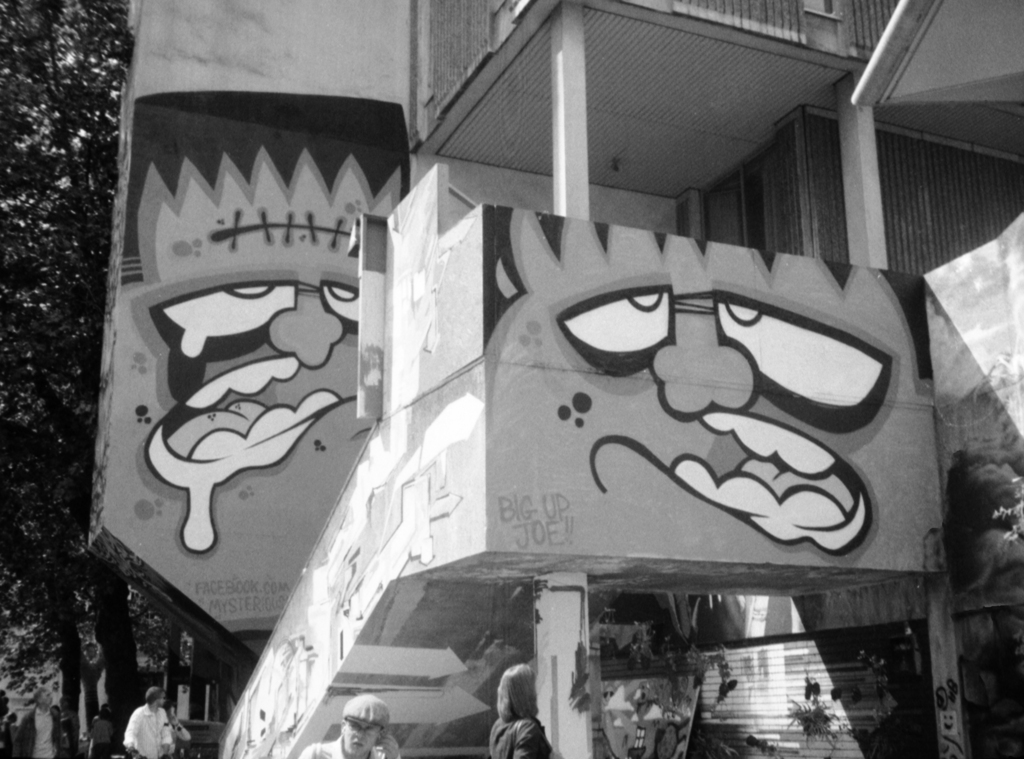
Earlier this year, street artists were invited to come and paint graffiti on various buildings along Nelson Street. Perhaps the black & white film I was using doesn’t do these vibrant works of art justice, but I like the graininess.


These works are taking place to demolish the old children’s hospital to make way for the new University biological silences building. Most of the demolition work is to remove and 1950s brick and concrete structure. The original frontage of the old building is being kept, and will be incorporated into the new building.

I took these photos of Oldbury Court Estate in October but it’s taken me a while to get round to processing the film, as I have moved house. The good news is my new darkroom is much larger and better equipped. The first film to emerge from it has come out perfectly.
These photos are unusual for me, because they are taken in the early morning. Usually I’m too lazy for that, and sunsets are much more common on this blog. But fog is also my favourite weather and so the sight of mist out of the window is usually enough to get me out of bed early and outdoors with a camera.
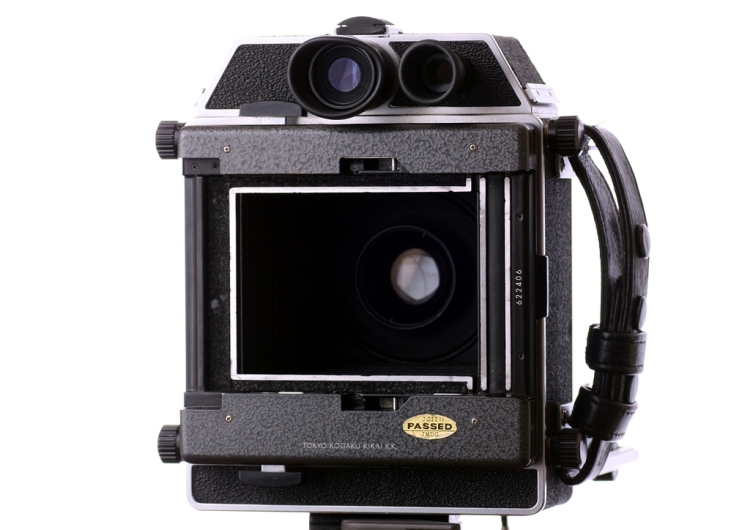
On this occasion, the camera of choice was the mighty Horseman 980, loaded with Kodak Ektar film.


This photo of the weir near Snuff Mills was taken a few days earlier, but it was on the same film so it can live here too.

Tonight found me on top of Troopers Hill, which overlooks the city of Bristol. It’s about three miles from the centre, so it affords pretty spectacular views.
Click this image below for a somewhat larger version, or inspect the really huge version.

I also took this long-exposure shot of the chimney on the top of the hill.


This picture of Troopers Hill inspired me to look up John Keats’s well-known poem. I also entered this picture into the Photo Challenge.
To Autumn
Season of mists and mellow fruitfulness,
Close bosom-friend of the maturing sun;
Conspiring with him how to load and bless
With fruit the vines that round the thatch-eves run;
To bend with apples the moss’d cottage-trees,
And fill all fruit with ripeness to the core;
To swell the gourd, and plump the hazel shells
With a sweet kernel; to set budding more,
And still more, later flowers for the bees,
Until they think warm days will never cease,
For Summer has o’er-brimm’d their clammy cells.
I recently saw a web page about a project called CameraMail. The idea is simple – you post a disposable camera to a friend with instructions for postal workers to take their photos using the camera along the way. Hopefully, at the end you are left with a series of pictures, documenting the camera’s journey.
I bought a cheap Fuji camera and stuck it to a sturdy piece of corrugated cardboard with a hot-melt glue gun. It stuck rock solid, so I then decorated the board with various instructions to make it stand out in the sorting office.


Below the camera, I stuck an address label in the plain black area. It was addressed to my brother Edmund in Nuneaton – a journey of around 110 miles if you drive directly. I have no idea of the route taken by the CameraMail.
[mappress mapid=”6″]
Here I am, just about to post the CameraMail in Bristol. It’s a shame I didn’t have time to post it in the post office during office hours, as I might have got another photo or two.

From here on, I have no idea where any of these pictures were taken. Just enjoy the pictures! A couple of the negatives came out completely blank, so I assume either someone took photos indoors without a flash, or the camera accidentally went off in a sack of letters.


I am guessing this photo was taken in Nuneaton, as the mail seems to be out for delivery in a small van.

And finally, Edmund received the CameraMail safe and sound. Unfortunately, he seems to be too young to know that you have to use a flash if you use film indoors! 😛

So please allow me to give my thanks to the postal workers who participated and took photos. I hope it was fun for you, too.
Sorry it has taken me a little while to get these photos online. The CameraMail was posted on 2nd August, and took around 3 weeks to arrive. Then, it took me a while to get round to processing the film. 🙂
I might try this again some time – but perhaps with a route that’s a bit more exciting than up the M5 to Nuneaton. If anybody reading this lives in the Orkney Islands, let me know! 😉
Released 1999
I decided to buy this EOS 300 to make my lenses more versatile. As much as I love my AE-1, it can’t take the same lenses as the 450D. This EOS 300 isn’t a very interesting camera, but it can share lenses with the Canon DSLRs and the body only cost a fiver. Bargain!
See all shots taken with the EOS 300.

| Lens | Canon EF mount |
|---|---|
| Film | 135 |
| Focus | SLR auto |
| Meter | CdS full frame auto |
I’m no stranger to medium format photography. I’ve owned a few box cameras, a basic folding camera, and a cheap TLR for a while. Last year I started to take it seriously by buying a Mamiya RB67 outfit. I’ve been using it mainly for landscape photography and perhaps inevitably, I ran into the need to have movements on the camera.
I don’t have a scanner or an enlarger capable of taking 5×4″ negatives, and with the added cost of the sheet film, it would be an expensive venture. So I decided to buy a medium format technical camera, aka field camera. After looking around, I settled on one of the Horseman cameras – 970, 980, 985, VH or VH-R.

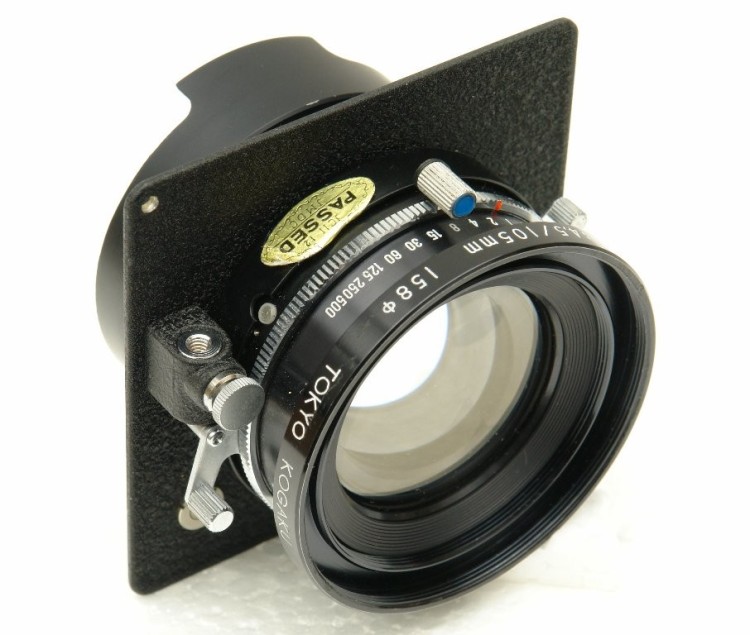
But this isn’t my life story, nor is it a review of the Horseman 980. This is supposed to be a few snippets of information that I have found out for myself about the 980, and have decided to publish here given the scarcity of information about the Horseman 6×9 technical cameras.
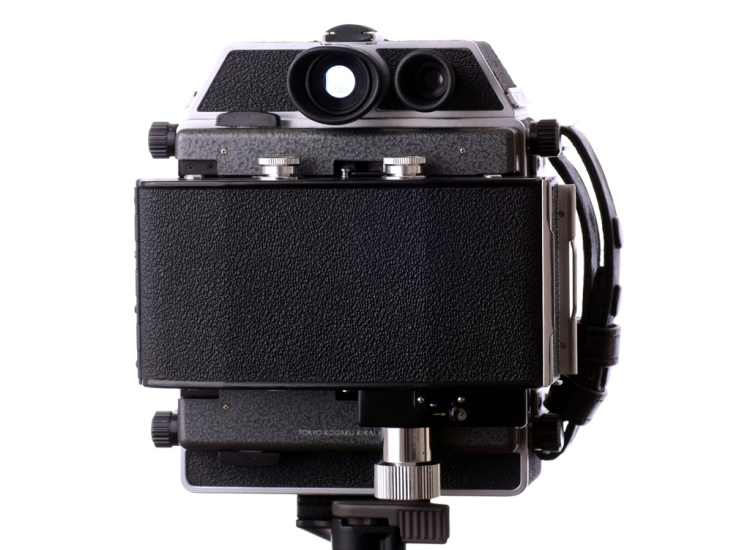
Compatibility with RB backs is an important factor for me, since I already have several Mamiya backs for my RB67. Information is hard to come by, but as far as I can gather…
| Will work with RB backs | Will not work with RB backs |
|---|---|
|
|
I think this can be roughly summarised to say that the Horseman cameras with rotating backs can take Mamiya RB67 backs. The older ones can’t.
The baby Graflok mechanism is the same, but the older Horseman models have raised silver metal areas around the film gate that do not allow the Mamiya backs to get close enough to the camera body for the sliding Graflok blades to mate. To mount a Mamiya back on a Horseman 960, 970 or 980 you will need to modify the camera itself. I haven’t seen a later Horseman body to compare.
This note particularly concerns the older roll-film back (pictured) with a chrome knob advance rather than a lever – although I have no idea if the same also applies to the lever-advance backs.
When loading a new film, there is no painted or engraved mark to align with the arrow on the paper backing. Instead you have to wind the paper on until you see the arrow peeping through a hole in the pressure plate. At this point, you close the back and wind until number 1 appears on the film counter.
However, in my experience, this means the film is wound about 5cm too far before the first exposure, meaning the last exposure is cut off. Now that I’m aware of this, I’ll just advance a little less to begin with. After I’ve figured out the best way of doing this reliably, I’ll comment on this post.
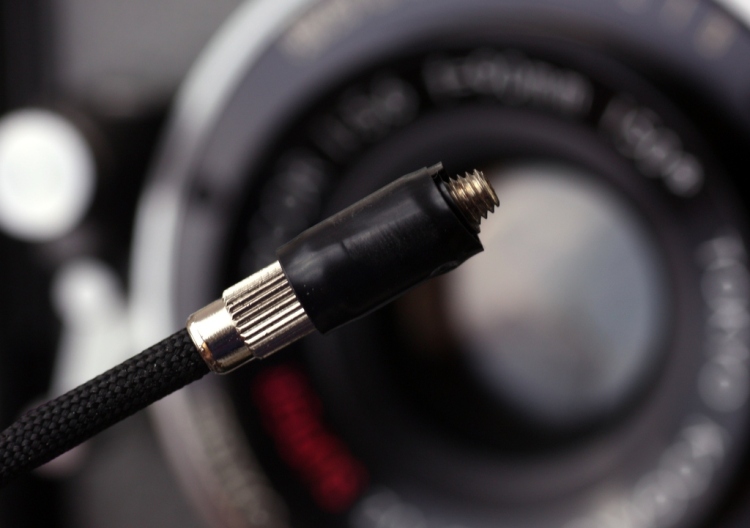
These Horseman cameras do not take a standard cable release. The standard type of cable release found on 99% of (non-digital) cameras has a small screw thread on the tip of the cable, and screws into a socket somewhere on the camera or lens. There is no threaded socket on the Horseman lenses. Instead, there is a tube that the cable release sits in, with a screw clamp to hold the cable in place. Sounds OK, except the diameter of the tube is 6.5mm and almost all cable releases are too thin to be gripped by the clamp.
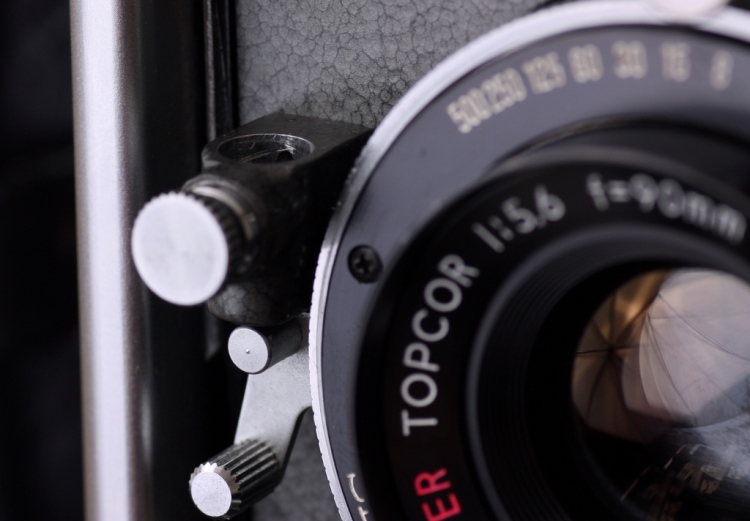
The Horseman cable releases seem extremely rare – I haven’t found one anywhere online. There is also an adapter that exists but is very rare. I’ve searched extensively and found them only occasionally supplied with lenses – never on their own. I’ve pinched this photo from an eBay auction, to illustrate what the adapter looks like. It’s the small chrome thing in the shutter release hole.
I’ve contacted the Analog Photography Users Group and a camera shop that sells Horseman accessories, but neither were able to offer any insights.
I have worked around this by taking a standard cable release and wrapping it in a few layers of electrical tape to fatten it up a bit, so it gets clamped in the Horseman shutter release. It works reliably enough for me, and even looks OK when mounted.


