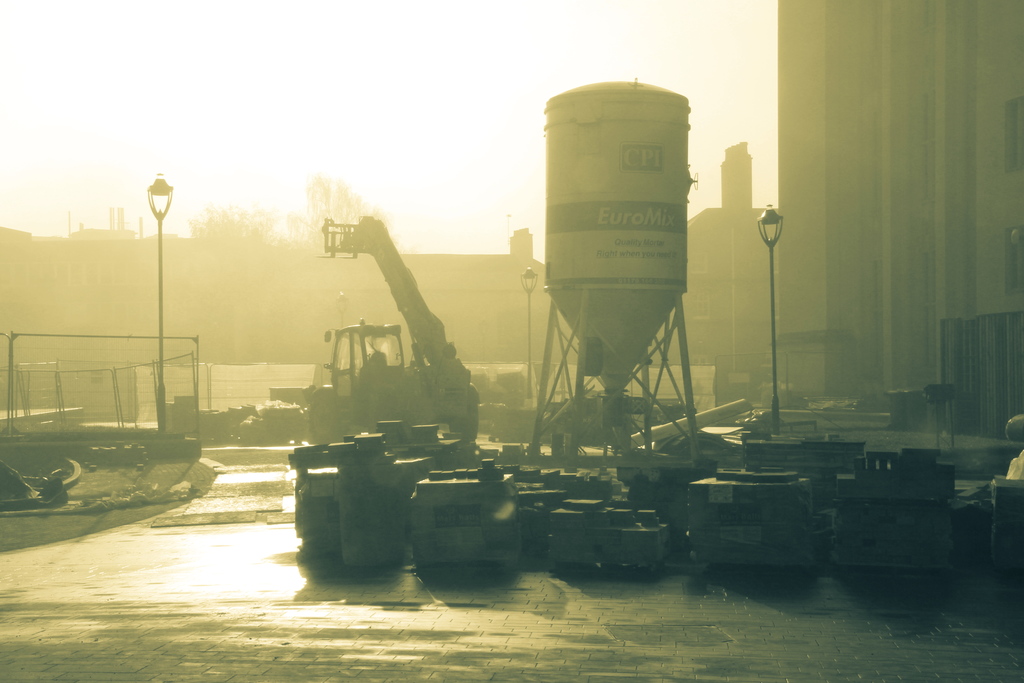
This picture was taken for the industrial photo challenge, and depicts a construction site in Bristol on a misty morning.

This picture was taken for the industrial photo challenge, and depicts a construction site in Bristol on a misty morning.
During an IT site visit at my workplace, I had to go into a well-hidden cellar. The person who let me in said he hadn’t been in for twenty years. I suspect not many other people have been in, either.
The cellar sprawled out under the foundations of a large building with interesting alcoves and side rooms. Several of the rooms contained ancient equipment to ventilate the building above, using dangerous-looking belt-driven fans to draw air in down a grille at street level and blow it into enormous ducts which disappeared off around the place. Thankfully the fans were not running, because their blades were not enclosed.


My favourite room was small, but very tall indeed. It had shelves from floor to ceiling, all creaking under the weight of bundles of old documents, wrapped up in brown paper and tied with twine. A few documents were lying around on the floor, so I had a look. There were exam papers dating back to the 1890s (older than the building), booklets of log tables, minutes from meetings that happened a century ago, and some classical music scores.
Apparently at some time in the past, someone had sorted through some of the documents and some of the bundles were labelled “KEEP” or “THROW”. Those labels were yellowed with age so I think the would-be organiser embarked on the tidying at least 30 years ago and never finished the job.

All of these photos were taken with a Mamiya M645 and Mamiya-Sekor C 55mm f/2.8 lens on Ilford FP4+ film. Not bad given that I didn’t have a tripod 🙂
645 is probably a mysterious code to most people, but to film photographers it represents the smallest of the medium format sizes, 6×4.5 cm.
I’ve always overlooked 6×4.5 in the past, thinking that if you’re going to shoot medium format, you might as well do it “properly” and shoot at least 6×7. To me, 6×4.5 seemed barely larger than 35mm. I did shoot a handful of frames in 6×4.5 using a 6×4.5 back on my Mamiya RB67 but I never really got into the format.
Looking at the diagram below, it’s clear that 6×4.5 is far closer to 6×7 than to 35mm.

While I love shooting 35mm, recently I’ve become more frustrated with handling the tiny negatives in the darkroom. On my last holiday, I took the RB67 as my main camera. I enjoyed using it and I got some great pictures, but it was very big and heavy – and you only get 10 photos per roll.
I wondered about getting a Mamiya M645 as a “travel” camera, with a good balance between size, weight, economy and negative size. In the same week, I also bought a Zeiss Ikon Super Ikonta A 531 in 6×4.5 format, which is much smaller again than the M645.
The M645, while not exactly small or light, is much more like a 35mm camera than the RB67. The lenses are much more like 35mm lenses than the RB lenses. It has semi-sane metering. The camera and lenses are modern enough that I trust the metering, mechanism and multicoating to work when I need them to.
My copy is the slightly less expensive M645 J edition. It’s in pretty good condition throughout, with some rub marks on the edges that show it has been used. My only lens so far is the slightly wide angle Sekor C 55mm f/2.8 N.

The Super Ikonta A 531 is most definitely a travel camera. It folds up and is barely larger or heavier than a modern digital compact camera. It has no metering, but it does come with a fast lens (Tessar 70mm f/3.5) which is slightly wider than the usual 75mm lens you get on a Super Ikonta A. It also has a rangefinder – which really sets it apart from inexpensive folding cameras such as my Ensign Ranger Special. This is a portable camera I could actually use to get very high-quality results that will print well in the darkroom.
However this is a camera that was designed and built in the 1930s. It seems to work as well as it ever did, but the lens is understandably of an older and more simple design and might not offer such great image quality in demanding situations. It certainly is portable, though – much more so than a 35mm SLR.
My copy of the Super Ikonta 531 is very tatty. The inside is all in fantastic condition where it has been folded up and protected, but the exterior shows corrosion to the metal work and damage to the leatherette. I paid to have the camera serviced and repainted but it is still showing its age. I don’t mind – I bought the camera to use it and I feel less guilty slinging a tatty camera into my rucksack when on holiday.

I’ve taken the Super Ikonta out for a test run to prove that it’s light-tight and that the shutter is OK (it is). There is currently a film in the M645 which has taken up residence on my desk at work, and gets used occasionally. Hopefully soon I’ll finish shooting it and be able to publish some interesting photos.
There’s a fantastic Facebook group called Bristol – Then and Now Photographs. For ages I’ve wanted to contribute something but I haven’t had a suitable “then” photo to recreate.
Recently, I came across a picture of the Computer Centre at the University of Bristol. This unremarkable structure on Tyndall Avenue was completed in the early 1980s to house the university’s computer (singular) and the staff required to maintain it. I don’t know the photographer or the date of this picture, but the building has only just been completed – the skip is still outside and the trees haven’t yet been planted.

These days, the building still houses the university’s data centre but also contains a 24-hour computer room for students, an IT service desk, offices for many of the IT staff, the Careers department and a service counter for the students’ union.
Unlike many other buildings on and around the university campus, the Computer Centre has had no significant external modification. A few rooms have been moved around internally but the building has never been extended. The trees are now grown, and the roof is also sporting some moss.

Immediately to the left of the Computer Centre now stands the Centre for Sport, Exercise and Health, which was completed in 2002.
Both of these pictures were taken from the roof of the H H Wills Physics Laboratory which is the highest point in the city, with the exception of the white chimney on Southwell Street. Note – there are taller buildings than the Physics department but none that are more elevated. The church of St Mary Redcliffe, the tallest building in Bristol, stands almost at sea level near Redcliffe Wharf.
I’ve owned a De Vere 54 enlarger for a few months, and in that time I have modified it several times. First I spruced up the bulb-powered condenser head by converting to diffusion and making it use a halogen reflector lamp. This proved unsatisfactory and I couldn’t get the illumination even enough. Plus it was too dim.
I picked up a cold cathode head for it. In its original state, it wasn’t really usable because the tube had a nasty flicker. Plus it looked as dangerous as hell when I opened the lid. I decided to convert the cold cathode head into an LED head. This was a success, but recently I noticed that not all of the LEDs in the array were no longer shining with equal brightness, and one or two had broken completely.

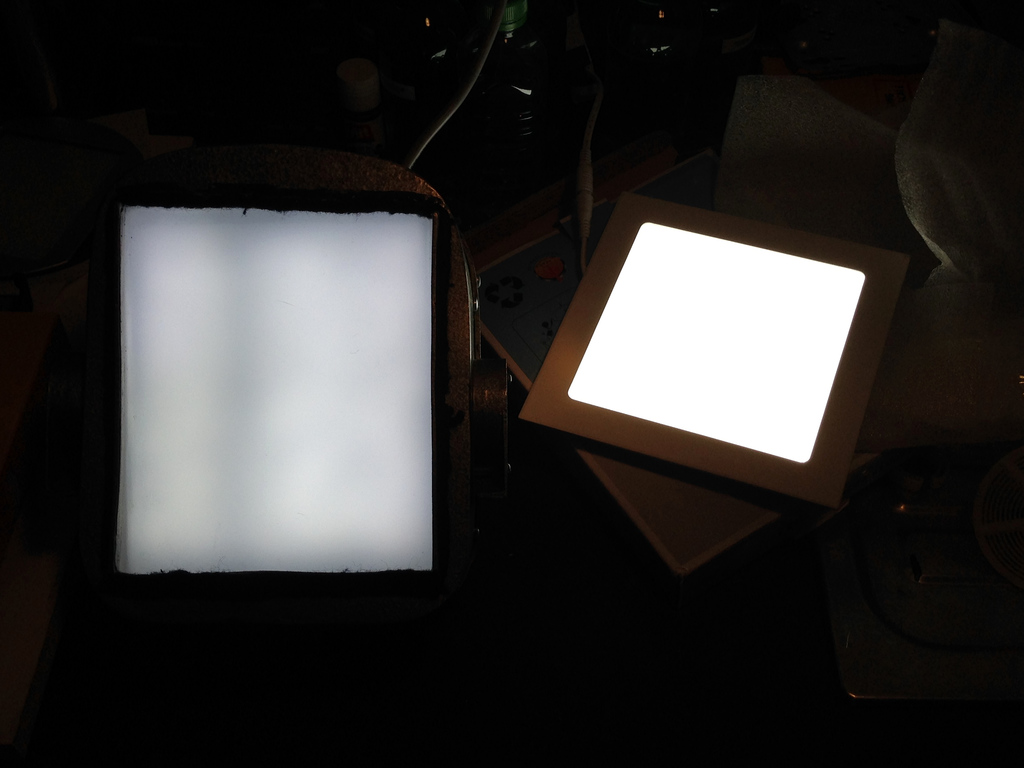
So I picked up an LED panel from an eBay seller in China which is intended to be mounted in a ceiling tile. Its 6×6″ size makes it ideal for a 5×4″ enlarger and the light is much brighter, whiter, and more even than my home-made LED array. It’s not much smaller as the photo makes it appear, but it is square rather than rectangular. I’m not sure why the original cold cathode head was rectangular either.


Finally here’s a glimpse inside the head, fitted with new LED panel. It came with an LED driver included. In the interests of future flexibility last time I worked on this head, I decided to terminate the incoming power lead with a trailing 13A socket. This time, I could have wired the LED driver directly into the incoming power lead but I decided to fit it with a 13A plug. Most of the space inside the head is empty – it used to contain the cold cathode tube, a diffuser and a huge ferrite transformer!

I will now need to do some testing with this new LED panel to determine its baseline exposure times and its contrast grade. The new LED panel is warmer white than the old array, which looked quite blue. The old array had a native contrast grade of about 4, so I hope the new one is a bit softer. Grade 2 would be nice.
For a while now I’ve wanted a lightweight medium format camera for when I’m travelling. I thought I’d try something from the Super Ikonta series, and eventually settled on one of the 6×4.5 models – the Super Ikonta A 531.
I purchased one quite cheaply which turned out to be in quite bad condition when it arrived. The moving parts (e.g. shutter, rangefinder, bellows) were all clean and working but the bodywork was tatty. The leatherette covering was cracked and peeling, the chrome trim had turned green with corrosion and the bodywork was rusted in several places. For less than the cost of two cinema tickets, I found a repair man who was able to restore the camera to somewhere near its original condition.


This camera dates from 1937 and its lens is not coated. These days we take lens coatings for granted, but before the Second World War they simply didn’t exist. Photographers of the time had to be careful not to shoot into the sun, otherwise the images may be spoiled by flare, ghosting or poor contrast.
As part of the first run with this camera, I took photos in a few situations to test the shutter, aperture and lens.


The photo of the log shed was taken in favourable conditions, with the sun behind me. The photo of the bramble was taken looking towards the sun. You can see a sort of pale area in the middle of the photo where it ought to be shadowy – this is caused by the lack of lens coating. Finally the photo of the steps was taken in low light with the aperture wide open. It is astonishingly sharp even wide open, especially given that it was designed 77 years ago using pencil and paper, and lots of trigonometry! Those clever Germans.
I’m extremely pleased with this camera – it is fun to use, very portable, and produces fantastic photos. Now I know that it works properly, I can start using it when I travel 🙂
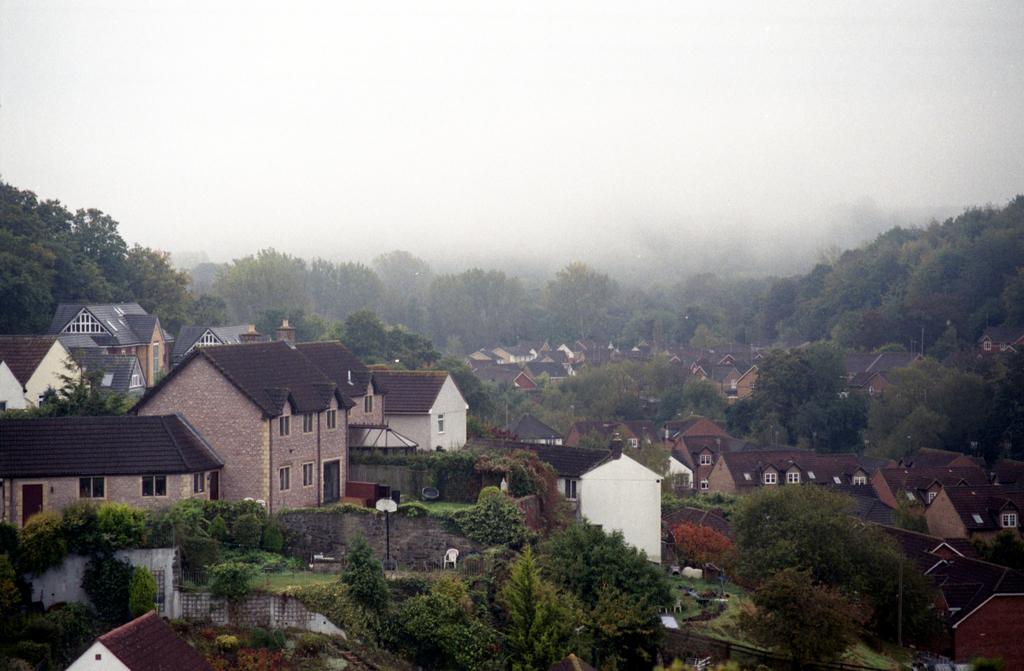
I processed a handful of films today. My film database ticked over the 5000th negative and I promised myself I would publish the 5000th picture, whatever it was.
Turns out the 5000th photo is a picture I took on Troopers Hill on a misty morning in October. This view is looking towards Dundridge Park . I like how the combination of trees and mist makes it look like a little village nestled into a remote forest – very atmospheric.

The picture was taken with a rather unusual SLR, the Canon EX EE. It’s a bit wacky because the rear half of the lens is permanently fixed to the camera body, while the front half unscrews and is interchangeable. For this picture, I used the EX 95mm f/3.5 lens.
This week’s Photo Challenge is entitled peace. I’ve wanted to try using my large format camera indoors for a while now, so this seemed like the perfect opportunity to capture the peaceful interior of a cathedral.

I used my Horseman 45HD camera with Schneider-Kreuznach Super-Angulon 65mm f/8 lens, which really is extremely wide angle on the 5×4″ format. Film was Ilford FP4+, exposed at box speed and developed in Ilford ID-11. Exposure was 16 seconds at f/22.
In order to keep the pillars parallel, I kept the camera back vertical and raise the lens rather than pointing the camera upwards. (See my previous photos of the cathedral, shot with a 35mm SLR, for an example of non-parallel verticals).
This is the first time I’ve shot large format indoors (except some crappy test portraits at home) and I ran into a few difficulties:
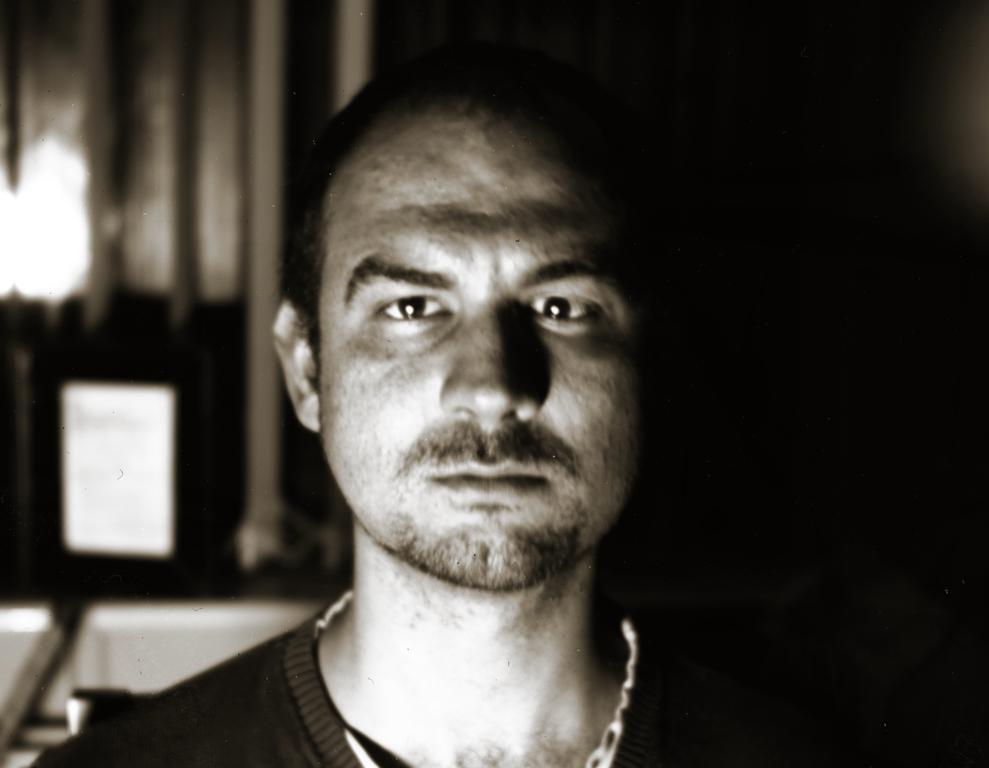
Now I have some film that will fit my Instantograph, I’ve been using it quite a lot recently. A few weeks ago I took a selfie using a mirror. Yesterday I wanted to try a more close-up self-portrait.
It’s dark outside in the evenings now, and with all the lights in my living room turned on, the base exposure for a close-up portrait was going to be about 30 seconds. But as it was a close-up, the bellows were extended quite a lot, meaning I had to add another stop-and-a-bit of exposure. And due to reciprocity failure, I had to add another two stops. Eventually, the exposure was going to be several minutes and I can’t sit still for that long.
I dug a 500W halogen lamp out of the garage and did some exposure tests. With the lamp about one metre from my face, the total exposure was more like 8 seconds. Much more reasonable duration, although the light was too hot and bright in my eyes. That’s why I have entitled this piece unpleasant selfie.

Not too long ago a chemistry lab near me shut down its wet darkroom and I was the lucky recipient of a box of Kodak Kodagraph Projection Paper. I’m not entirely sure what the paper was originally intended for, but the fact that it is A4 size rather than 8×10″ and has the same paper weight and finish as regular photocopier paper implies it was probably for use when copying documents. There’s surprisingly little about the paper online, but the instruction leaflet has an introduction which reads:
This projection-speed, high-contrast (approximately a Grade 3) paper is intended to meet the requirements of projection photocopying in enlargers, process cameras, and specialized microfilm-printing apparatus.
Use regular procedures when projection printing with this paper. This paper is similar in speed to the normal projection speed, black-and-white, general-purpose papers.
I had no idea whether this paper was still good, so I cut a test strip in two, developed one without exposing and developed the other after flashing it to a bright light. As hoped, one strip turned out white, and the other black. So at least the paper “works” and has not been spoiled.

I then made a test strip from a recent negative (a steam train at Bishop’s Lydeard, taken on a recent trip to Dunster). I had no real idea how to develop this paper (the instruction leaflet listed a bunch of developers I don’t have) but it turned out that my go-to developer Ilford PQ works perfectly in about 90 seconds.
It was quite hard to analyse the test strip. Anyone familiar with darkroom printing will know that the dry-down effect is a thing, but this paper was something else completely. Being only as thick as regular photocopier paper, it went dark and mottled as soon as it got wet, meaning the whites all went grey.
Here’s how the print looks immediately after I hung it up to dry. It was too fragile to squeegee. This is a 8×10″ image on an A4 paper, so there is quite a large margin at one end. You can see where the A4 paper was slightly too big for my 8×10″ tray, and was not exposed to developer.

After drying, the paper base lightened a bit but the paper is still noticeably fogged and mottled. Being very thin paper, it dried quite crinkly and now has permanent creases in it. I should probably dry these prints in a press (but I don’t have one).

It was suggested to me that slight bleaching of the print may remove the fog and lighten the highlights, without adversely affecting the shadow areas. I have no idea whether this print will tolerate bleaching, but I’ll give it a go.

Bleaching has indeed reduced the fog. However, I didn’t do a very good job of it. By doing a few test strips I calculated that this print needed about 30 seconds in the bleach. This thin paper tends to float and it was hard to get it all underwater at the same time. I struggled to get it to submerge evenly, and you can see a large unevenness immediately below the locomotive. I spent so long faffing with it that it also had a bit longer than 30 seconds, and the print is now too pale.
Density can be restored to over-bleached prints either by re-developing or by toning in certain toners. I decided to tone it in sepia to give the picture a vintage feel.

It’s clear that this paper is not particularly receptive to the action of sepia toner. I would normally expect a warmer colour (such as my Victorian selfie). The toner has worked unevenly and you can see darker areas. Not to mention that this paper doesn’t tolerate getting wet very well, and it has now been soaked and dried three times. You can see the wrinkles in the borders, even after I squashed it onto the scanner glass.
The end result is a mottled, faded, blotchy print on crappy paper which is wrinkled and has become a bit tatty at the edges after being handled with tongs while wet. It actually looks like a genuinely old print, so this is a novelty technique I might use in future.