Still life photography isn’t usually a field I dabble in. You might think it would be easy, but it’s actually quite hard to make an arrangement that looks good. I’m quite pleased with this arrangement, although I’m hopeless at making up titles so it is simply called keys, music and rose.
Keys, music and rose
This picture was taken “properly”, using a studio film camera – my trusty Mamiya RB67, complete with the Sekor C 150mm f/4 soft focus lens for a vintage effect. It was shot on Ilford FP4+ and this is a direct scan from the negative with selenium tone added digitally. There will, of course, be proper prints next time I get a few hours to lock myself away in the darkroom 🙂
OK, so this isn’t a gate, and it isn’t so much being crashed as crushed, but I stand by my title.
This metal fence was bent by a large branch that fell from a tree. It is a huge branch – larger than the trunk of most trees. The tree from which it fell is just out of shot to the right but you can see the fine twigs of a younger branch reaching out towards the fallen branch.
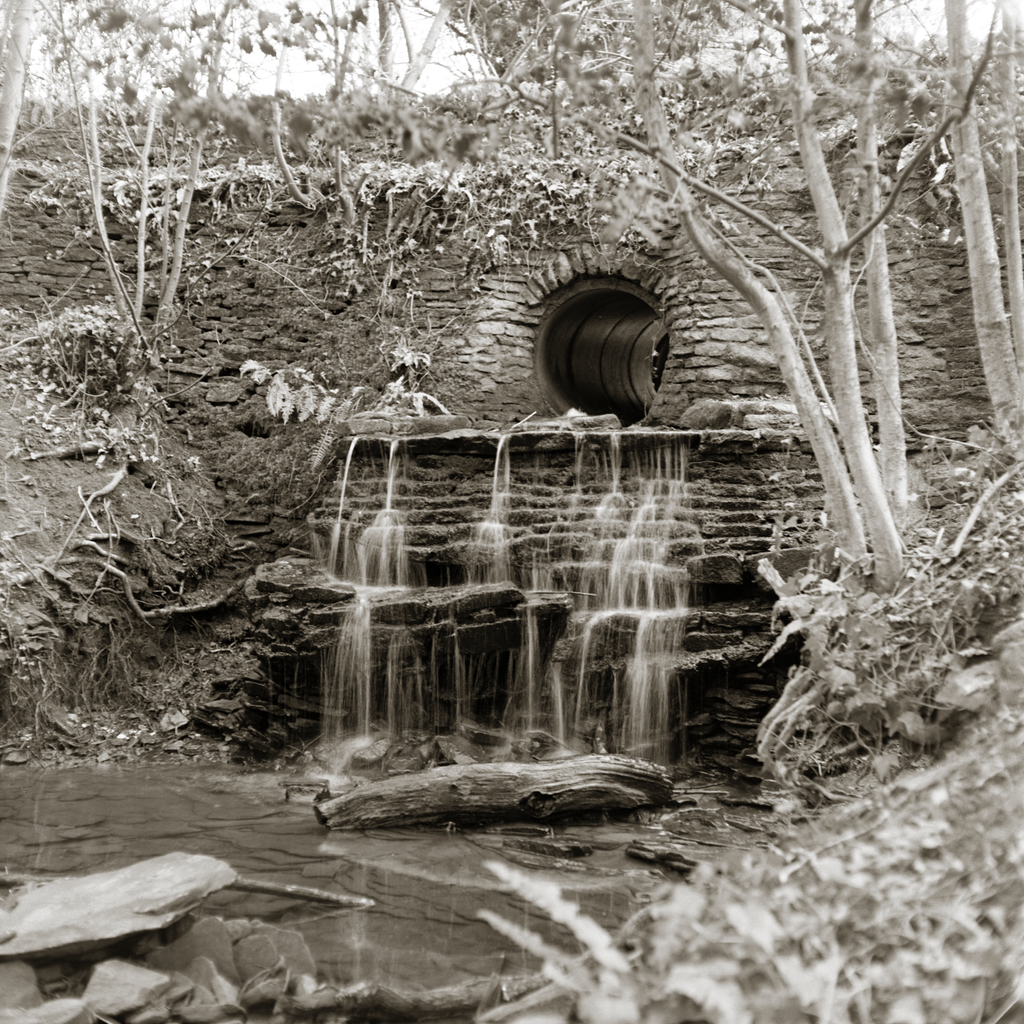
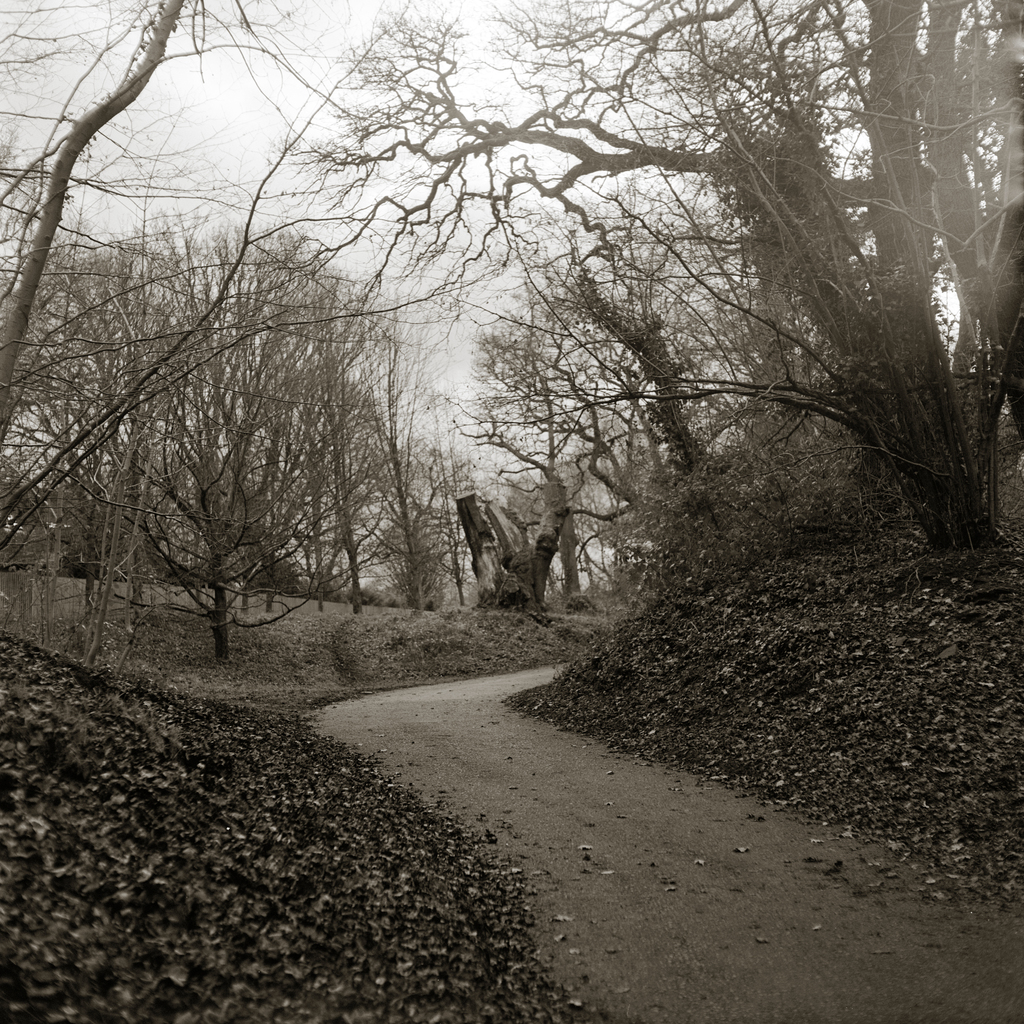
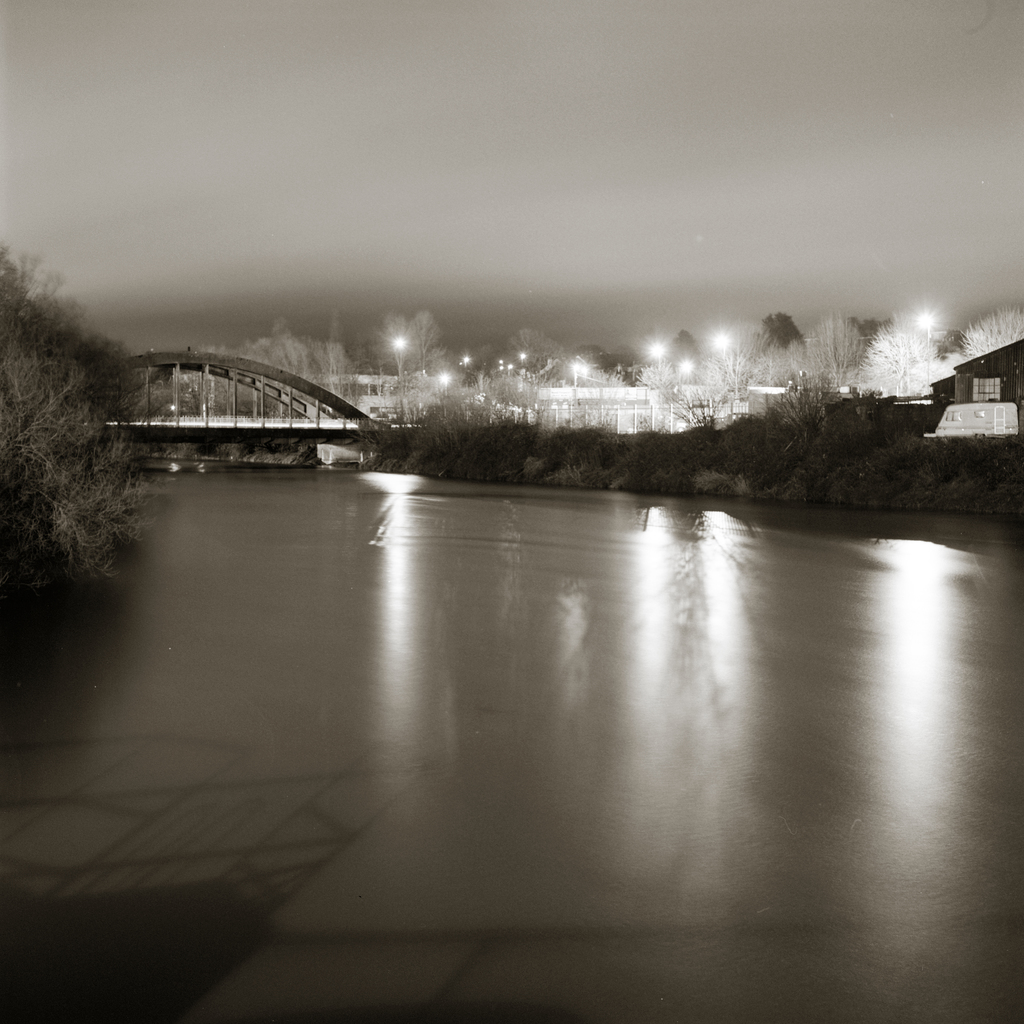
I like to live within walking distance of photogenic areas. Until a few years ago, we used to live adjacent to Oldbury Court, but these days we live near Troopers Hill instead. It’s only three miles away but I’ve missed Oldbury Court as we rarely go now. For the first time in a while, we visited for a walk on a chilly day last weekend. The last picture was actually taken at Netham Weir, but is included here because it was on the same film.
I took my Mamiya C220 which is showing its age a little (it was born in 1968) and seems to be developing a small light leak.
Be sure to click the photos and use the gallery for best picture quality and extra information!
The Duaflex is a pseudo-TLR. TLR because it has two lenses (one for viewing, one for taking) but pseudo because it isn’t a true TLR. It has fixed focus, no ground-glass viewing screen and behaves more like a box camera. This one was a gift from my colleague Paul.
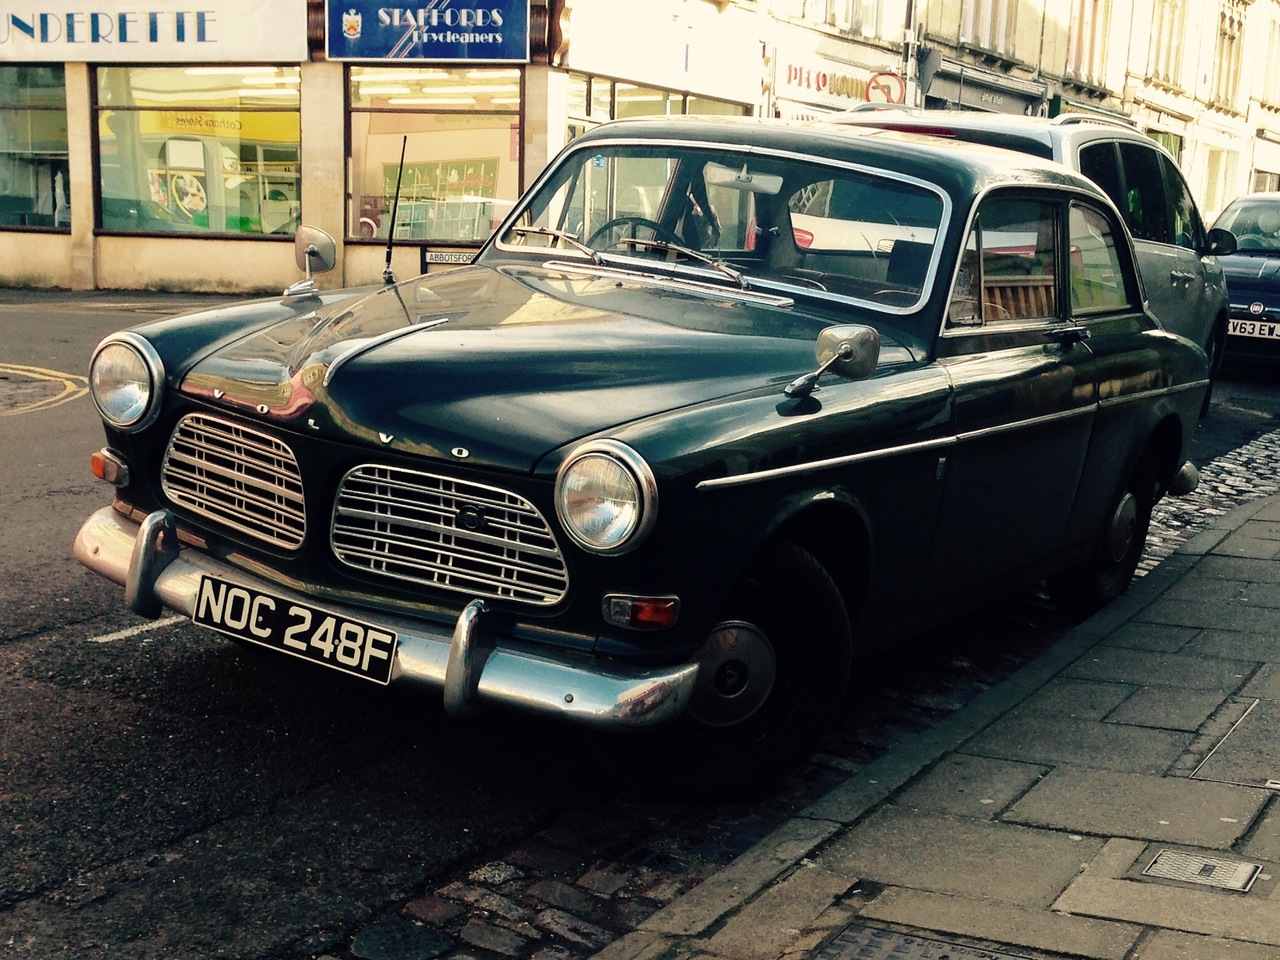
I saw this 1968 Volvo Amazon (also known as a Volvo 120) parked up in Bristol the other day. I’m not a classic car buff it was so shiny and really stood out on the street, so I thought it was worth a photo.
A quick check of the number plate tells me this is the 1.8l version with 100hp. I bet it sounds great, but I didn’t wait around for the owner to return.
It’s been cold and frosty in Bristol for the past few days. We’ve also been spoiled with bright, sunny weather and beautiful sunrises and sunsets. The other day on my way into work, I stopped off from cycling, removed my gloves for as long as I dared, and snapped this image.
Daguerrotypes are an old type of photograph which were produced on a silver-coated copper plate, giving a mirror-like finish. True daguerrotypes need unpleasant chemicals but I tried to find a different technique to make unique pictures which appear to be on a metallic background.
Daguerrotype of the inventor, Louis Daguerre
A few years ago, I found a box of glass photographic plates. Strictly speaking, they are autoradiographic plates (Kodak AR.10), designed to image radioactive emissions from plant and animal samples which had been injected with radioactive markers. There are more-or-less the same as X-ray plates. Fortunately, they are also sensitive to light and work like a normal photographic plate. There’s no date on the box but they look several decades old and are quite fogged.
Usually, glass plates are exposed in a camera to form a negative which is then printed onto paper in a darkroom to form a positive image. But there’s nothing to stop you using a darkroom enlarger to print an existing negative onto a glass plate as a positive, which is then transparent.
I chose to print a medium format negative of my daughter onto this glass plate, which is 4¾×6½” in size. This negative was originally taken with a Mamiya C220 and Sekor 80mm f/2.8 lens. I chose to crop the square negative into portrait orientation, like most daguerrotypes.
It took a few experiments to get the right exposure on the plate, which is very slow (and long expired). In the end I settled on an exposure of 45 seconds with the enlarger lens set to f/5.6. For comparison, exposing a 5×7″ paper print would probably take 10 seconds at f/16. If I’ve done my head-calculations right, that means the plate is five stops slower, with an effective ISO speed of about 1/32 (0.03). So these plates might not be suitable for high-speed sports photography.
Glass plate being washed
I developed the plate in ordinary paper developer (Ilford Multigrade developer) for 90 seconds, just like a regular print. I treated the plate as usual with regular stop bath and rapid fixer. There was a nice strong image there, although not as high contrast as you’d get from modern paper. To try and blacken the dark area and boost contrast, I toned the plate in Harman selenium toner for about a minute, although I had to stop because it was turned the plate more brown, rather than black. After a quick dunk in a bath of wetting agent (Ilfotol) to prevent drying marks from the hard water, I left the plates to dry.
Glass plates drying
So this gives a positive image on a glass plate which can be put in a backless frame to be backlit by a window or an artificial light source, but I wanted to create something that looked like a daguerrotype. My first idea was to try sticking a piece of aluminium foil to the back of the frame. This plan was “foiled” because the brand of foil we normally use has a strange diamond pattern pressed into it.
Plate with textured foil
Fortunately, the cheap-o-nasty foil is smooth so I gave that a go. The only glue I currently have that dries transparent is PVA glue. It’s not the ideal thing but it will probably do. I expect it will take ages to dry because neither the glass plate nor the foil allow evaporation. I spread the glue with a brush and then squeezed out bubbles and excess glue by smoothing the foil without creasing it.
The emulsion side of the plate must be the side touching the foil, otherwise you get ghosting (you can see this in the picture of the plate being washed). This also means the delicate emulsion is protected. It also means the image is flipped left-to-right, as daguerrotypes always were.
Plate with PVA gluePlate with PVA glue
Turns out that my hunch about the PVA glue not setting was correct. After waiting for more than a week, the glue was still wet and was clearly not going to set any time soon.
Glue that hasn’t set
PVA glue is soluble in water though, so I decided to peel the foil off and wash the glue off in water. The glue had dried in a few places around the edge and it damaged the gelatine emulsion. The rest of the glue washed off in tap water in a few minutes and then I washed the plate in Ilfotol again before leaving to dry. Back to square one (and with a little damage).
Back to square one, with damage
I don’t have any other glues at home at the moment, so I decided to take a different path. I painted the emulsion side of the plate with silver spray (supposed to be for my car).
Painting the emulsion
This does not give a mirror finish – it gives a glittery metallic finish, like a silver car. However, viewed from the front it is sufficiently shiny to look a bit like a metal plate. After a couple of coats of paint, I applied a couple of coats of clear lacquer to the back to give some protection.
Almost-finished fake daguerrotype
Last but not least, I cut a custom mat to mount this unusual 4¾×6½” glass plate in a more typical 5×7″ frame. I discarded the original glass from the frame because the glass plate obviously comes with its own glass. The emulsion is on the back and is protected. Here’s the finished result.
My most recent microphone purchase was a pair of Sontronics STC-1 small condenser microphones, primarily as an upgrade for some less expensive microphones I already owned. I did my homework before buying, and ultimately decided on the STC-1 over other brands based on the technical data, although the lifetime warranty was a nice touch too.
Now, several months down the line I consider myself a Sontronics fan not only because of the great microphones, but also because of their really excellent customer service.
One of my mics developed a fault* last week and I emailed Sontronics directly to ask about about warranty repairs or returns. I got an immediate response from them, and because Sontronics is a small company they don’t have ranks and ranks of annoying technical support people that don’t care. My email response was from Lisa Coley, Director of Communications at Sontronics.
Lisa was super helpful and explained that warranty repairs/returns normally go via the retailer (in this case, the venerable StudioSpares.com) but that they were happy for me to return the mics directly to them. Yes, mics. Only one was faulty, but Lisa offered to check over both mics to make sure they weren’t suffering from the same fault, and to make sure they were still a matched pair after being repaired.
Trevor Coley, who designs the Sontronics mics, personally repaired and tested my microphones and throughout the process, I was kept up-to-date by text and email. At every turn, Sontronics have been helpful and accommodating. You don’t get fobbed off, put on hold or delayed. I suspect the customer care at larger microphone manufacturers is not so good.
To anyone considering buying a microphone, I strongly recommend Sontronics for your next purchase!
* Or possibly had it from new and I never noticed, because the fault is only triggered when you use the attenuation switch, which I rarely do
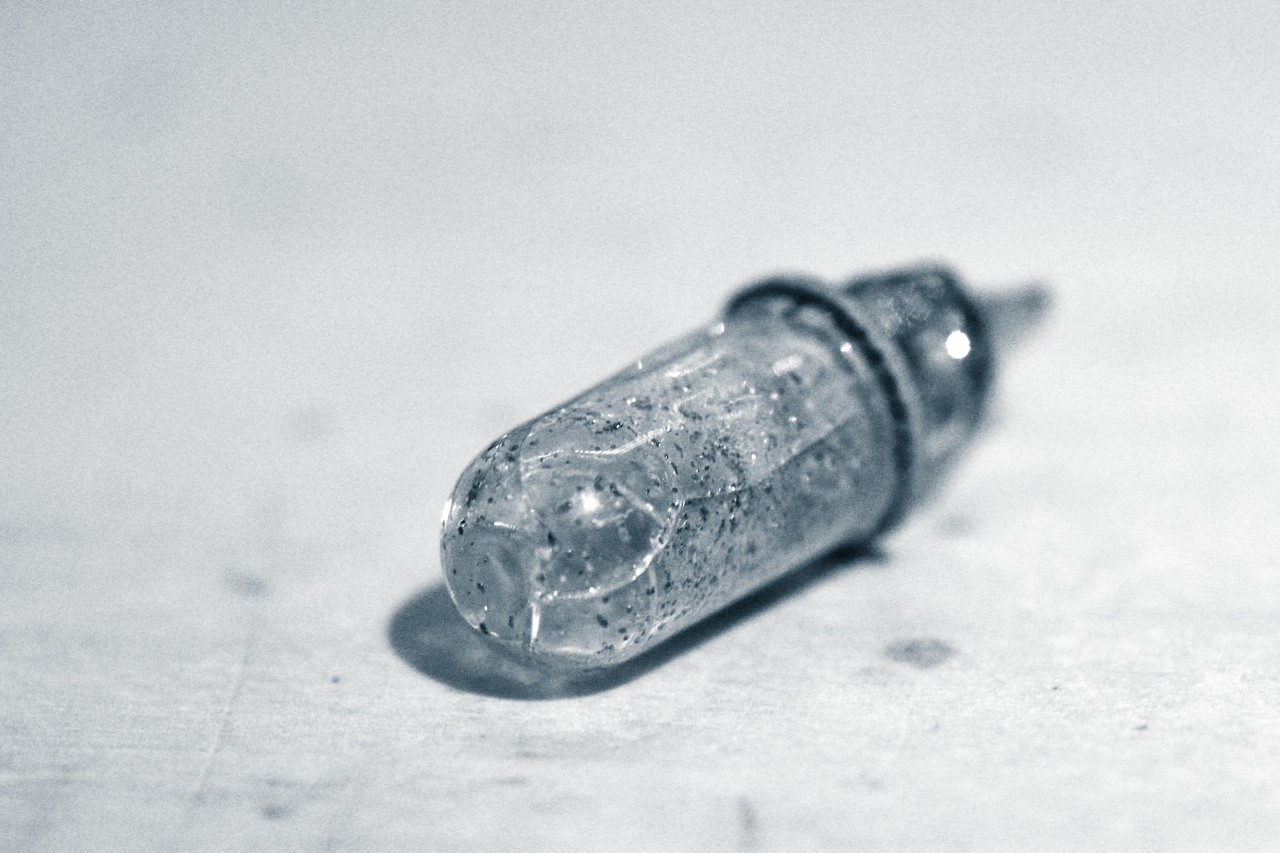
This is a used Philips PF1 flashbulb. It used contain magnesium wool – now it contains magnesium oxide splattered over the inside, and the glass has cracked with the heat of the flash.
I’m becoming interested in surround-sound (5.1) recording. For me, this doesn’t mean upmixing a multi-track recording and encoding as 5.1, but capturing the real ambiance of the environment in true 5.1.
There are several methods of using multiple microphones in array to record in surround, and they are discussed in reasonable detail at DPA’s Mic University. The Fukada Tree looks like a good design, but the array is three metres from front to back, so for occasional use it is going to be a pain to assemble.
Then I found this paper on Multichannel Microphone Array Design by Michael Williams and Guillaume Le Dû which describes several different configurations using cardioid microphones. All of the variations are more compact than the ones described by DPA. I picked the layout shown in Figure 9 to try, since the front-left and front-right pair almost resemble the ORTF stereo layout and it should be possible to extract a reasonable stereo recording from the same array.
Williams microphone array
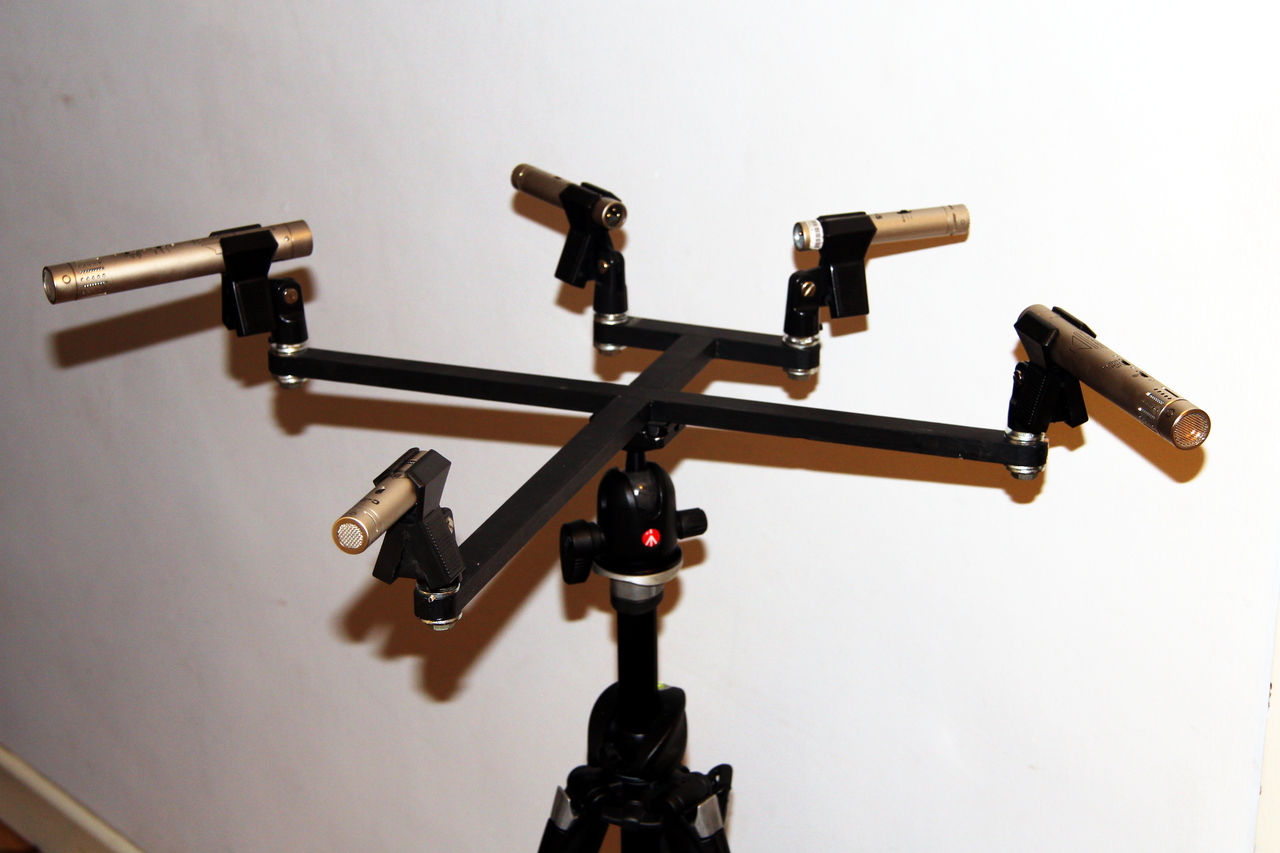
A while back I laid out this design of Williams array using multiple mic stands and checking the alignment with a ruler and a protractor. It was quite awkward because the feet of the mic stands kept bumping into each other. The mics in use here from front to back are a Behringer B-1, a pair of Behringer B-5s and a pair of Behringer C-2s.
Williams microphone array
The result was quite good though. I wrote about it at the time and there are sound samples too. Since doing the above test, I got hold of some more small-diaphragm condenser microphones and in future I’ll use a pair of Sontronics STC-1 for the front pair, the Behringer B-5 for the rear pair and a Behringer C-2 for the front centre – all with cardioid capsules. The STC-1 mics are particularly good.
I also set about building a microphone array holder to enable quick and accurate setup with one microphone stand. Woodwork is not a particular strength of mine but I find it oddly satisfying, even when I make a mess of it. I made a full-size diagram of the array on the back of a piece of wrapping paper (it was all I had that was big enough). The extent of each wooden arm is shorter than the theoretical diagram above suggests, as the body of each microphone forms part of the length.
Sorry for the bad photo – it’s surprisingly hard to photograph a large piece of paper evenly. There’s a 30cm ruler in the picture for scale.
Williams array layout
I found some scrap wood (pine, with cross section of 15×25mm) and made cross joints to create an aeroplane-shaped form. At the “nose”, the tips of the “wings” and the tips of the “tail fins” I drilled 11mm holes to enable 3/8″ Whitworth bolts to pass through, which screw into five standard mic holders.
Cross joint
I painted the entire construction with extra-matt black paint (left over from blackening parts of my darkroom) to help keep it unobtrusive, and match every other mic stand ever made.
Williams array
Finally, I thought the array would weigh too much and be unstable on a single mic stand, so I looked for alternatives. Fortunately this problem has already been solved in the world of photography, where cameras regularly weigh several kilograms. I took a Manfrotto quick-release plate intended for use with Manfrotto photo tripods, removed the standard photographic 1/4″ captive bolt and screwed it into the wooden frame of my array using wood screws through two holes that were already in the quick-release plate. Setup is now much easier: set up tripod, snap the wooden array onto the tripod, attach the 5 mics, plug them in and start recording. I’m considering adding a spirit level to the centre of the cruciform to make sure it’s all level.
Williams array
I plan to use this array to make a 5.1 recording of one of the Christmas services at church, and this should be a good real-world test. As I mentioned above, it should also be possible to extract a reasonably good stereo recording by taking the front pair feed as an approximation of an ORTF recording. There will be samples when it gets its first use!