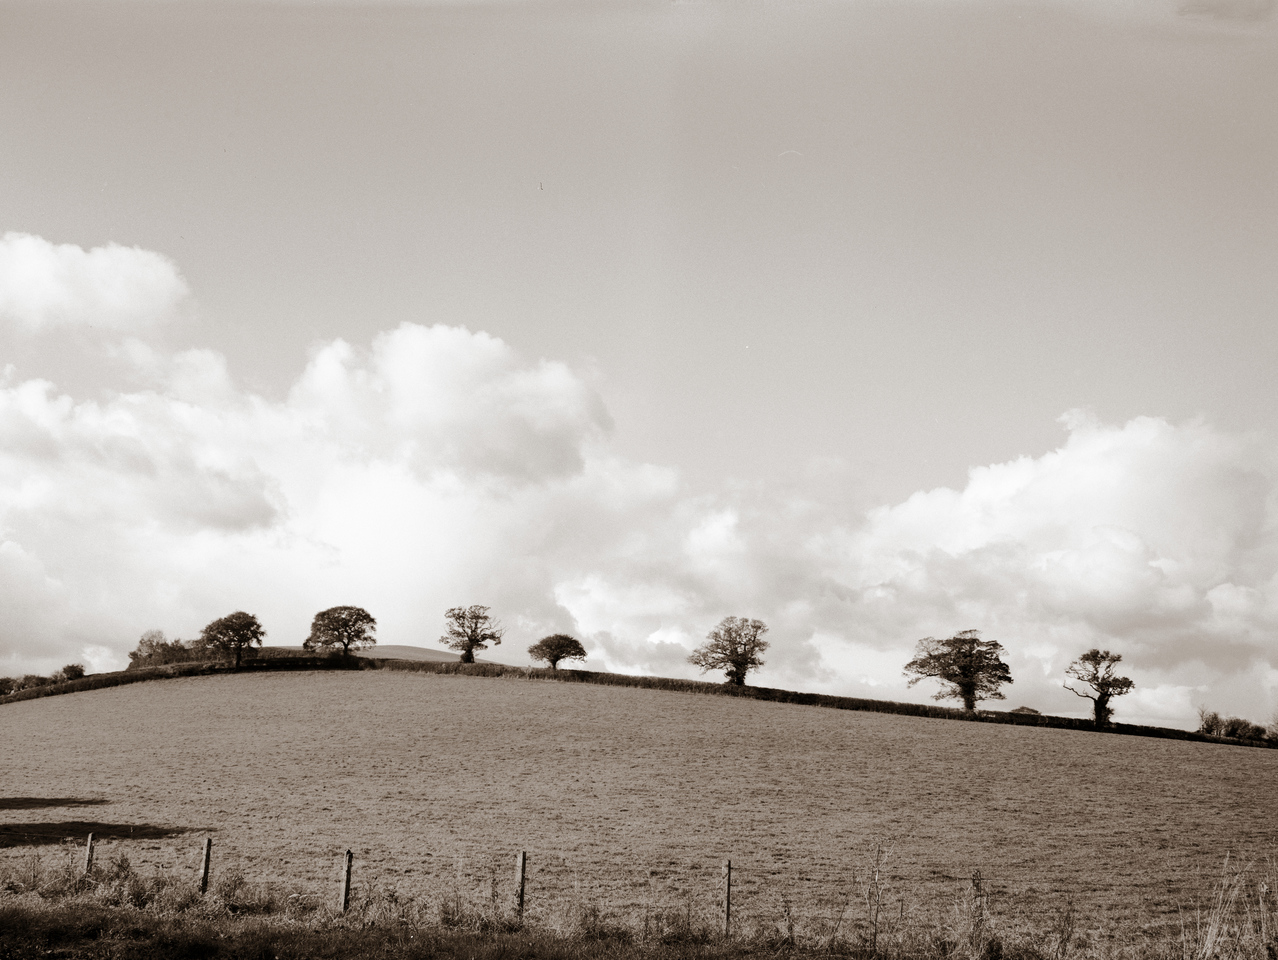
A combination of bad weather, having a toddler and generally being busy has meant I haven’t done much photography recently. When I have taken pictures, it’s never been enough to finish a film. Last fortnight, though, I finished a roll of film in my Canon T90 that’s been in there for ages, and I had the inspiration to shoot a few frames of large format film in my Horseman 45HD.
Click on the photos and go through the gallery – I’ve put more detailed captions on the individual photos.
Spem in alium was written by Thomas Tallis in c1570 and stands apart from most other choral music because it is written for 40 parts. Most choral music, regardless of the number of people in the choir, only has 4-6 parts. Just for its sheer flamboyance, Spem is famed among choristers due to the challenges of learning and performing it.
Delving into the details of how the music is constructed, rather than being written for a single choir of 40 voices, it is written for eight choirs each of five voices. Each choir comprises one soprano, one alto and either two tenors and one baritone, or one tenor and two baritones.
I decided it would be fun to experiment with recording it, although I don’t currently have access to a choir of 40 with the time to learn and perform it! I thought about William Orbit‘s recording of Barber’s Adagio for Strings and how well the gentle synthesised sounds worked for him. I’m no expert at electronic music but it is something I have played with in the past.
My goals were:
Synthesise the choral parts for Spem
Master the recording to be played back in a 5.1 surround-sound format
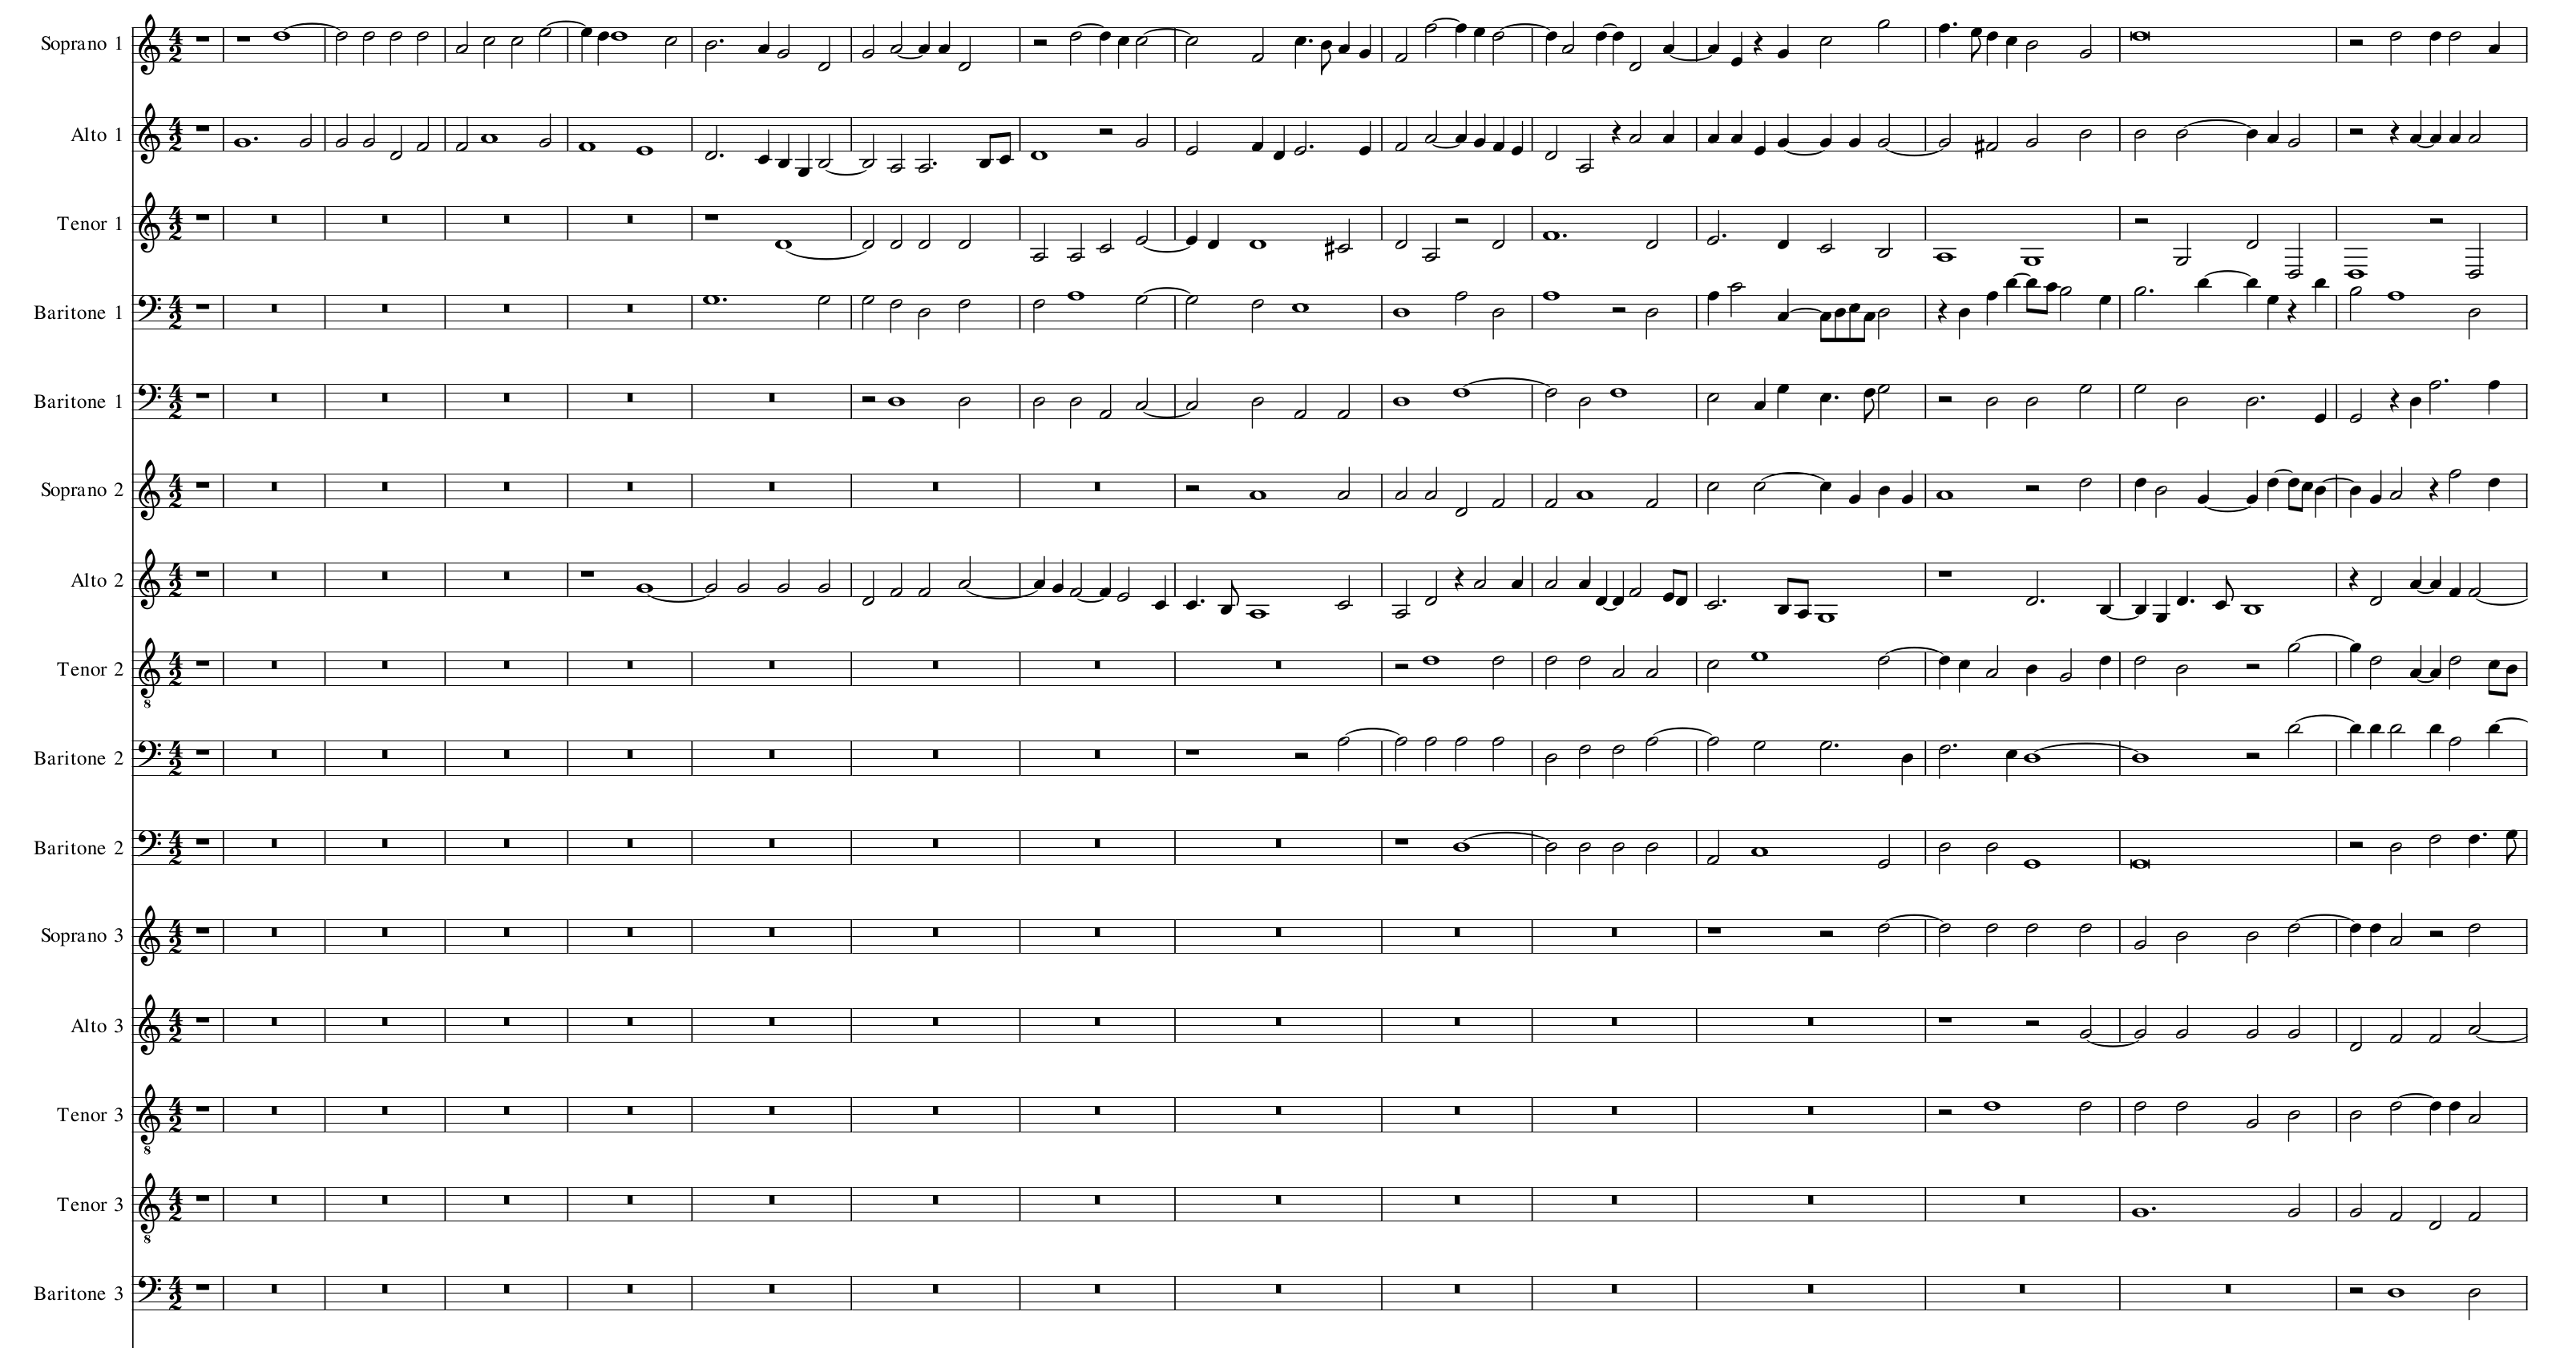
Being out of copyright, it was easy (and legal!) to obtain a MIDI file of Spem which contains the 40 parts as separate tracks. I imported it into my favourite musical editor, MuseScore, and had a look at the tracks.
Spem – first 15 bars for the first 15 voices
For those not in the know, MIDI files don’t contain sound but rather are the computerised equivalent of sheet music – they contain instructions about what notes to play. The computer generates the sound during playback by using a soundfont, which contains sound samples. Just like a real font with a text document, you can change the soundfont for a different sound. The default soundfont with MuseScore is reasonably good but the choir sound is lacking. I downloaded a few free soundfonts until I found one with a choir sound that I liked.
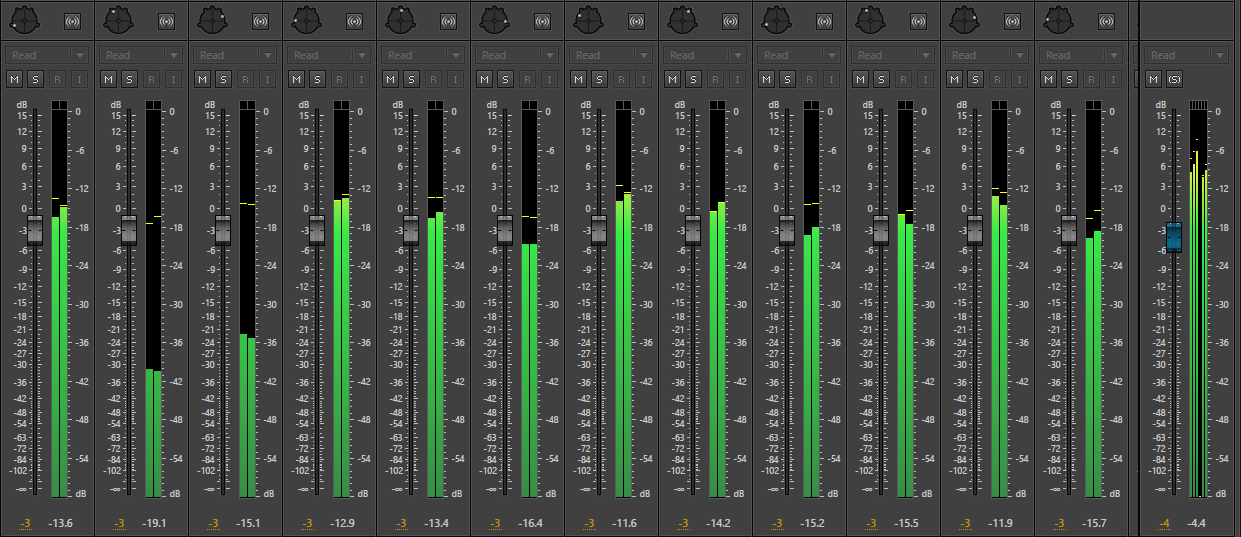
As well as using a soundfont to play MIDI files back, MuseScore can generate a WAV or MP3 sound file from the MIDI file. I got MuseScore to export each choral part as a separate sound file, which can then be edited using a multi-track sound editor – in my case, Adobe Audition. I told MuseScore not to add any effects like reverb to the output, as I’ll do that later.
Adobe Audition screenshot
I imported each sound file to a separate track and played back the result. It sounded pretty terrible – obviously the synthesised choir is not very realistic but with the whole thing played back in mono and with no reverb, it was a rowdy wall of noise. As I planned to create a surround-sound version, I needed to create a sound stage with each voice pinpointed in the right position. This is done by positioning each voice at an angle offset, like this:
Track panner
Traditionally, when performing Spem, the 40 choristers stand in a semicircular shape around the conductor, grouped in their eight choirs. This is how I configured my first attempt with the 40 singers standing in a semicircle.
It sounded odd. The first voice is the 1st Soprano followed by the 1st Alto which are voices 1 and 2 out of 40. These both come from the extreme left. As the piece evolves, more choirs join in in ascending numerical order which gives the impression of the sound moving from left to right. This diagram shows the eight choirs, each drawn in a different colour. Sopranos are the palest shades and baritones are the darkest,
Choir layout
I wondered about arranging the voices grouped not in choirs but in parts: into soprano, alto, tenor and baritone. This would mean all the high notes coming from the left and all the low notes from the right, and that would also sound odd.
Choir layout
Eventually I decided to sort the voices using a numerical pattern to split up the choirs and the parts so there would be no overall weighting. I made a spreadsheet to work out the ordering, and then spread the 40 voices over the arc, 5 degrees apart with a total spread of 200 degrees – just over a full semicircle.
Choir layout
With the positioning set, I applied gentle compression to each individual voice part to limit the dynamic range and then added a surround reverb to the master channel (i.e., after the parts have been mixed). I chose a cathedral reverb for a long duration and a large, swimmy effect.
The final recording was mastered for 5.1 surround but there’s also a stereo version for Internet compatibility.
Spem in alium (for synthesized choir)
As a bonus, I’ve also included Spem rendered for more traditional electronic synthesizers, with each of the eight choirs taking on a different synthesized sound.
Spem in alium (for synthesizer)
Last but not least, I thought I’d render a recording of another of my favourite choral pieces, When to the temple Mary went by Johannes Eccard. It was written around the same time as Spem and also sound richer than the average choral motet because it is written for six parts rather than the more common four. I experimented with sounds but didn’t like either the choral or synth takes, so I decided to render it for string sextet. I think it works quite nicely, and if I can ever get my hands on a real string sextet then I will ask them to play it!
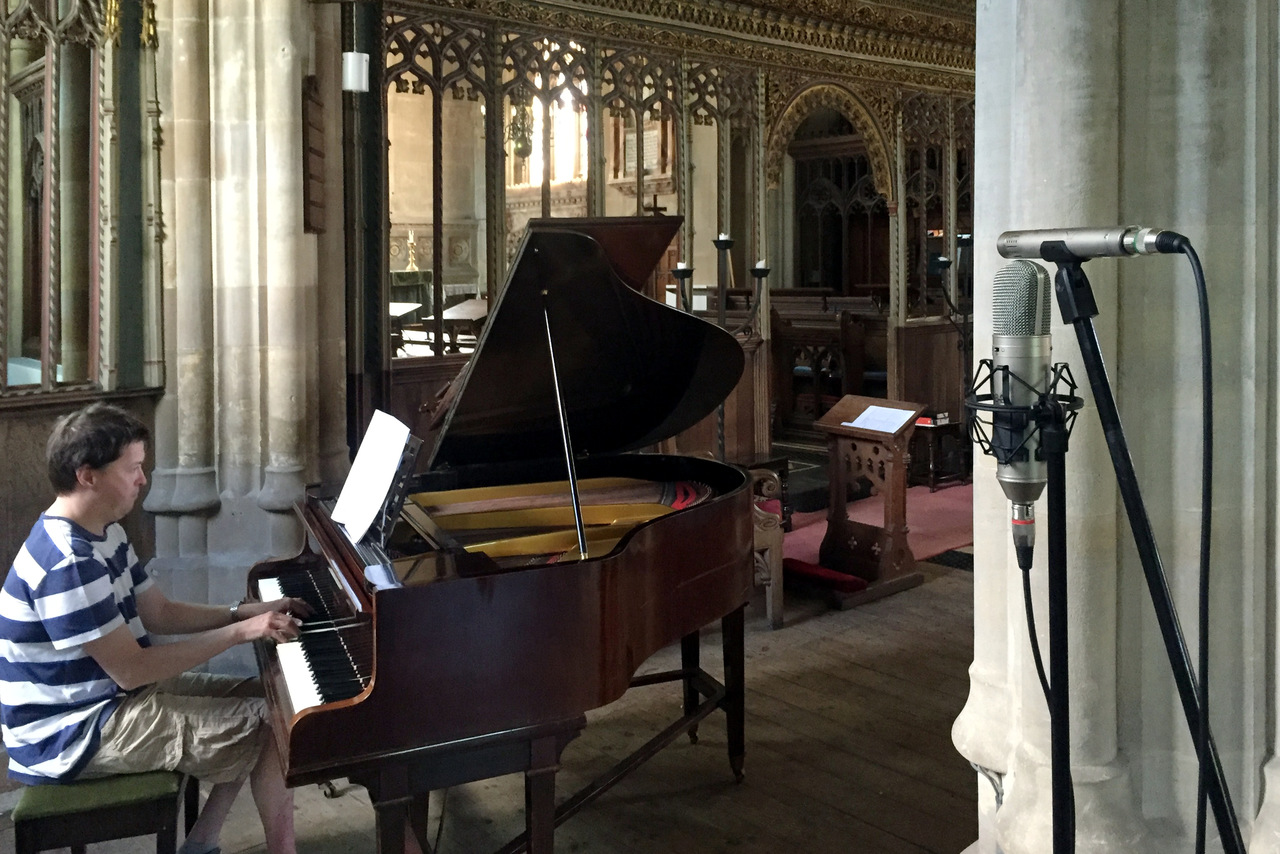
There are many methods of recording a grand piano with their various pros and cons which are suitable for different applications. I recently did some experiments to try and figure out the best way of making a stereo recording in a reverberant room (in this case, a church).
This video demonstrates six different methods but it is just an introduction. There is so much more experimentation that can be done by moving the microphones around the room. Techniques demonstrated are XY, AB cardioid, AB omni, ORTF, Mid-Side and Blumlein.
Basic microphone techniques are taken from Bobby Owsinski’s excellent textbook The Recording Engineer’s Handbook. The microphones being used are Sontronics STC-1 and Behringer B-2 Pro. The music is Piano Parchment by Johnny Pearson – better known as the TV theme from All Creatures Great & Small. Huge thanks to tame pianist Matt Timms for tickling the ivories at All Saints Church, Long Ashton.
Since having a baby and giving up astronomy, I’ve not been out much at night. But last week, Ed invited me to go and photograph the industry at Severn Beach in the small hours. There’s a new SITA Severnside energy recovery centre (i.e. burning rubbish to generate electricity) and every night there’s a delivery of rubbish from London by rail that arrives at about 1:30. It has to come after the last passenger train on the Severn Beach line due to the single track. Ed wanted to photograph the Class 66 that was pulling it while I was happy taking more general photos of the scene.
The train arrived at 1:30 as scheduled and then spent another two hours shunting, collecting the empty rubbish wagons from the previous night and delivering the new ones. It was actually quite interesting watching it all happen. It spotted with rain a few times and unfortunately some of these photos were spoiled by water droplets on the lens, and exacerbated by the harsh floodlights.
Industrial unit
Class 66 in sidings
SITA Severnside
These pictures were all taken with my Canon AE-1 Program on Ilford FP4+ film, using a Canon FD 85mm f/1.8 lens (portrait shot) and a Canon FD 135mm f/2.8 (landscape shots). The cyano tint was added digitally after scanning the negatives. This week I ordered a cyanotype kit so I plan to start experimenting with real cyanotypes soon. I also took some pictures at Severnside on colour slide film, but I haven’t yet finished the film.
Last week, Matt and I visited the Priory Church of St Mary in Usk, South Wales. Our visit centred around the large pipe organ which boasts three manuals (keyboards) and horizontally-mounted trumpet pipes.
Usk pipe organ
We were both a bit out of practice but I made some recordings anyway. There are mistakes aplenty but these three pieces show some of the sounds this organ can make. Note the opening of the Wedding March, which uses the trumpet. It’s loud enough to hurt your ears when you’re sitting on the organ stool! Another cool sound available is the the trombone pedal stop, which I only use for one note – the final chord of Heav’n and the Earth display.
When I’ve got some more practice in, I plan to return to Usk and record the organ again. It really is a pleasure to play and to listen to.
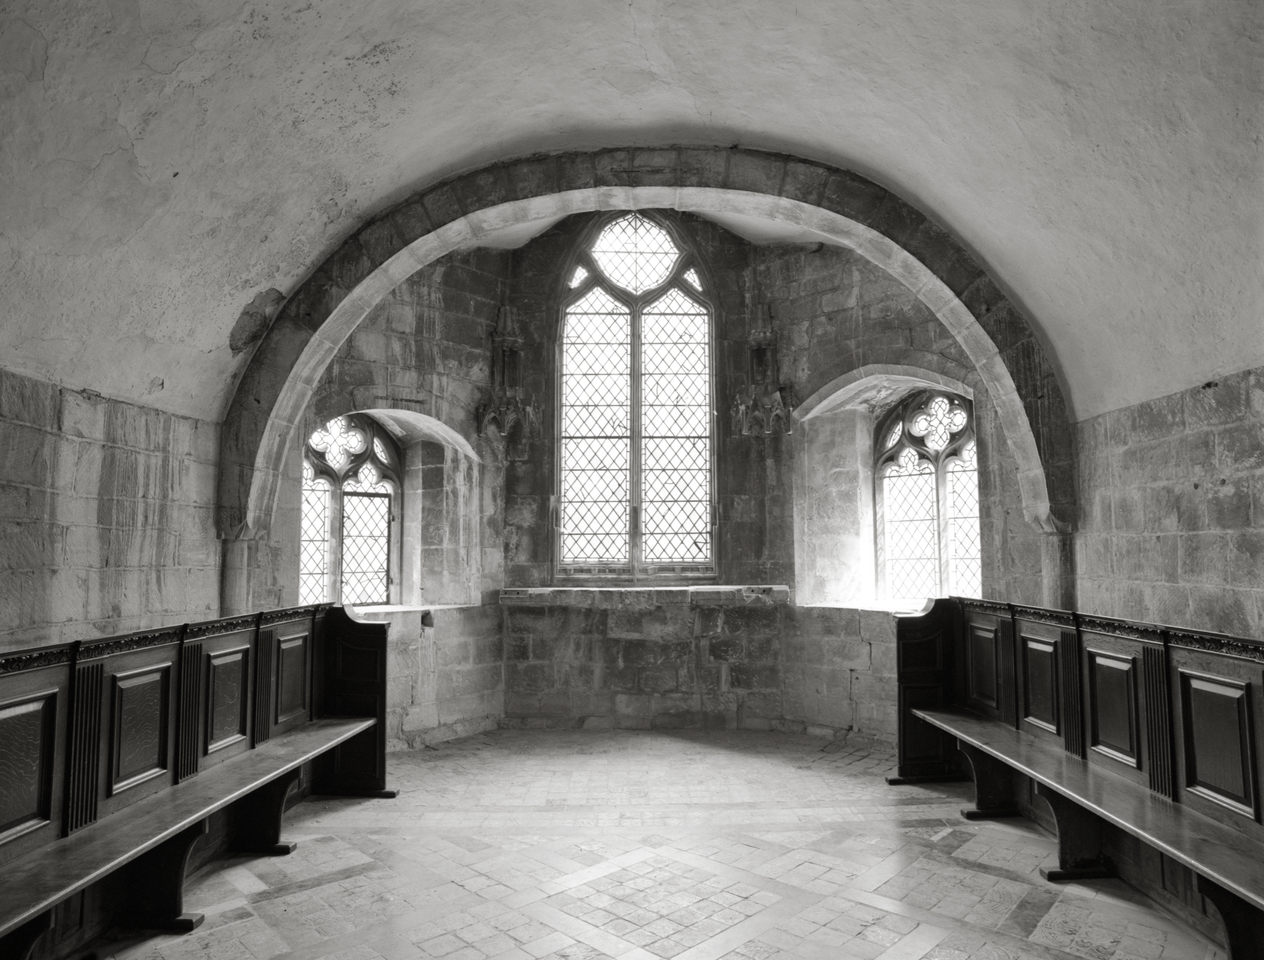
Still playing catch-up with the backlog of films! This trip to Gloucester took place weeks ago but I’m extremely pleased with the photography. Many large churches and cathedrals don’t allow tripods so I’m forced to shoot handheld and to use fast Delta 3200 film, which brings its own set of limitations. Gloucester cathedral is welcoming to photographers and tripods are permitted (provided you purchase a photo permit from the gift shop for £3*) so I was able to shoot slower film (Ilford FP4+) and get finer grain in the negatives, with the luxury of being able to set the aperture to my heart’s desire and drag the shutter instead. The range of tones is much smoother and I think these negatives will enlarge really well.
I don’t have many Kodaks in my collection but over the last two days I have been given three very old Kodak cameras. I’ve enjoyed doing a little research on these cameras, and here are my notes.
Vest Pocket Autographic (1915-1926)
Kodak Vest Pocket Autographic
The Vest Pocket cameras were tiny by standards of the day, hardly any larger than a modern digital compact and as the name suggests, able to fit in a shirt pocket. This one is the autographic model, so there is a flap that opens at the back where the photographer can use a metal stylus to write the caption on the negative directly. This requires special autographic film though, which hasn’t been available since 1932. The body is entirely metal and when folded shut, it is tough.
The Vest Pocket camera launched at around the start of the First World War and due to the portability and durability it became known as the soldier’s camera.
My copy is in a sad state. One of the metal struts has snapped meaning it’s not stable when unfolded, and the bellows are completely torn through in several places. There is lots of paint loss on the body which tells me the camera has been well-used. Nonetheless, the lens and shutter are perfectly working. The photographer can choose two shutter speeds and four aperture settings for quite comprehensive exposure control. Focus is fixed.
It takes hard-to-find 127 film but it may be possible to rig it to use a different type of film.
No. 2A Folding Cartridge Hawk-Eye Model B (1926-1934)
Kodak No. 2A Folding Cartridge Hawk-Eye Model B
In 1907, Eastman Kodak purchased the Boston Camera Company, who produced Hawk-Eye cameras. After the First World War, the Hawk-Eye line was retained as a premium range. This particular camera has an immaculate lens and shutter although the bellows have some pinholes at the corners which will need to be repaired before the camera can be used. The camera takes 116 film which is hard to find these days, but it should be possible to use readily-available 120 film.
This camera has the same shutter and aperture options as the Vest Pocket but adds four preset bellows positions which correspond to different focal points.
Six-20 Brownie Junior Super Model (1935-1940)
Kodak Six-20 Brownie Junior Super Model
Like most of the entry-level Brownie range, this one is unremarkable. It’s fully working though, and I may well put a roll of film through it for the soft effect from the meniscus lens. Despite being 20 years more advanced than the Vest Pocket, it is a completely dumb camera with no exposure or focus control.
I don’t usually use zoom lenses with 35mm film cameras and instead I prefer to carry a selection of prime lenses and change as I go. I prefer primes because the image quality is usually better and the aperture is usually faster. My kit bag would usually contain the FD 50mm f/1.4, 35mm f/2.8 and 85mm f/1.8. Maybe the 24mm or 28mm f/2.8 and the 135mm f/2.8 too on a good day.
Zooms have just never interested me and dabbling with the cheaper FD zooms like the New FD 35-70 f/3.5-4.5 showed that they are mediocre. Then I heard about the Canon New FD 35-105mm f/3.5 from 1981 which is said to be the best of Canon’s non-L zoom lenses. It has a fast continuous maximum aperture and a useful range of focal lengths, so I was suddenly interested. They tend to be quite expensive but I watched eBay for a while and got one for a bargain price. It’s taken me a while to get round to it, but I’ve now taken it out for its first run and processed the film.
Canon FD 35-105mm
The build quality is great. It’s a heavy lens but it feels solid. Unlike many manual-focus zooms, this one is two-touch – it has separate rings for zoom and focus. The cheaper one-touch lenses have a single ring that twists for focus and slides for zoom, and I hate them. This lens has a larger front element than I expected, and takes a 72mm filter. It also has a macro mode. While this isn’t a true macro mode, it could be pretty handy out and about.
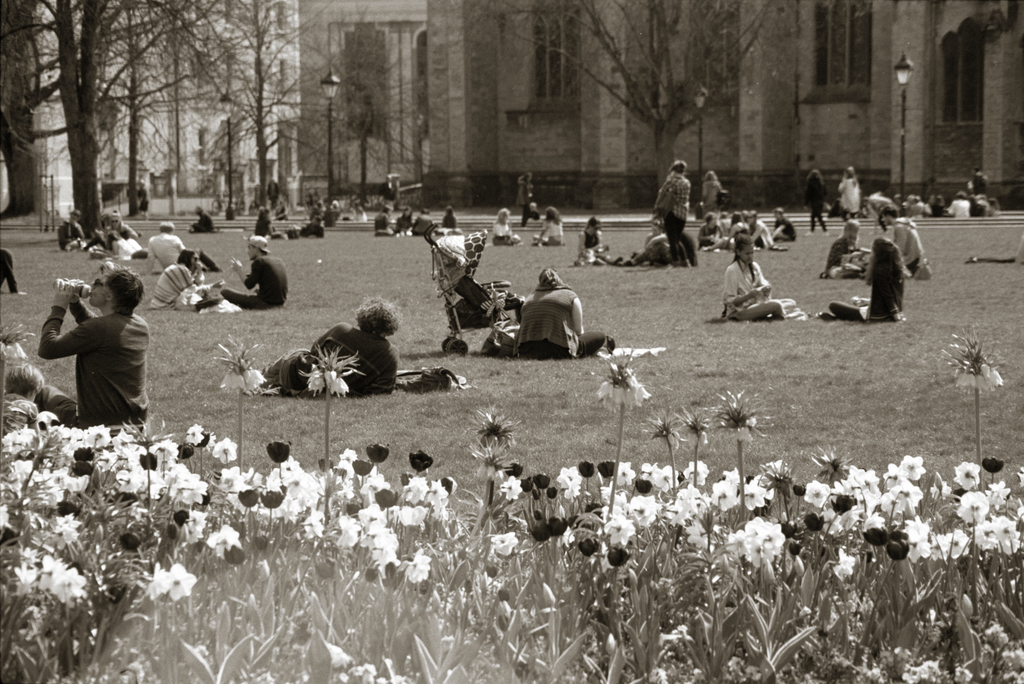
I wasn’t sure how much use I’d get out of it but actually I really enjoyed using it. I don’t really do much street photography but a sunny, spring day in Bristol floating harbour was the ideal opportunity to try it. With the lens mounted on my Canon T90 and a roll of Ilford FP4+ inside, I found I used the longer focal lengths (especially around 80mm) quite a lot.
I can’t think of a sensible order to present these photos from the test roll so I’ll go through them in chronological order and make a few comments.
Ivy
This shot of some ivy on a concrete wall was taken using the macro mode. There’s something strange about the image that I can’t place my finger on. It looks somehow “swirly” which could indicate curvature of field or astigmatism. You don’t expect amazing results from the macro feature on a zoom lens, but this is acceptable.
Bud
This was also taken with the macro mode. While the background still looks a little odd to me, the detail on the bud itself is pin-sharp.
College Green
This is a fairly unremarkable picture of some people lunching on College Green, but you can see a nasty lens flare in the flower area. The sun was high in the sky but I was shooting generally towards it, and it it’s well known that older zoom lenses suffer more badly from flare than modern designs.
Fountain
Nothing special about this image in terms of testing the lens – I just like it. It’s the fountains in Millennium Square.
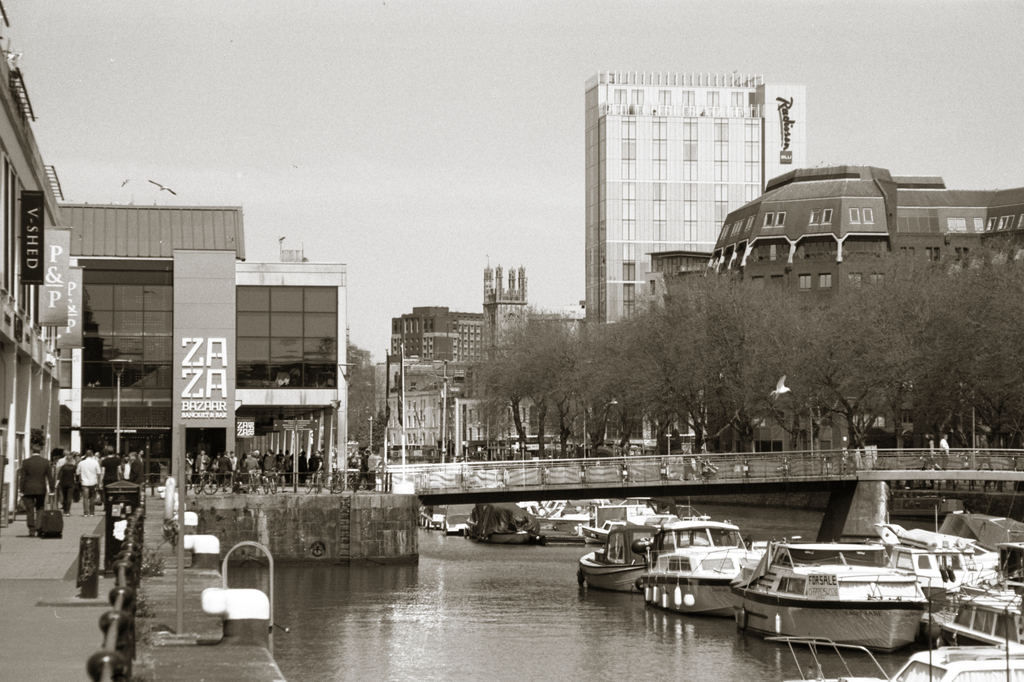
St Augustine’s Reach
I don’t usually use longer focal lengths for “out and about” photography in the city, because you often can’t get far away enough from your subject to fit it all in. Here, looking up St Augustine’s Reach I was able to crank in the zoom almost all the way to 100mm and achieve the typical telephoto compressed perspective. I like this one.
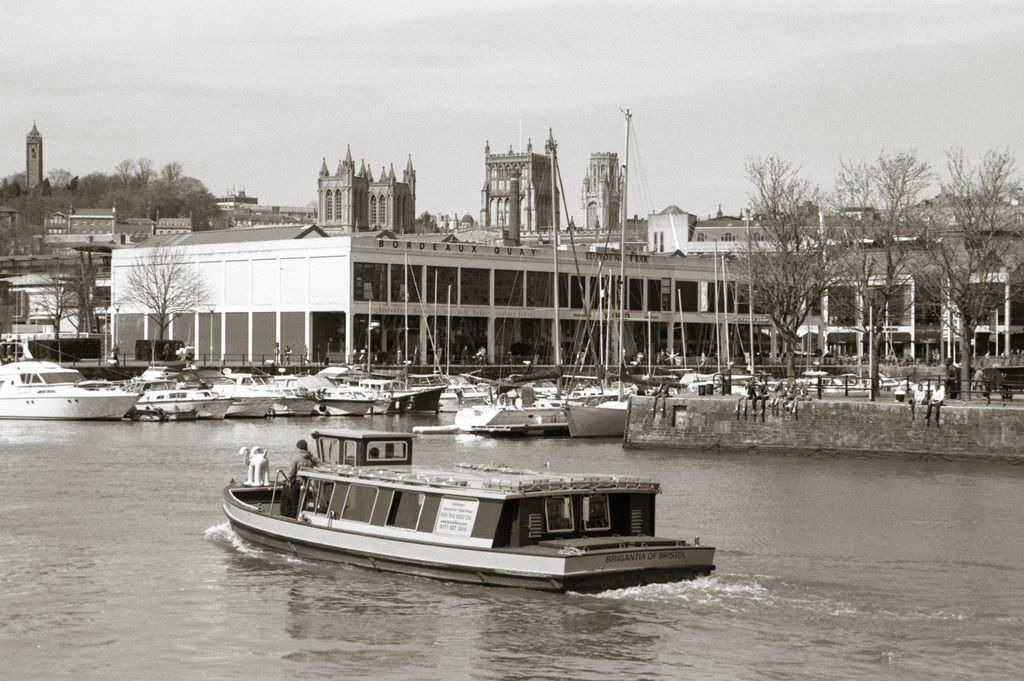
Bordeaux Quay
Another example of compressed perspective but more importantly, a Gromit on the front of the Brigantia. Very Bristol.
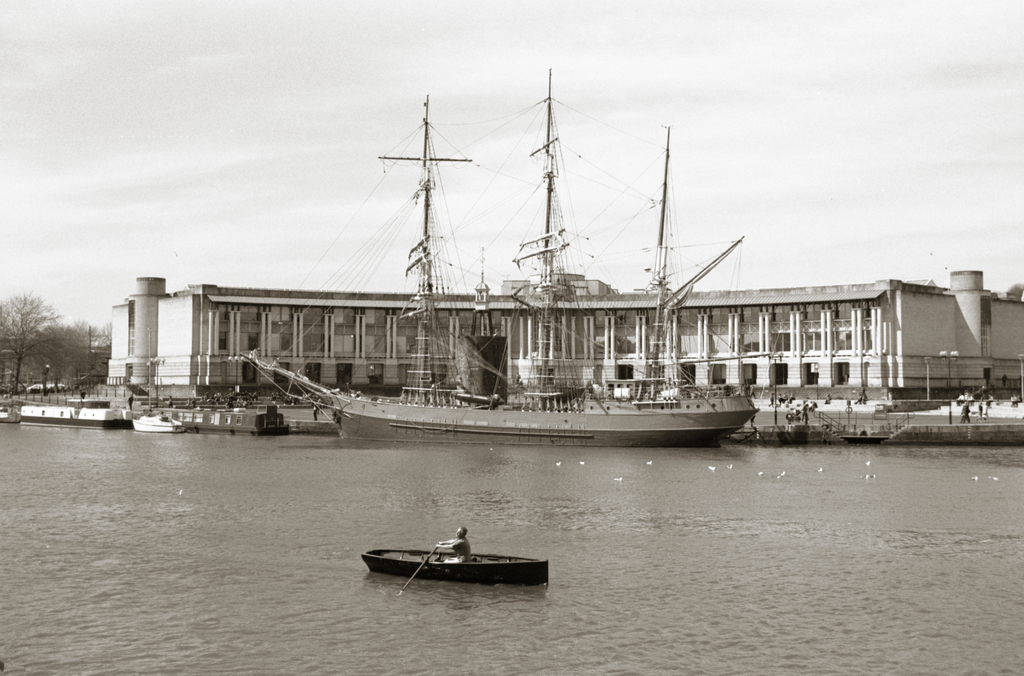
Sailing ship
I wish I’d taken notice which sailing ship this was. I like the contrast with the small rowing boat. This image was taken zoomed almost all the way out to 40mm, and the lens still performs well.
Rebecca
Last but not least, a portrait of my daughter. This was taken at 100mm and f/8, although with hindsight I would have opened up the aperture a bit more to blur the background more. It works well on portraits, and it did well not to flare on her white clothes in sunlight.
So in summary: other than the increased risk of flare when using an old zoom lens, this lens performs really well at all focal lengths. The macro mode compromises image quality, but that’s to be expected. I don’t think this lens will replace my fondness for primes, but if I’m travelling light I would certainly consider taking just this lens.
It’s been weeks since I visited Hereford and these pictures have been waiting in my queue to be reviewed and published. I’ve finally found the time to have a look, and I’m pleased with the results. These shots of the cathedral were all taken with my Mamiya M645, mostly with the ultra-wide 35mm f/3.5 lens. I shot handheld with Ilford Delta 3200 film.
When buying enlarger lenses, it is important not only to choose a lens of the right focal length to give the required magnification, but also sufficient coverage to cover the negative without vignetting. The rule of thumb with enlarger lenses is:
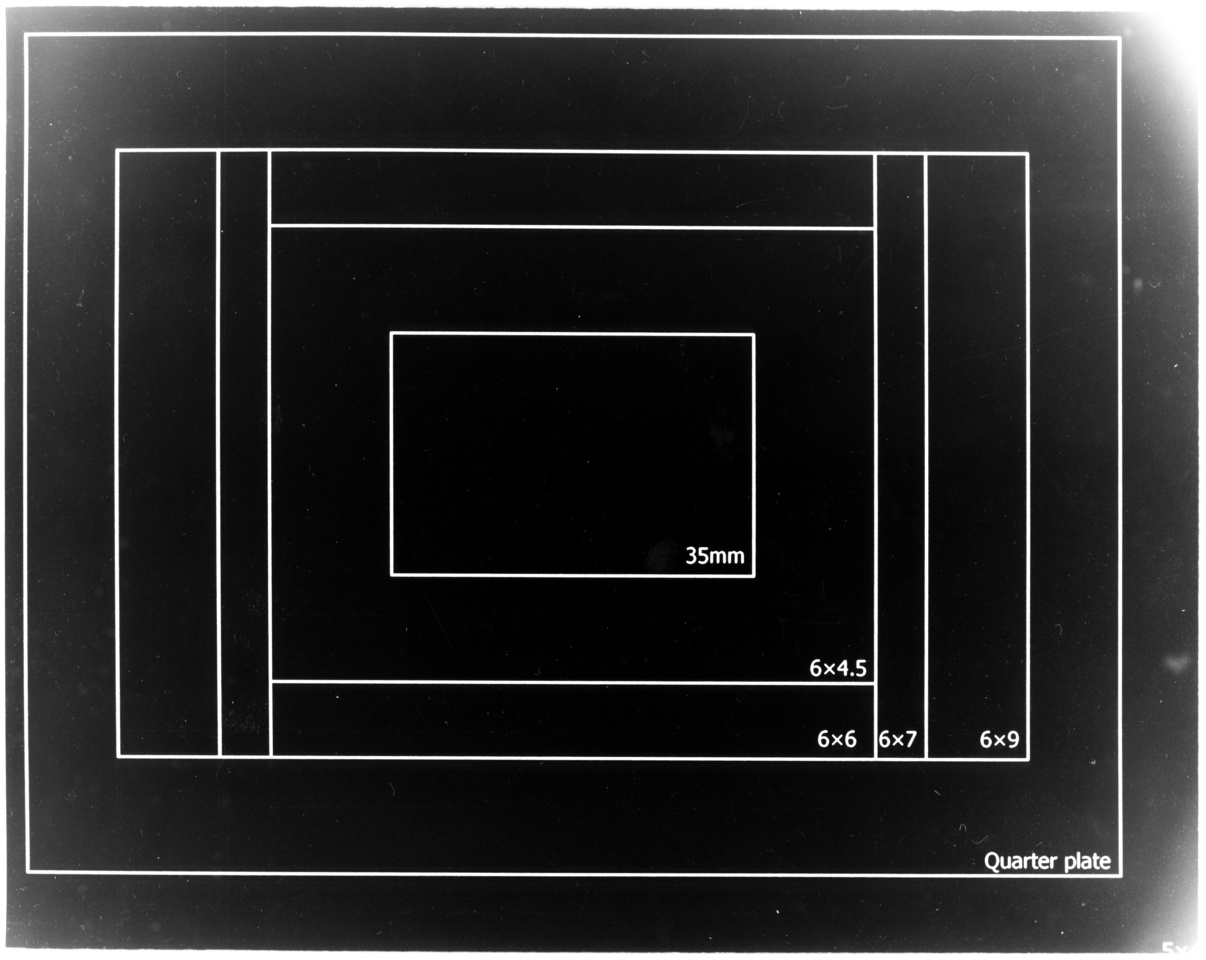
I decided to test the coverage of my enlarger lenses by using a piece of acetate transparency and printing on the frame sizes of various film formats up to 5×4″. I used a standard office laser printer to print the diagram below onto transparency. You can download and print your own test negative, but be aware this is sized for A4 paper so be careful if you’re printing onto other formats such as US letter. Check it with a ruler after printing no matter what paper size you’re using, as some printers do “magic” things with resizing.
In turn, I focused each lens on the 5×4″ test negative in the carrier and enlarged the result onto a piece of 8×10″ paper. Sorry about the dust and fingerprints – I just chucked these in the flatbed scanner as soon as they had dried.
Schneider Componon-S 50mm f/2.8
Toshikato 75mm f/3.5
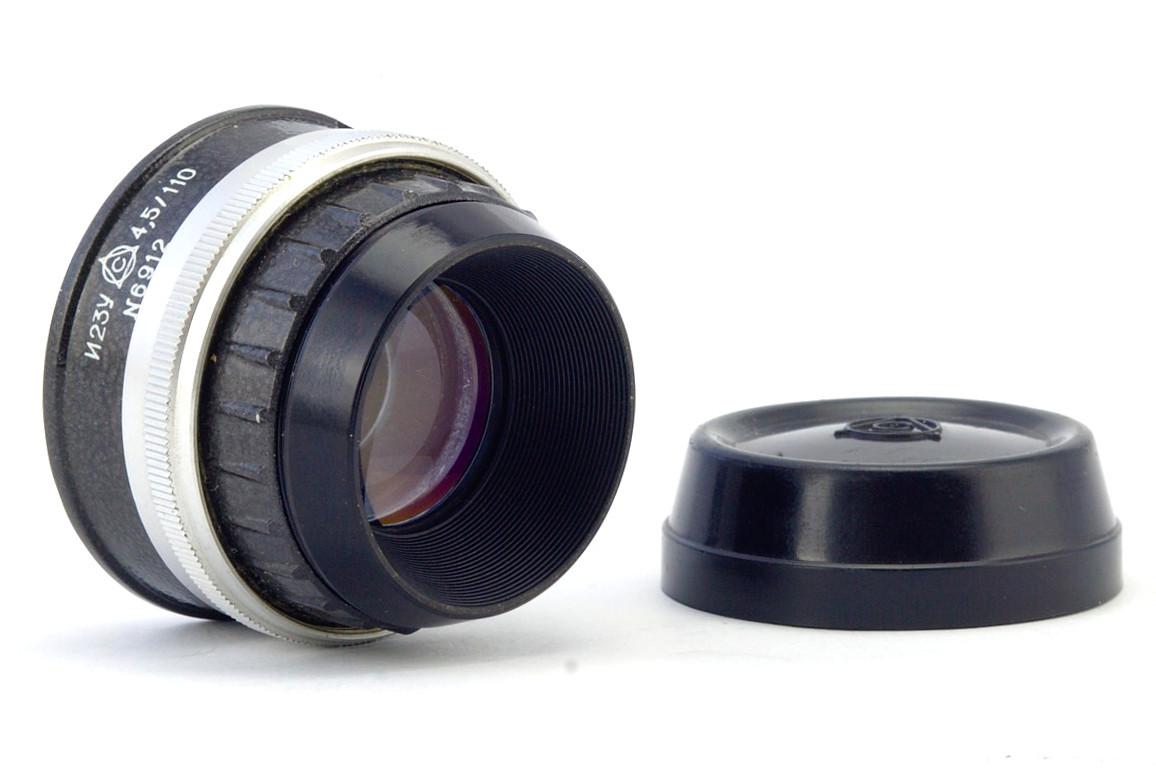
Industar 23U 110mm f/4.5
EL Nikkor 135mm f/5.6
The first thing that jumps out at me is that my test negative was a little too big, and due to the alignment guides in my 5×4″ negative carrier, it wasn’t quite central. If we ignore that, there are a few observations we can make.
The Schneider Componon-S 50mm easily covers a 35mm negative but vignettes heavily on a 6×4.5 negative. That’s fine, that’s what it’s designed for.
The Toshikato 75mm is an unusual lens and not much information is available about it. You might expect it to cover 6×6 but this one easily covers 6×7 and would even cover 6×9 with barely any vignetting if you were careful with the alignment. It does seem to suffer from some pincushion distortion on the 6×9 framelines.
The Industar 23U is another pleasant surprise. A cheap Soviet lens but easily covering 6×9 and also covering quarter plate if you are careful with the alignment. However it does suffer from a certain amount of light fall-off before you get to the proper cut-off.
The EL Nikkor 135mm is an expected good result. This lens is designed to cover 5×4″ and it does that just fine. Here, with the full viewable area printed you can see that the negative wasn’t properly aligned in the carrier because it was a little large, which explains why none of these pictures are centred properly.