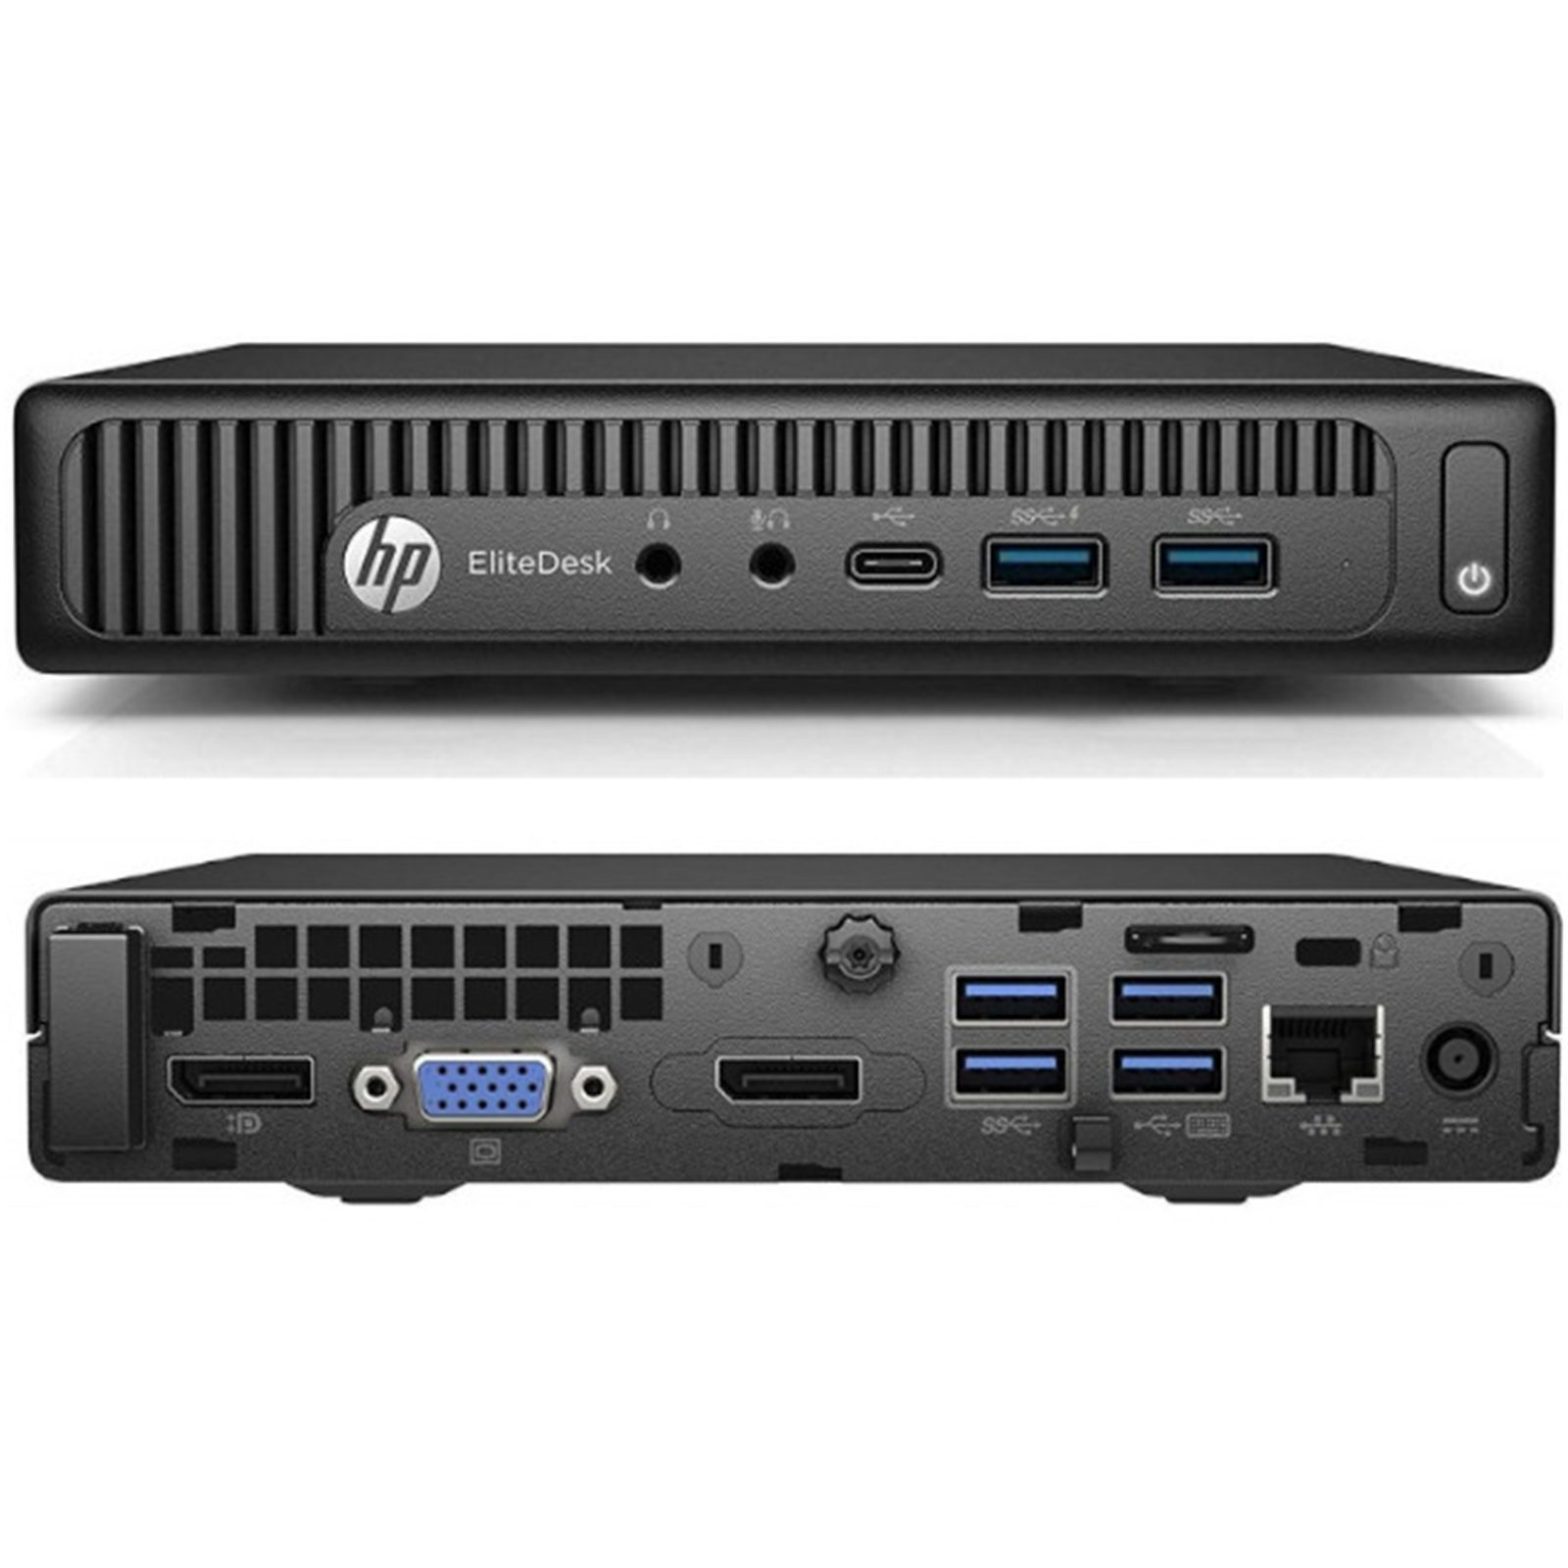
I use a stack of HP EliteDesk G2 Minis to run a Kubernetes cluster at home. While they are several years old now, they’re still useful because of their low power consumption. Plus, I’m a cheapskate and I hate spending money, so I bought old PCs and I’ve upgraded them in every way I can. I’ve maxed out the memory to 32GB and added an NVMe SSD to provide clustered storage with Ceph.
It’s actually Ceph that led me to discover a bottleneck. These little systems only have 1GbE on board, and when you have clustered storage, suddenly the nodes need to do a lot of I/O to each other. They easily saturate a 1Gbit network link while syncing a Ceph storage device.
So I looked for the best cheapest way to add 2.5Gbit network support to these tiny computers. I didn’t want USB dongles hanging out the back, so I looked for internal options.
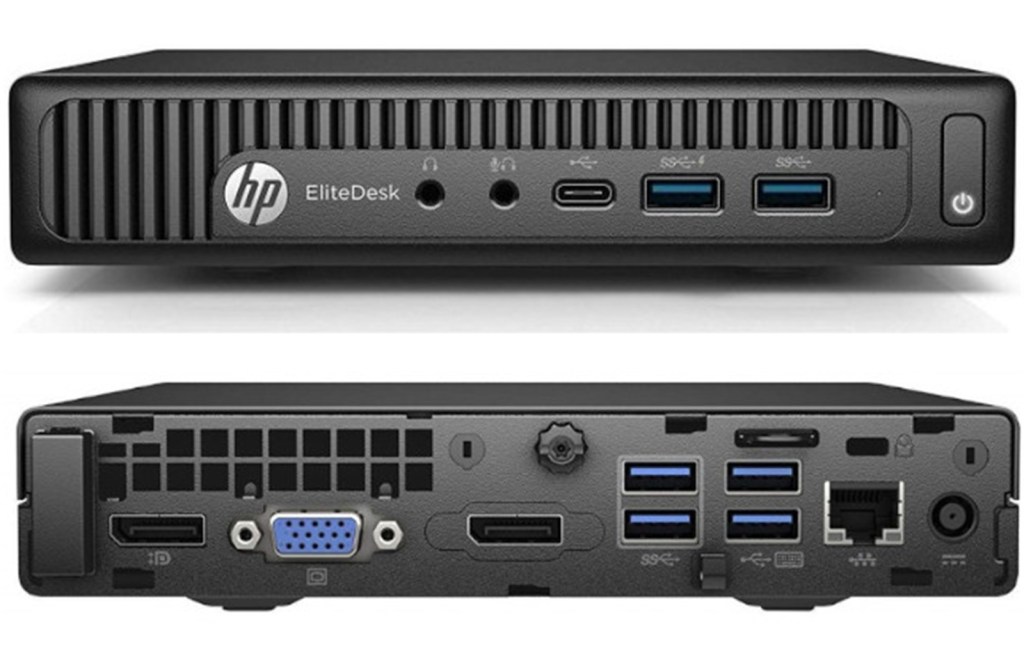
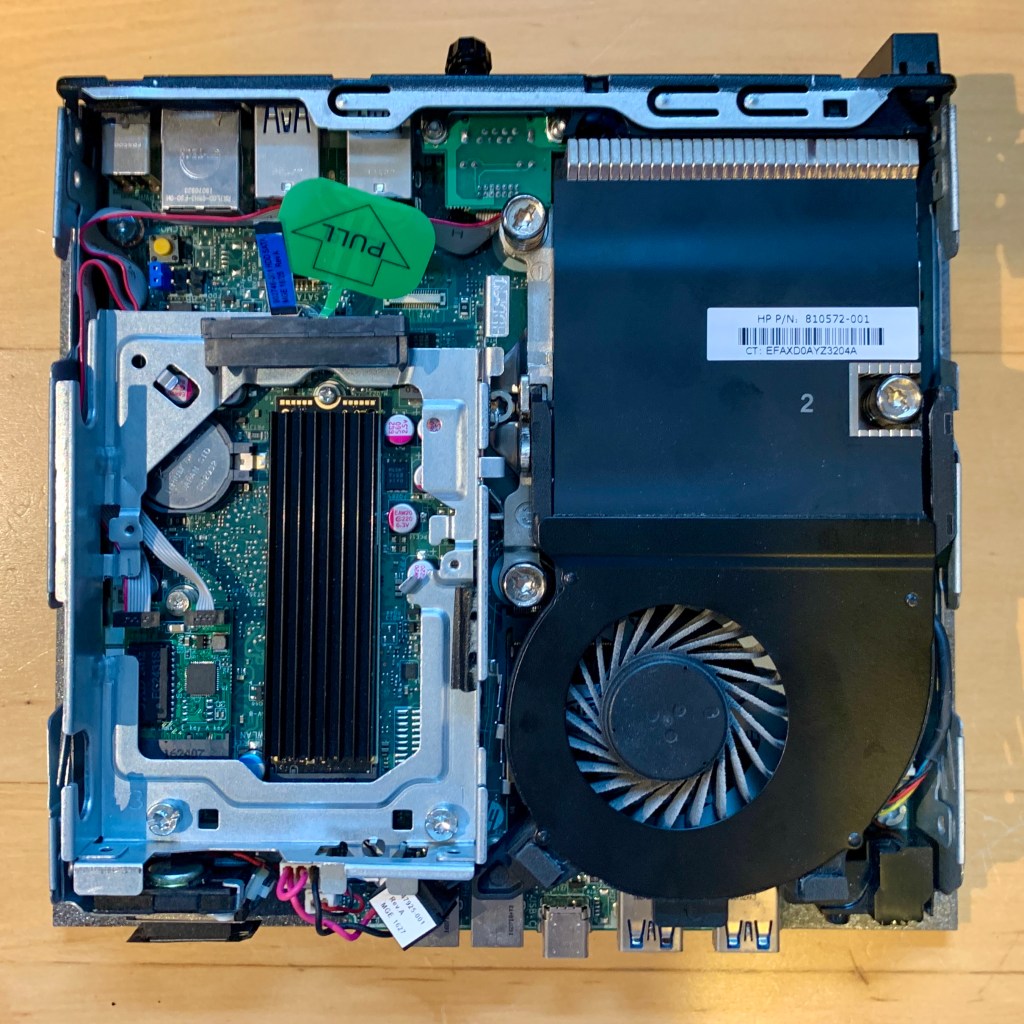
I noticed the G2 Mini has some kind of modular option on the back – in the photo above, it has a second DisplayPort port. Turns out you can get various proprietary daughterboards to fit in these with different ports on, but none have 2.5GbE in this generation.
As well as the M.2 NVMe slot for storage, the G2 Mini also has an M.2 Key A+E slot, which is typically populated with the Wi-Fi/Bluetooth card. As I’m not using Wi-Fi in mine, I searched for M.2 A+E 2.5GbE network adapters, and was pleased to find plenty of cheap no-name adapters on eBay. There isn’t much information available in the eBay listings, but it looked like they “might” fit, so I ordered one to have a closer look.
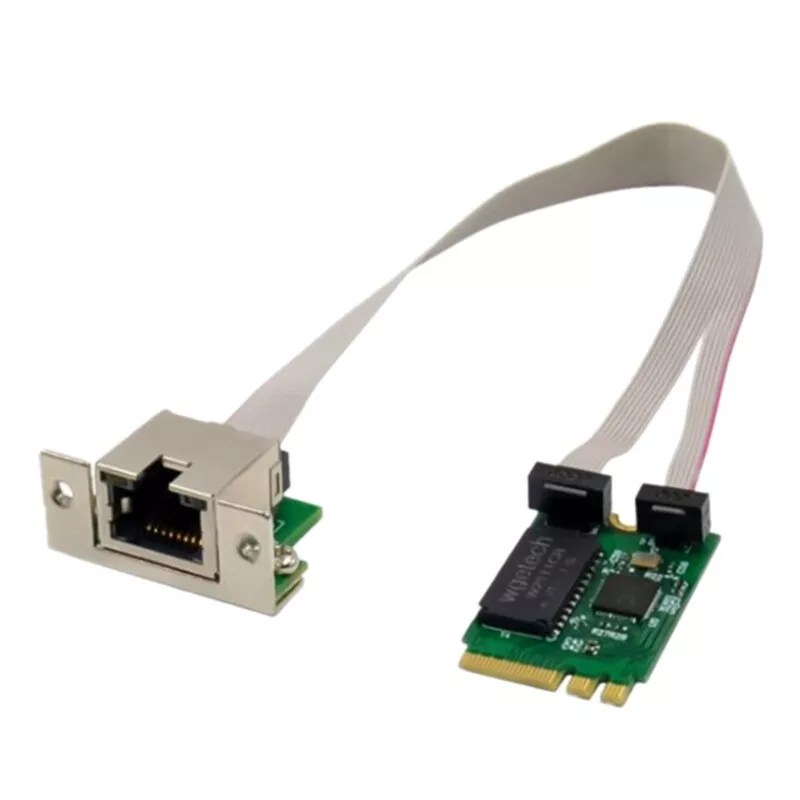
While these adapters don’t have a prominent brand name on them, the chipset is a Realtek RTL8125, which is a well known brand and has support in various operating systems.
Different variants of this device are available, but you need to order one that has the following characteristics, otherwise it won’t physically fit:
- Key A+E interface (two notches in the contacts on the same side)
- A single, central retaining screw at the opposite edge of the card
- A cable with a split to go around the retaining screw, and two push-on connectors
- Connectors which come out at 90° – sideways, not upwards
Fitting one of these network adapters into the G2 Mini is a fiddly process and requires a few modifications. I’ve now modded all 6 of my Kubernetes nodes with this procedure, and I have documented the procedure with photos, in the unlikely event that someone else also wants to add 2.5GbE to their old G2 Minis.
You will need
- HP EliteDesk G2 Mini or similar
- Generic M.2 A+E 2.5GbE network card
- Small Phillips or Pozi screwdriver
- Flat blade screwdriver
- Junior hacksaw
- Pliers
- Metal file
- M3x8mm bolts, qty 2
- M3 washers, qty 2
- Thermal paste
- Alcohol wipes
How to do it
Take the lid off the G2 Mini. Gently pull out the SATA connector from the 2.5″ SSD, if fitted, then remove the SSD from its cage by pulling the metal latch sideways and sliding the SSD towards the rear of the machine before lifting it out.
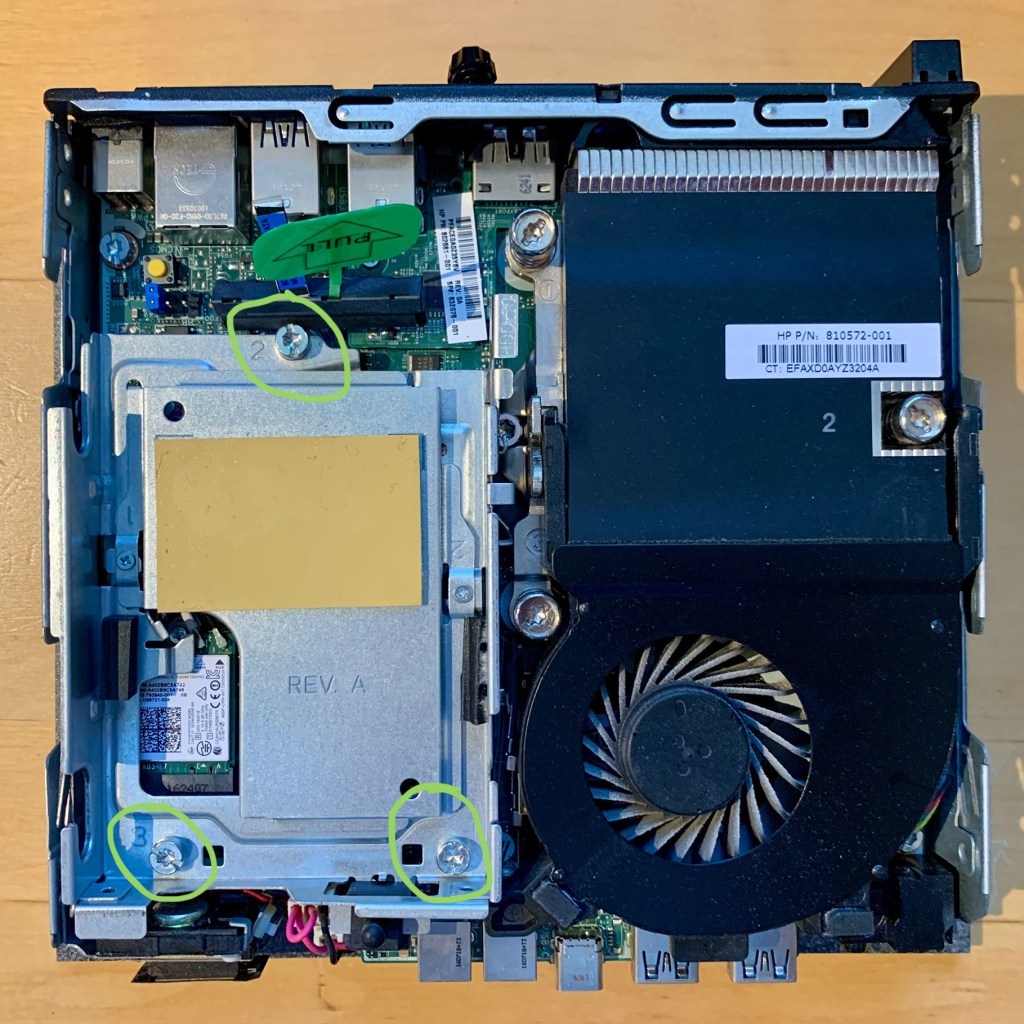

Undo the three bolts which hold the drive cage in place. Make sure to slide the case open sensor out of the drive cage. Put the cage to one side.

If your system has a Wi-Fi card fitted, carefully remove the two antenna cables by lifting the gold connectors away from the board with a table knife (or similar). Tuck the antenna wires down the side of the motherboard to keep them out of the way. Undo the retaining screw to remove the card.
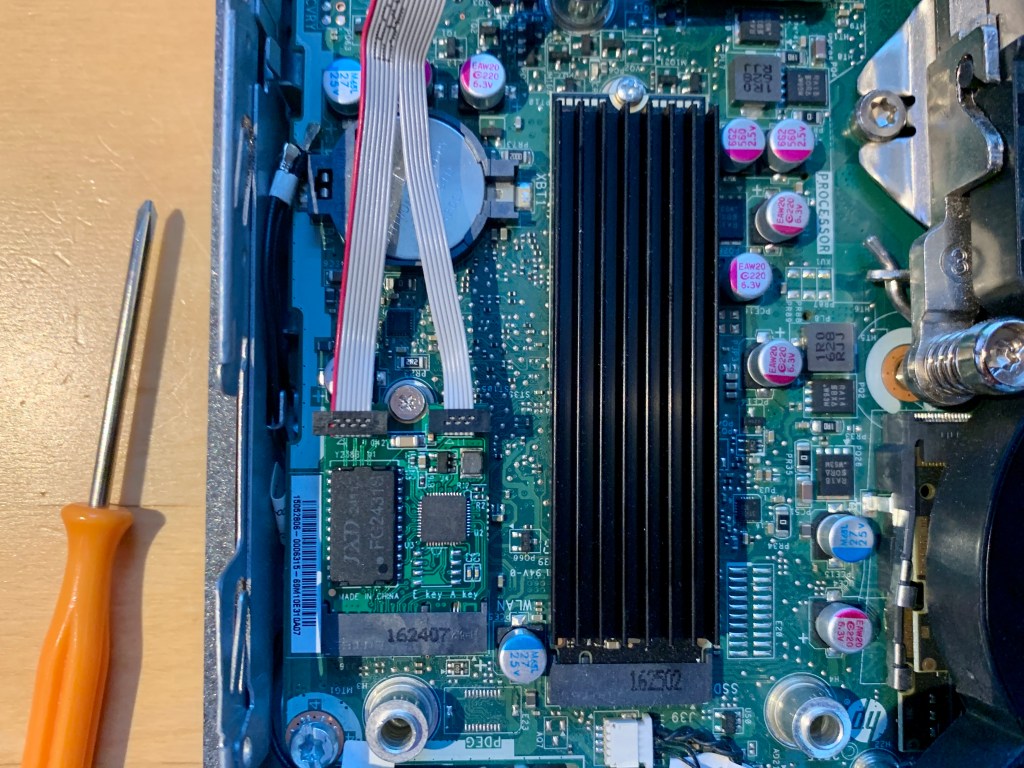
Fit the 2.5GbE card in its place and replace the retaining screw.
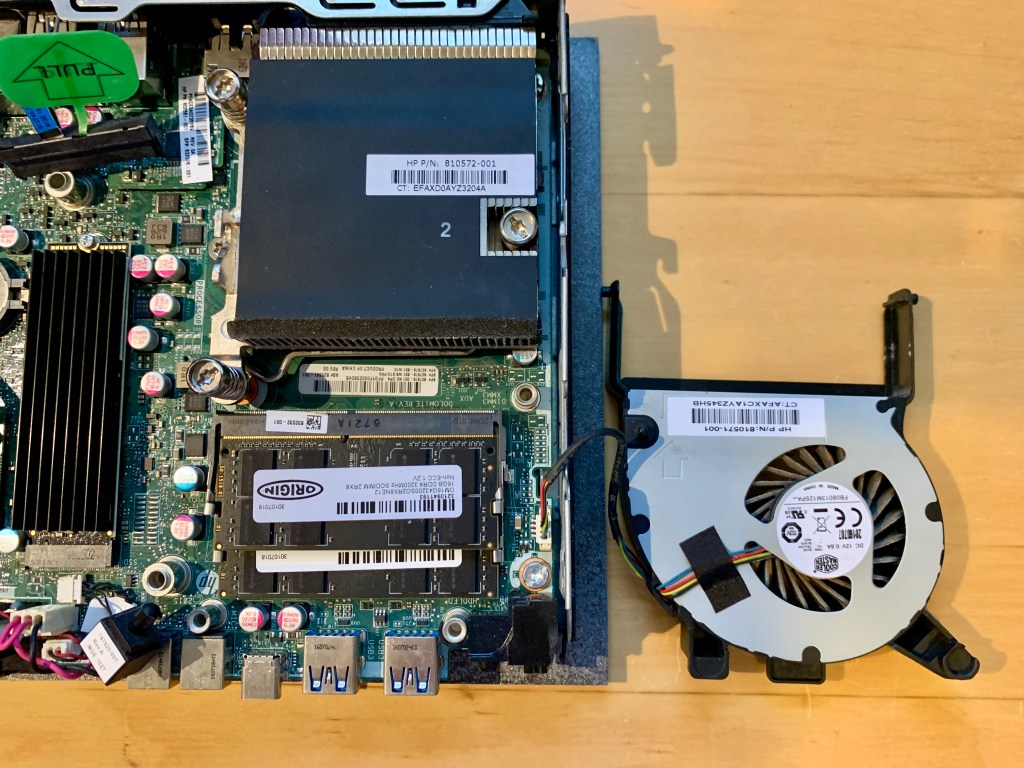
Remove the system fan by gently lifting up the black plastic tab to rotate the fan unit upwards, then sliding towards the front of the machine to free it. Place it to one side, being careful not to pull the cable.
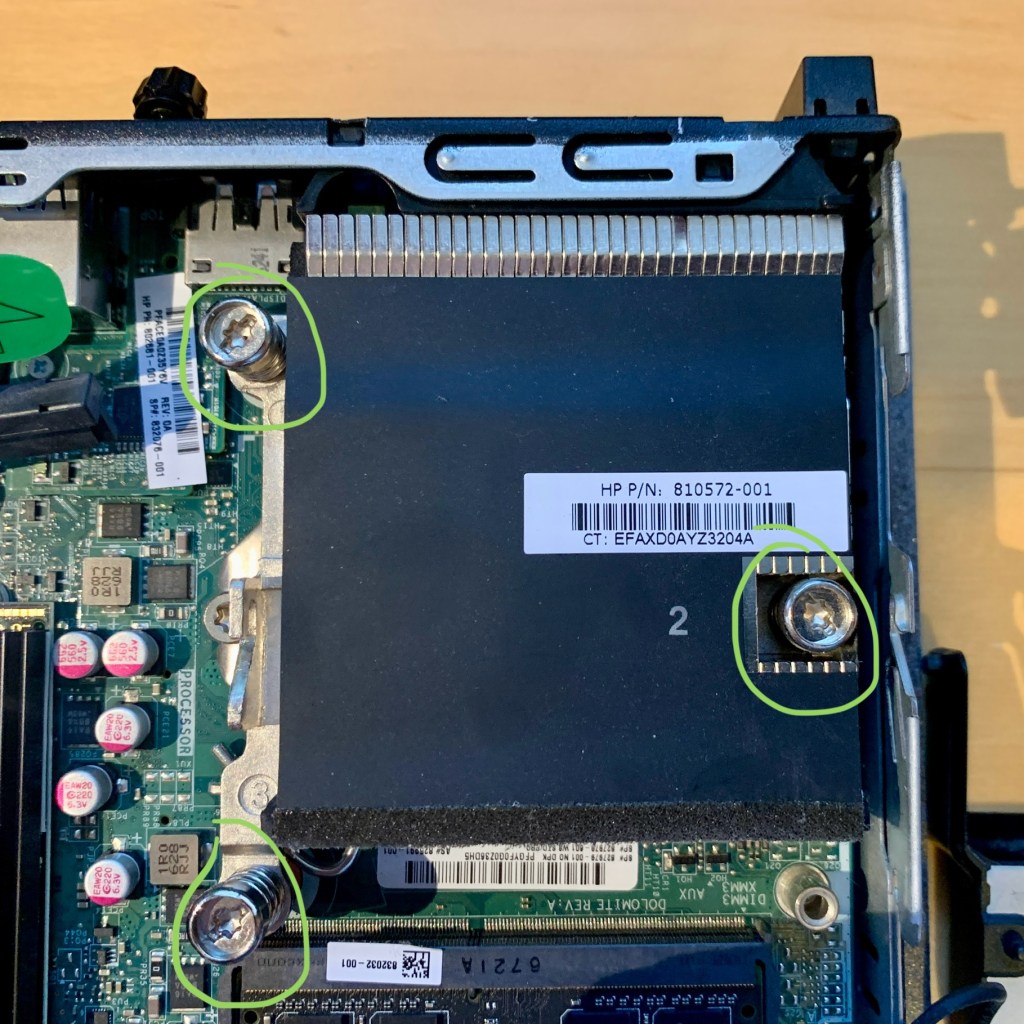
Remove the three CPU heat sink screws. You can use either a Torx or a flat head screwdriver. Flip the heat sink over, and place it to one side. Try not to get thermal paste on anything! Clean the CPU and heat sink with alcohol wipes.
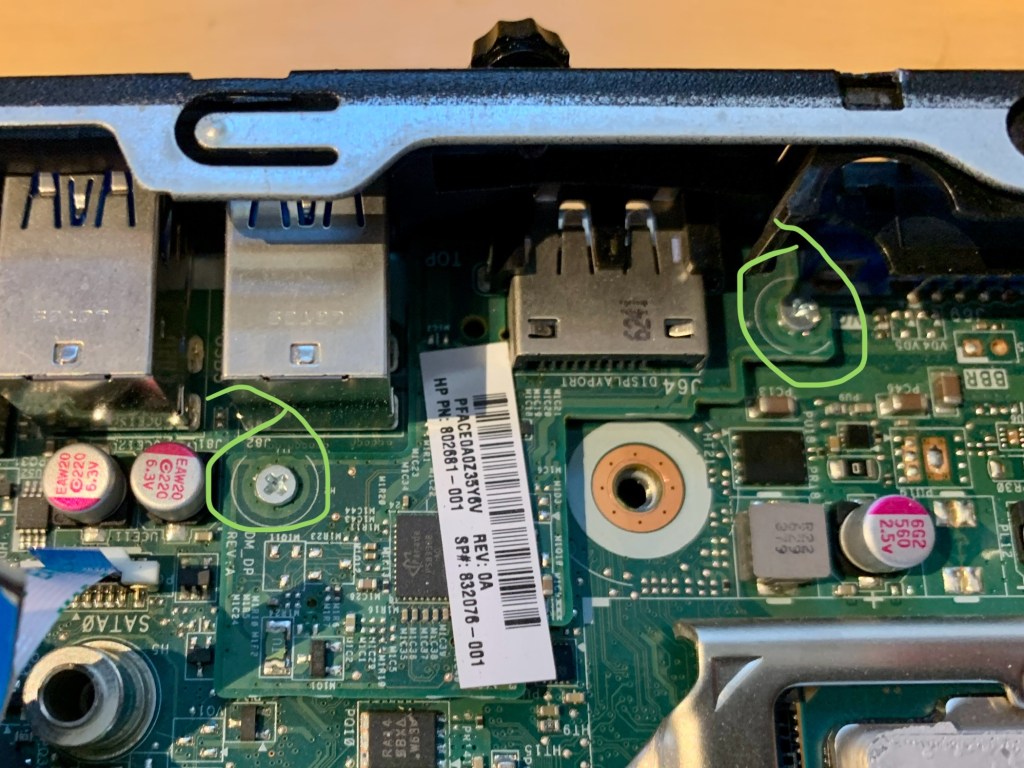
With the heat ink out of the way, undo the two small screws that hold the daughterboard in place. Use a knife or flat screwdriver to lift the daughterboard up from the motherboard. Remove the daughterboard – sometimes it gets stuck to the foam around the opening in the case.
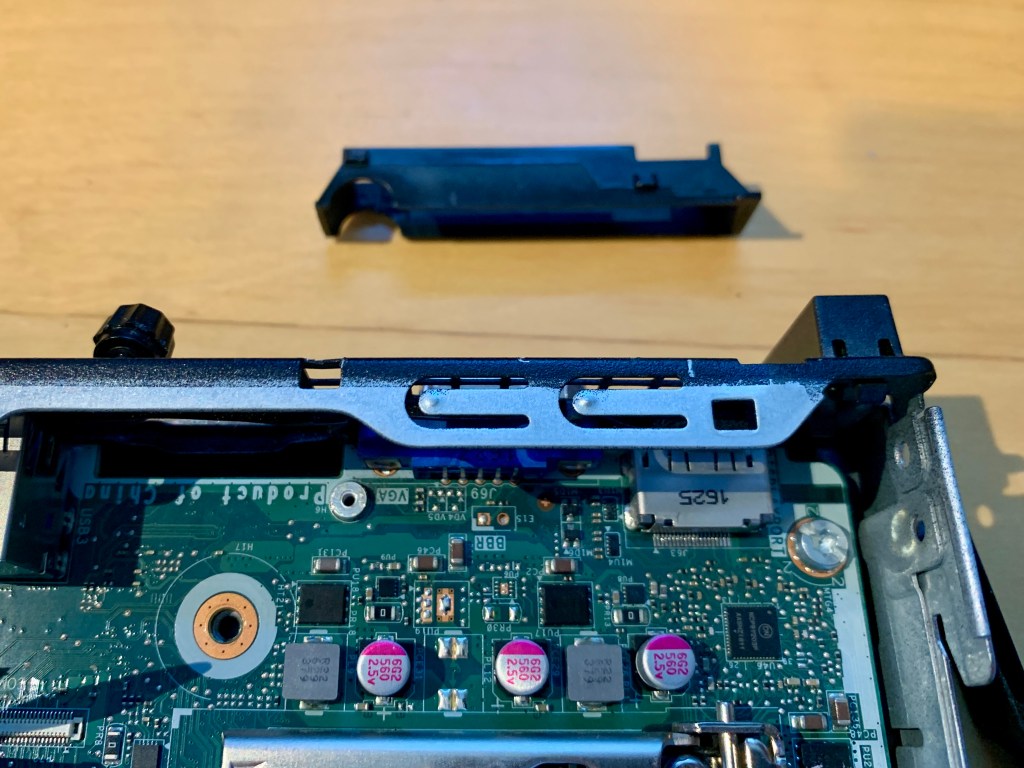
Unclip and remove the black plastic shroud from behind the heat sink.

Use a junior hacksaw to remove the area of plastic that I have hatched in the above picture. This is to allow clearance for the corner of the RJ45 port.
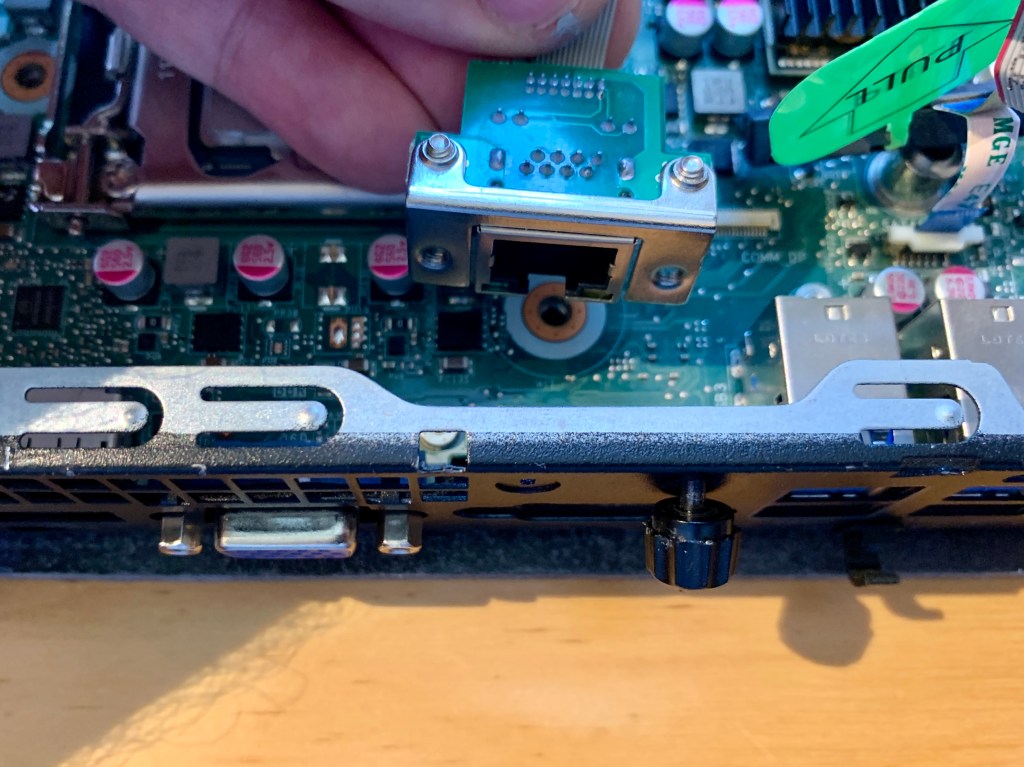
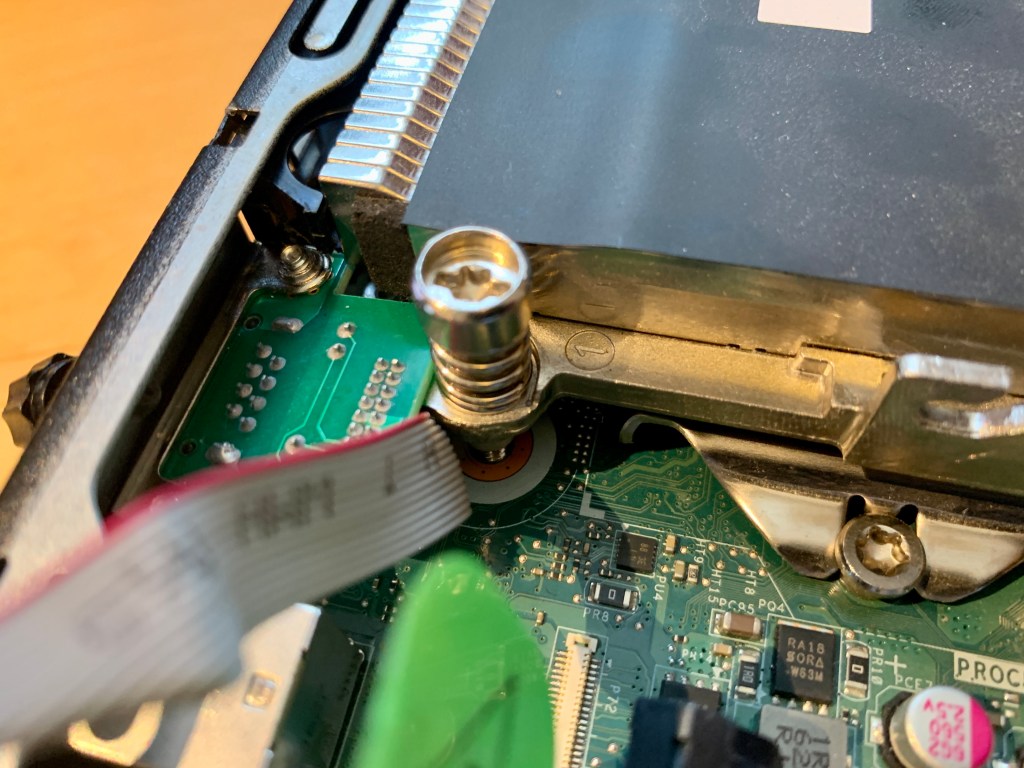
Offer up to the RJ45 port to the opening left by the daughterboard. Check that the orientation matches the above photo, i.e. cable latch and LEDs should be towards the bottom of the machine. Loosely hold the RJ45 port in place with the M3 bolts and washers, but allow it to move for now.
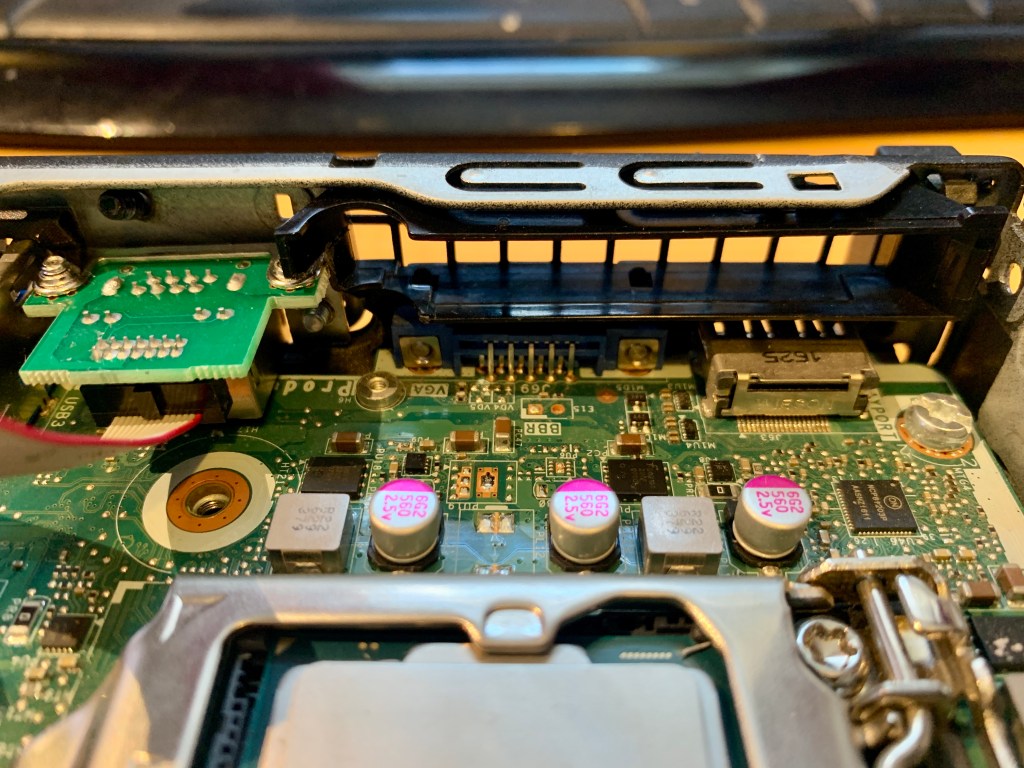
Refit the modified heat sink shroud by clipping it back into place. Check that the RJ45 port is still free to move a little and is not being obstructed by the shroud.
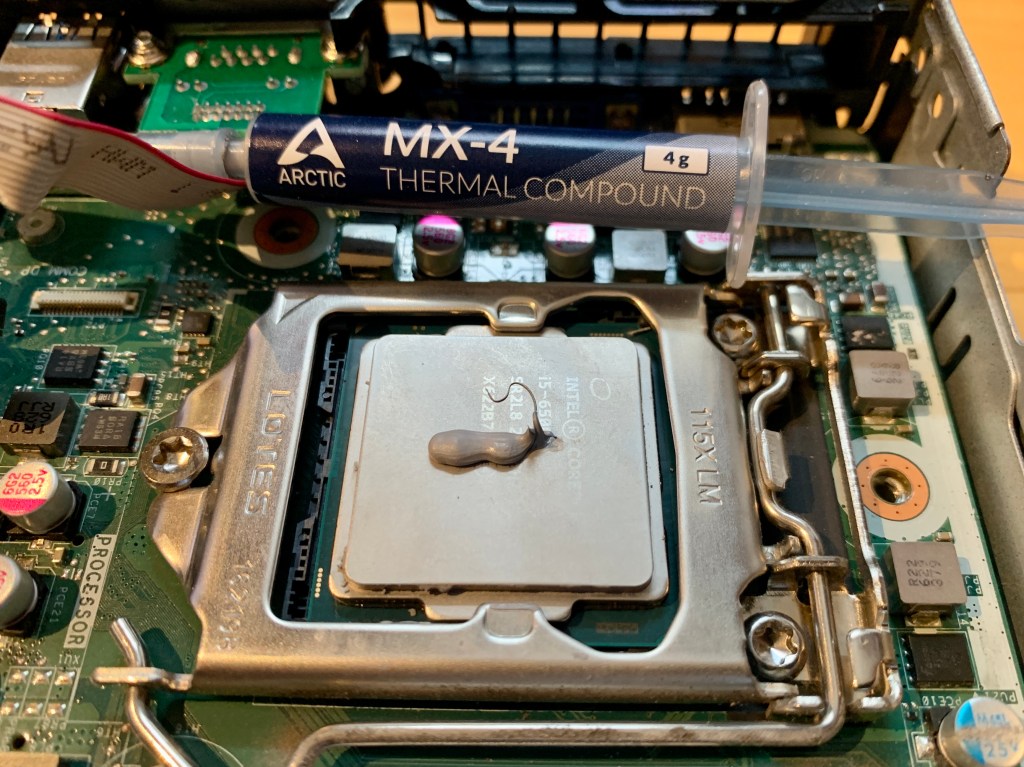
Apply some fresh thermal paste to the CPU, in preparation to receive the heat sink.
Refit the heat sink. This is the most fiddly stage of the process. You must lift the edge of the loosely-fitted RJ45 port to allow the heat sink to pass under it. Bend the cable out of the way, fairly sharply. When you tighten down the heat sink bolts, triple check that you have not pinched the cable, and that it hasn’t been pulled off the connector. Use a flat screwdriver to carefully push the cable back onto the connector if the heat sink tugs at it.
Refit by fan unit by sliding the black pegs into the grooves, and lowering the fan into place. It doesn’t click; it just rests on top of the memory.
Carefully tighten the M3 bolts on the rear of the case, taking care that the washers are aligned with the edges of the cut-out, and do not obstruct the USB ports.
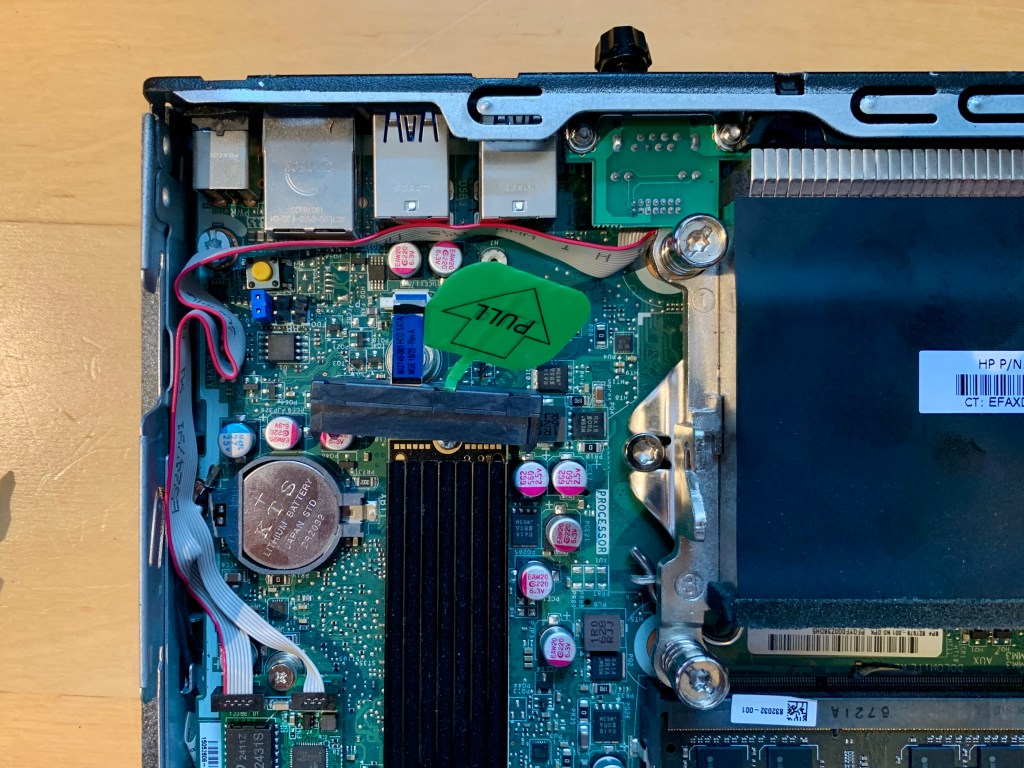
With both components firmly fixed in place, route the cable around the edge of the case. Take special care not to dislodge the SATA cable, and ensure that the cable runs down the side of the CMOS battery and not over it, or it will get pinched by the drive cage.
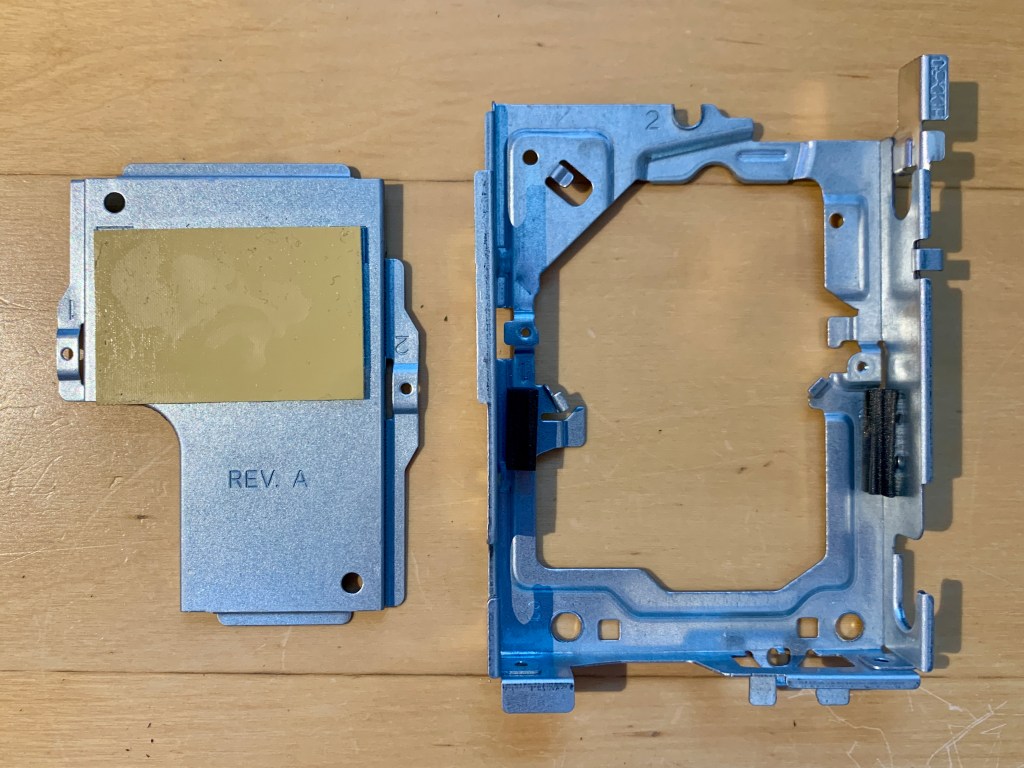
Take the drive cage, and remove two small screws to take out the piece stamped Rev. A. Discard this piece.

If you try to refit the drive cage now, you will find that it fouls the connectors on the 2.5GbE card. Peel off and discard the chunk of foam on the left hand side.
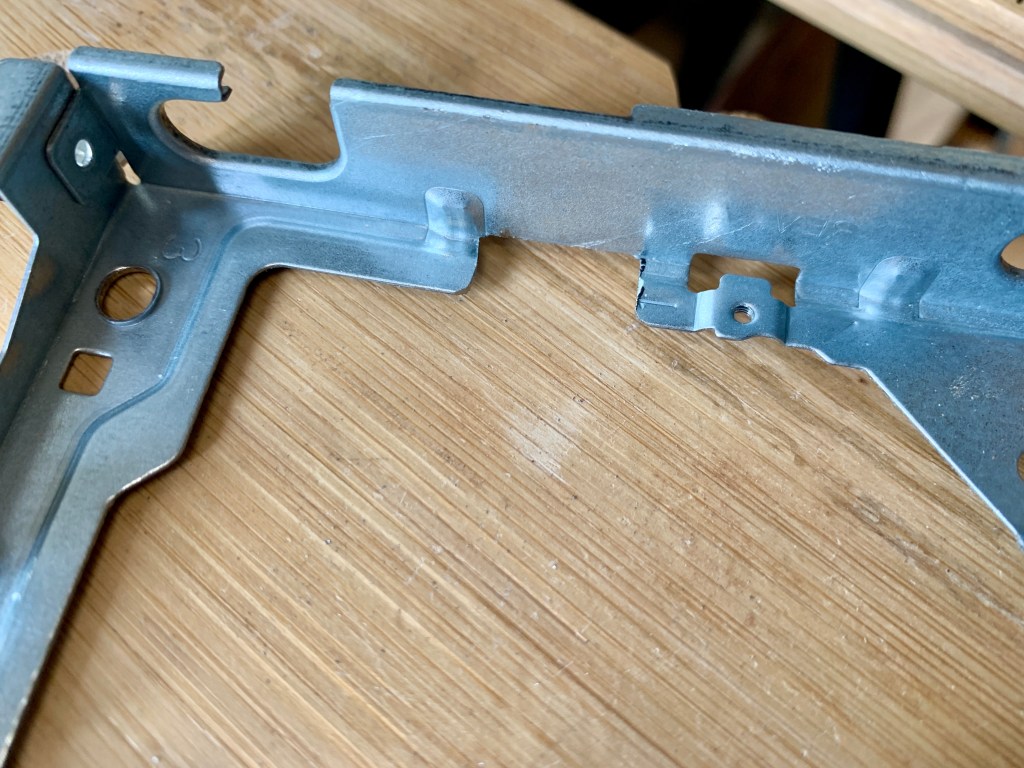
Use a junior hacksaw (or Dremel) to cut along the two lines I have drawn on the cage above with black pen. Use pliers to bend this piece back and forth a couple of times until it snaps off at the folded edge. Use a file to remove any sharp corners and burrs, and be sure to remove all metal filings so they don’t get into the PC.
When your drive cage looks like the photo above, you can refit it with the three bolts. Check that the grey ribbon cable is not snagged or pinched by the cage. Remember to slide the case open sensor back into place on the front of the cage.
With the drive cage refitted and the ribbon cable comfortably in place, refit the SSD by sliding it into place and carefully refitting the SATA cable.
Finally, you will need to trim the retaining catch on the case lid, otherwise it will foul the RJ45 port.
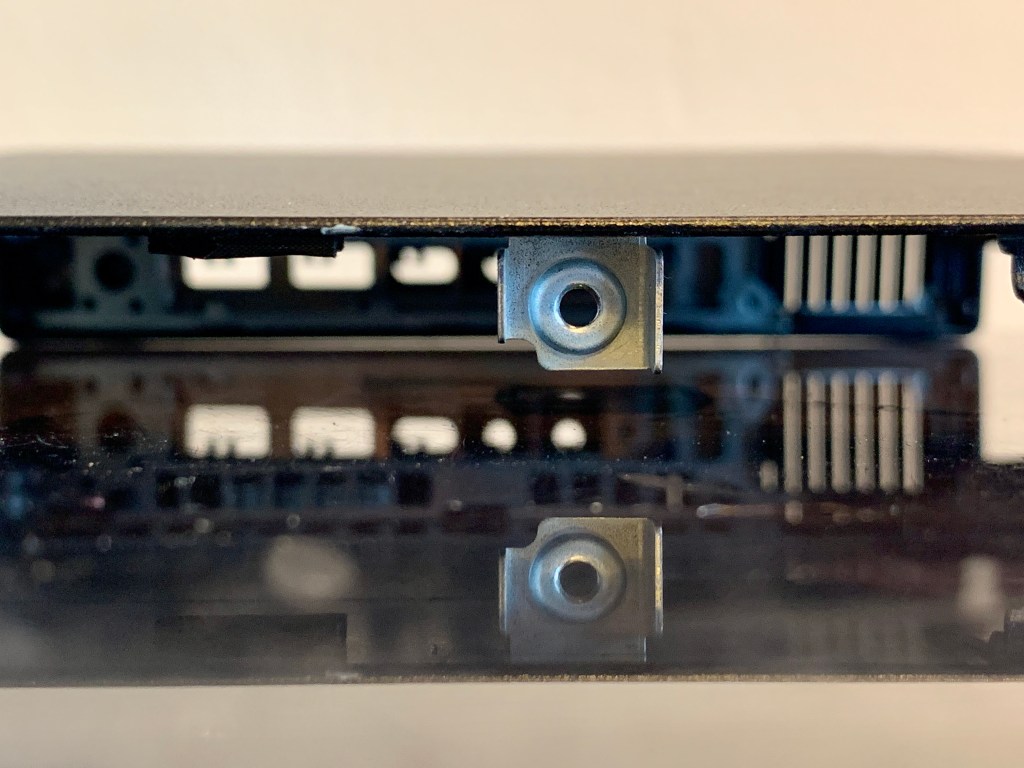
The retaining nut on the lid already has a corner cut out. Trim the whole nut in line with that cut-out using a hacksaw and file, taking care to remove all metal filings.
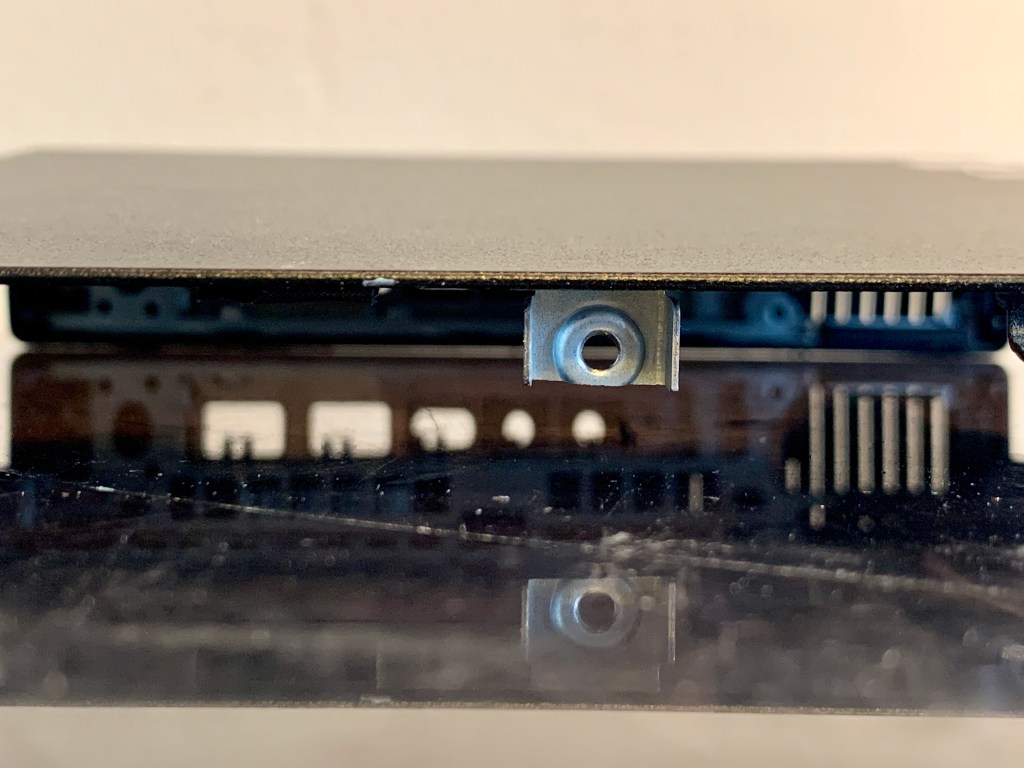
With the edge trimmed off, the retaining nut will work just as well, but it will now fit without damaging the RJ45 port. Replace the lid.

It’s not pretty – but it works!

Great write up! I decided to follow in your footsteps and installed a M.2 A+E RTL8125B nic into my hp elite desk g2 mini but the BIOS nor the OS detect the NIC. Did you configure anything in the BIOS to get yours working?
LikeLike
Howdy! Great write up! I followed in your footsteps and installed the same NIC into my Mini G2, but neither the BIOS or OS detect it. Did you configure anything in the BIOS to get yours working?
LikeLike
Hey, glad you found the article helpful. I didn’t have to change any BIOS settings, but I did previously update the BIOS to the latest version. This also enabled USB booting. I can’t remember off the top of my head what BIOS version, but it was the latest at the time I did the update a year ago.
If you have a network with DHCP the BIOS can automatically update itself over the internet. No need to download the image to a USB stick etc.
LikeLike
Hi there, thanks for the write-up! This is helpful and something I would like to do. I bought an M.2 2.5G ethernet card based on the specs in your post:
This is the one I purchased, as these connectors were coming out sideways, not upwards. However, I can’t install this card as the connectors are now hitting the capacitor that is immediately above/next to the 2230 M.2 slot. Did you just push the connector pins to point upwards?
Or maybe I misunderstood your post and it’s supposed to be: “Connectors which come out 90 degrees from the board – upwards, not sideways.”
Thanks!
LikeLike
On a second reading, my sentence is a bit ambiguous 🫤 I mean the connectors come out of the board at 90°, so you have the wrong type 🙁
LikeLike
I made the same mistake, but you can make it work by carefully bending the pins on the connector closest to the capacitor so they form a 45 degree angle. You will also need to careful trim the length of them so that they are even and the connector seats down on it properly.I did 1 of my 3 boxes and waited a month or so and it seemed the NIC reliably stuck to 2.5G so did the other 2 boxes yesterday. Unfortunately now i’m mucking about with it i’m noticing that the links downshift their speed from time to time; with one of them dropping to 100M.Next task is to investigate to see whether there’s some software based thing that’s dropping the card speed because its sitting idle, or if i’ve got some signal integrity problems after bending those pins 🙂
LikeLike