
Whether or not they have an interest in astronomy, at some point most photographers are likely to take a picture of the Moon. There’s a lot more to astrophotography than you might think, so I’ll walk through this step-by-step guide on shooting the Moon.
Capturing the best source image
It’s important to capture the best raw image data that we can, which will make the whole process easier. In this guide, I am assuming that you have a DSLR with a removable lens. Most of the advice also applies to film SLRs and digital compact cameras though, so don’t worry if that’s what you have.
Equipment
The lens has a lot more to do with the picture than the camera. For shooting the Moon, I recommend you use a telescope or a telephoto lens. The longer the focal length, the better. For most people, this means using a 70-300mm zoom lens, although if you have a 500mm camera lens, or a telescope which can be anywhere from 700mm up to 2000mm, then you can use that. On most crop-sensor DSLRs, a focal length of about 1400mm will make the Moon fill the viewfinder.
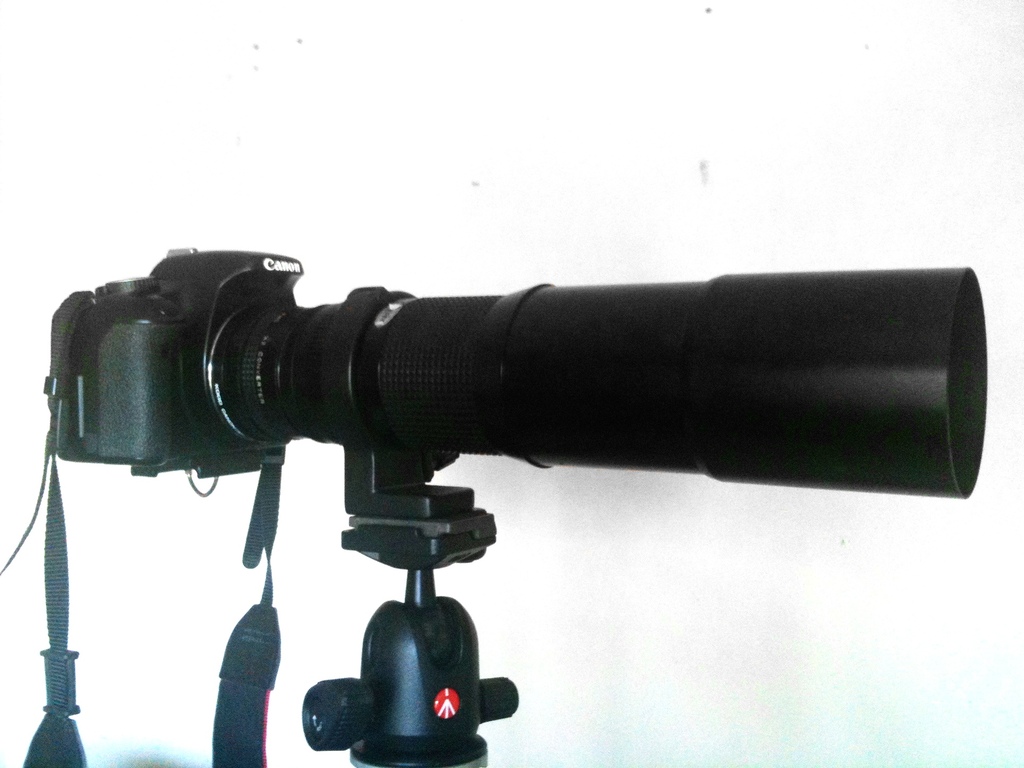
If you want to get a bit more reach, you could use a teleconverter. This fits in between your lens and your camera, and effectively multiplies the focal length of your lens – at the cost of losing some of the light and sacrificing some sharpness and quality. Common teleconverter sizes are 1.4×, 2× and 3×.

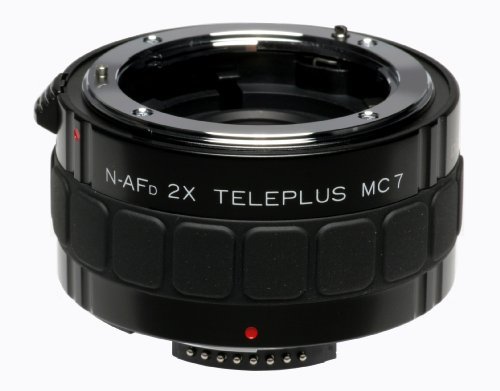
Kenko Teleplus MC7 2x TeleconverterAt these long focal lengths, the tiniest vibration will make your picture blurry. A tripod is absolutely essential – the sturdier the better.
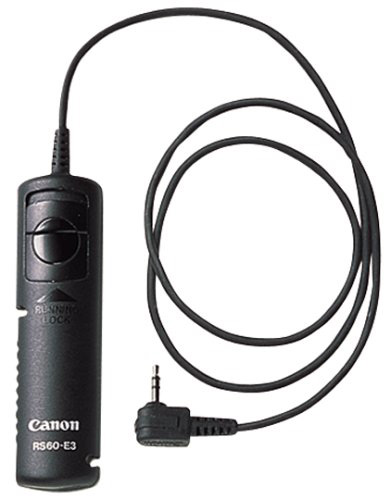
Always use a cable remote to trigger the shutter without touching the camera. All SLRs support these, but most compacts probably won’t. If you can’t use a cable remote, the self-timer is your second choice. Set the timer, carefully press the button, and hope that the vibrations have died down by the time the photo is taken!
If your camera has mirror lock-up, you should always use it. This means the first time you press the button, the mirror flips up and the viewfinder blacks out. Then you wait a few seconds for the vibrations to die down, and then press the button again to fire the shutter. Mirror movements are a common source of vibrations and are probably the biggest cause of blurry Moon photos.
Technique
Forget autofocus. If your camera has a manual focus option, use it. It will be more accurate, faster, and will prevent your camera from re-focusing on each shot you take. If your SLR offers live view, use that and magnify the view if possible. Once you’ve set the focus, leave it alone 🙂
The Moon is bright (brighter than you think) and it is set against a dark sky. This really confuses the camera’s auto exposure, so it’s best to use full manual mode (usually marked M on your camera dial). You’ll need to tinker with the settings, but if you set the ISO to 200 then some reasonable starting settings for the full Moon might be a shutter speed of 1/250 and an aperture of f/11. Take a few snapshots until you get an exposure that looks about right. The most common mistake is to overexpose the Moon. We often think of it as being white, but it should be grey in the camera.
Keep your shutter speed fast. If you let it get too long, you will start to get motion blur. Shoot at least as fast as 1/250.
Choose a middling value for your aperture. Most telephoto lenses have a maximum aperture of around f/5.6 at full zoom. Usually this gives poor image quality, so it helps to stop down a few stops. Usually f/8 or f/11 is OK. Much smaller than that, and you start to lose sharpness again due to diffraction. If you’re not sure where your lens’s sharpest aperture is, check some reviews. Failing that, a good rule of thumb is the the sharpest aperture is 2-3 stops down from the widest.
Feel free to set the ISO as high as you like. You may be aware that higher ISOs cause more noise in the picture – especially in low light conditions. This is absolutely true, but in this case it doesn’t matter. We will discuss effective noise reduction techniques for astrophotography later in this guide. If choosing ISO 1600 enables you to keep a fast shutter speed and to use the sharpest aperture, so be it. Don’t be disheartened by the grainy pictures that come out – these are not the end product.
For reasons that will become clear in a minute, once you’ve found the ideal focus and exposure, you’ll need to take a few near-identical pictures. The Moon will naturally drift across the viewfinder – this is fine. You might want to place the Moon in one corner of the viewfinder and repeatedly take photos until it reaches the other side. Anywhere between 3 and 10 pictures is fine – just don’t forget that when shooting repeatedly, you still need to give vibrations time to die down after each mirror lock-up.
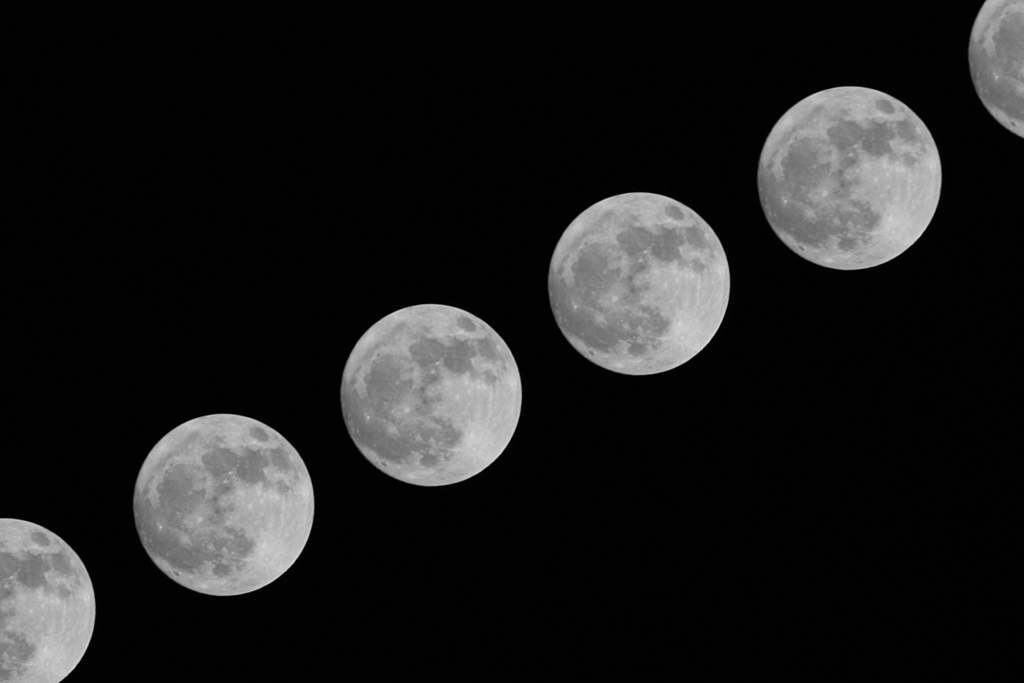
This next picture shows how fast the Moon moves across the sky. These exposures were taken just three minutes apart each, using a 300mm lens. Even leaving time to fiddle with the mirror lock-up between each exposure, you ought to be able to shoot at least one picture a minute, which will give you quite a few pictures at the end of the session.
Post-processing
Now that you’ve taken a handful of source images, we need to work on them to bring the best out.
Stacking
Stacking means taking a set of similar images, shifting and rotating them so they line up, and adding them together. This has the effect of averaging out noise from your camera, and distortions from atmospheric turbulence. The best free piece of software for Windows is called RegiStax. Those using Linux might want to consider ALE.
I wrote about ALE on this very blog not so long ago, but if you need a helping hand with RegiStax then I recommend you read this RegiStax tutorial. For the mostpart, you just follow through the steps it gives you – but there are a lot of scary options.
No matter which program you decide to use, after stacking, you will end up with a single image file which will look like a slightly improved version of a single frame. Now we move on to post-process this image in a more conventional photo editor. If you have Adobe Photoshop and you are familiar with it, then use that. I prefer to use GIMP which is similar to Photoshop but also free. It runs on Windows, Mac or Linux.
Colour channels
If you are shooting the Moon, it is effectively black & white, so we can do a trick with colour channels to improve sharpness at the cost of converting the image to actual black & white. (This doesn’t work if you want to end up with a colour photograph, by the way. If you’re shooting colour images of planets or similar, skip this step). Open your stacked image in GIMP.

Go to the Colours menu, Components submenu and choose Decompose. Make sure colour model is set to RGB, uncheck “Decompose to layers” and press OK.

This will split your colour image into its red, green and blue components, each of which opens as a new monochrome image. Now you can close the original image to save confusion.
Examine the three monochrome images you’ve got. They should be similar, but subtly different. Which one is sharpest depends on how much light pollution there is in your area, what colour it is, how well your lens/telescope performs at different colours and a million other factors. Zoom into each picture at 100% (do this by pressing 1) and have a look at the craters for comparison. When you’ve chosen the sharpest image, close the other two.

Unsharp mask
One of the best techniques for sharpening a slightly blurry picture is to use an unsharp mask. I won’t go into the theory here, but the basis of a blur is that a tiny dot becomes a small circle. Unsharp masking studies the image, and tries to convert the small circles of blur back into dots.
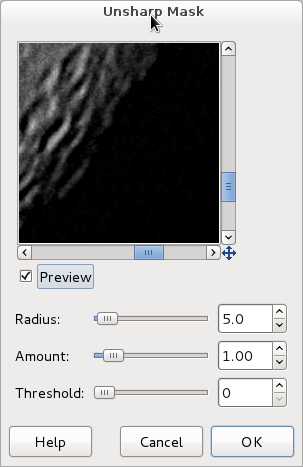
For this to work, we need to estimate the radius of the blur. Zoom into your image as far as possible (1600%) so you can clearly see the individual pixels as squares. Find an area of high contrast – either the edge of the Moon, or the edge of a crater. The edge of a crater or the lit edge of the Moon should be a sharp, defined line, but you’ll see that it is actually a gradual change, a few pixels wide. Count the number of pixels that it takes to cross the boundary.
In this example the middle red line (roughly) shows where the true edge of the Moon is. The outer two lines approximately show where the blur extends to. The distance between the two outer lines is roughly 5 pixels in this example. Work out the equivalent number for your image, and remember it.

Go to the Filters menu, Enhance submenu, and choose Unsharp Mask. Set Radius to the number you found in the previous step. Amount is set to 0.5 by default but you can change this if you wish. Numbers between 0.5 and 1.0 seem to work best.
Scroll around in the preview window to look at interesting parts of the image. Repeatedly tick and untick the Preview box so you can see what effect the unsharp mask will have. When you’re happy, press OK.

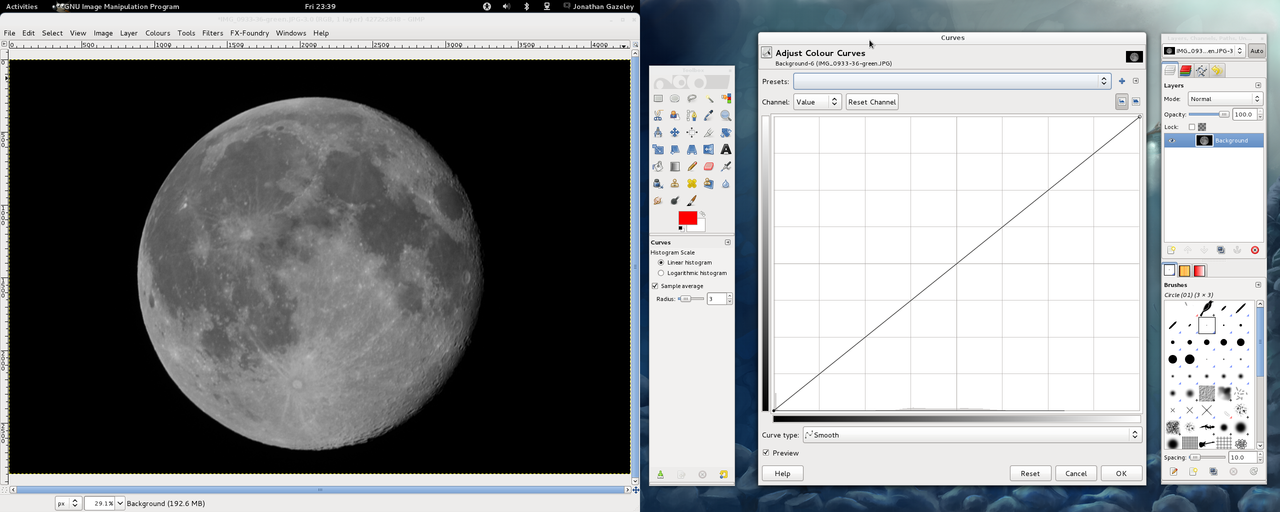
Colour curves
The name is a bit misleading – colour curves don’t have anything to do with colour in this context. They are a good way of enhancing contrast, though. Bring up the curves window by going to the Colours menu and clicking on Curves. The default “curve” is actually a diagonal line.
Arrange the curves window and your image alongside each other so you can see both at the same time. Drag the shape of the curve into a gentle S-shape. The exact shape and amount of the curve depends on your needs, but have a look at the next two screenshots to see what effect the curve has had. Click on the images to view them larger and use the arrow keys to go back and forth. You can immediately see that the dark patches are darker and the pale patches are paler.

Saving
That’s it! You’ve now finished all the basic editing in this tutorial. Save your image, but make sure you do Save As and choose a different name, so you don’t overwrite your original.
Summary
This guide touches upon a few of the most common techniques in astrophotography. It is by no means the ultimate guide. If you’ve got any questions, extra tips or if you spot any mistakes in this guide, please comment and let me know. Also, I encourage you to post your Moon photos at the bottom of this page, share your work and show off what you’ve done.
Further reading
On this blog
- Lenses for astrophotography – a comparison
- Astrophotography and stacking software
- Long telephoto lenses
- Mirror lenses: worth it?
Elsewhere

Hi, just read this and totally love it. I was wondering if by anychance you could allow me to publish this article in the next issue fo the Amateur Astrophotography Magazine?
Look forward to hearing from you soon
Steve
LikeLike