
Introduction
I’ve wanted to build a wooden large format camera for years, but I made myself wait until my skills were up to scratch. I reasoned that a wooden camera isn’t really too much more difficult than a sort of trinket box / picture frame hybrid, so I decided to take the plunge.
I looked at various plans for cameras that are available online, but eventually decided to follow Jon Grepstad‘s freely available plans for a monorail camera – partly because his instructions were complete and contained diagrams, and partly because his measurements were in metric. Can’t be doing with sixty-fourths of an inch!
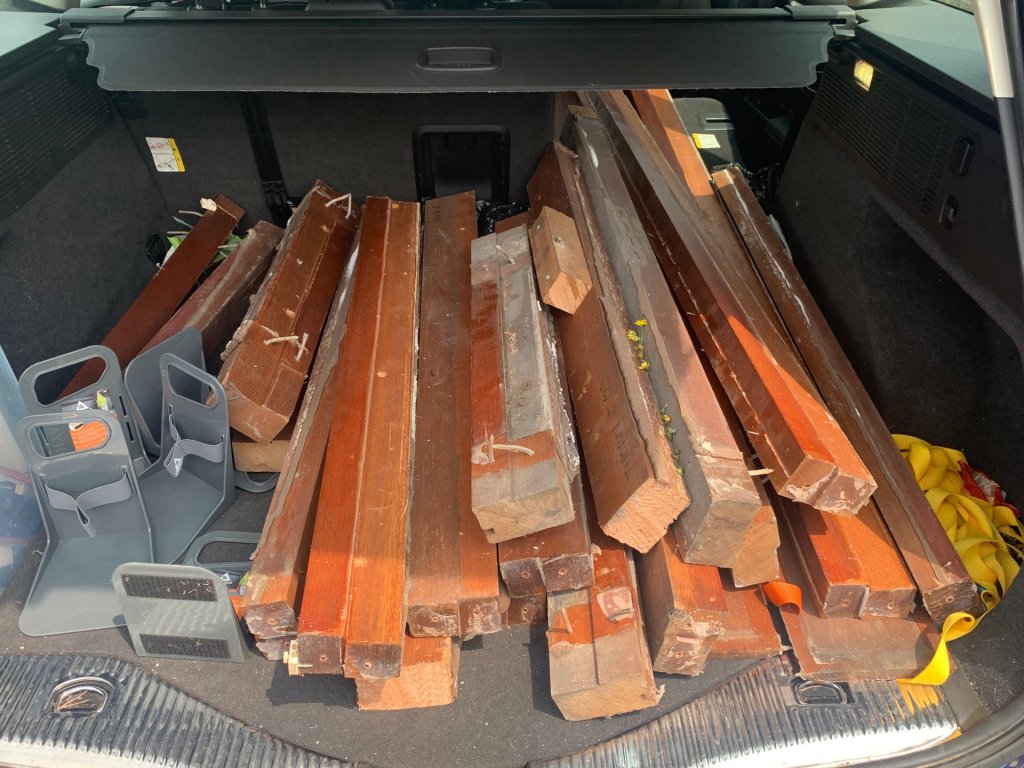
My decision to get started was cemented when I found some wooden window frames being ripped out. I saved them from the skip, and they turned out to be meranti, sometimes also known as Philippine mahogany. It’s a hardwood commonly used for window frames, because of its resistance to warping when it gets wet. My camera won’t need to withstand bad weather, but the reddish hue of meranti is very pleasant.
Preparation
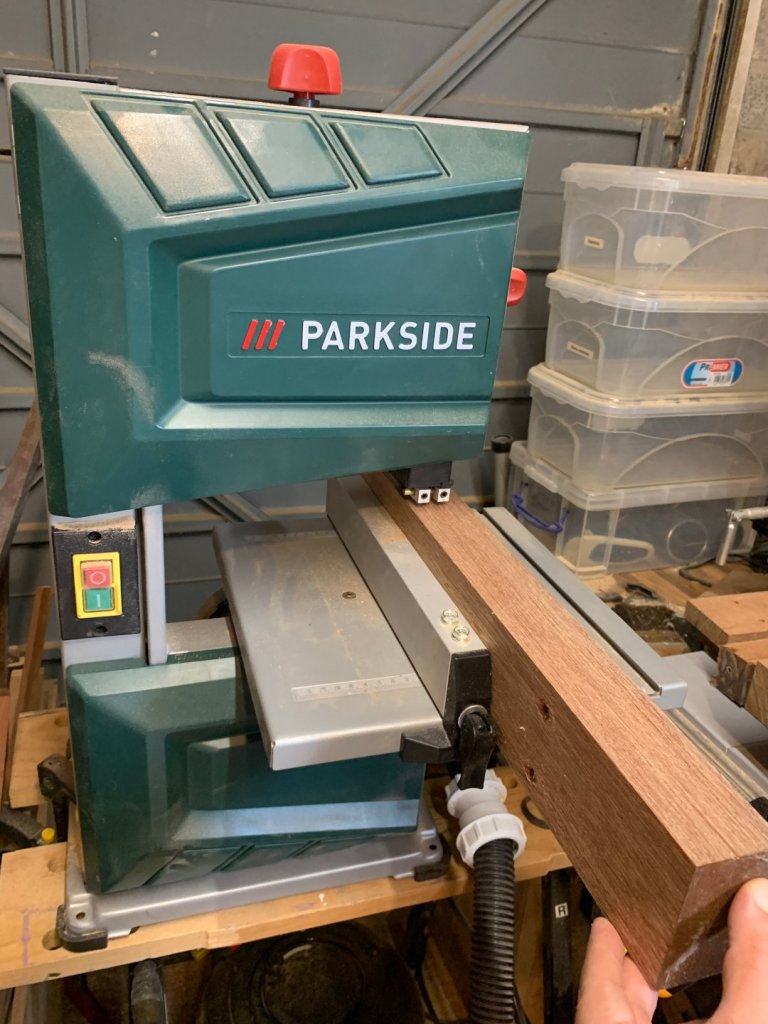
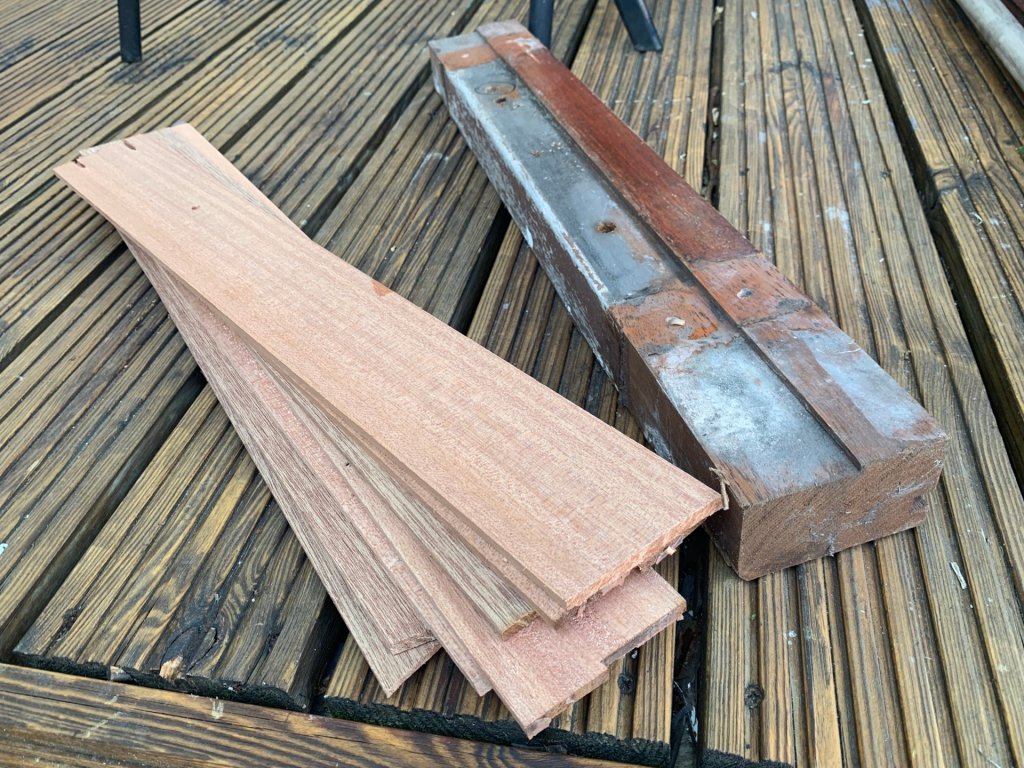
The meranti needed a bit of a clean-up – first scraping off remnants of glue and sealant, and secondly checking carefully for screws and nails, and removing them. The camera plans call for thin boards of meranti ranging between 6mm and 15mm rather than thick chunks, so I ripped these pieces on my table saw to reduce them down to an 80mm width that my band saw can take, then used the bandsaw to resaw them into boards that were slightly thicker than required. Finally I passed them through the thicknesser to reduce them down the precise dimension and leave a nice, planed finish. The old varnish and effect of weathering had only gone into the wood a couple of millimetres so I was left with beautiful fresh timber and no indication that it had been window frames for decades.

Construction
I didn’t actually remember to take many pictures of the construction process, but there was a theme with the woodwork side of the project: further rip the planed boards into narrower strips, and then glue them back together in various L-shaped profiles as specified in the plans. Then almost all of the camera parts are cut from these long L-shaped profiles with a mitre saw, working around the occasional nail hole, and assembled in the same way as a picture frame with ordinary wood glue. Band clamps came in very handy here.

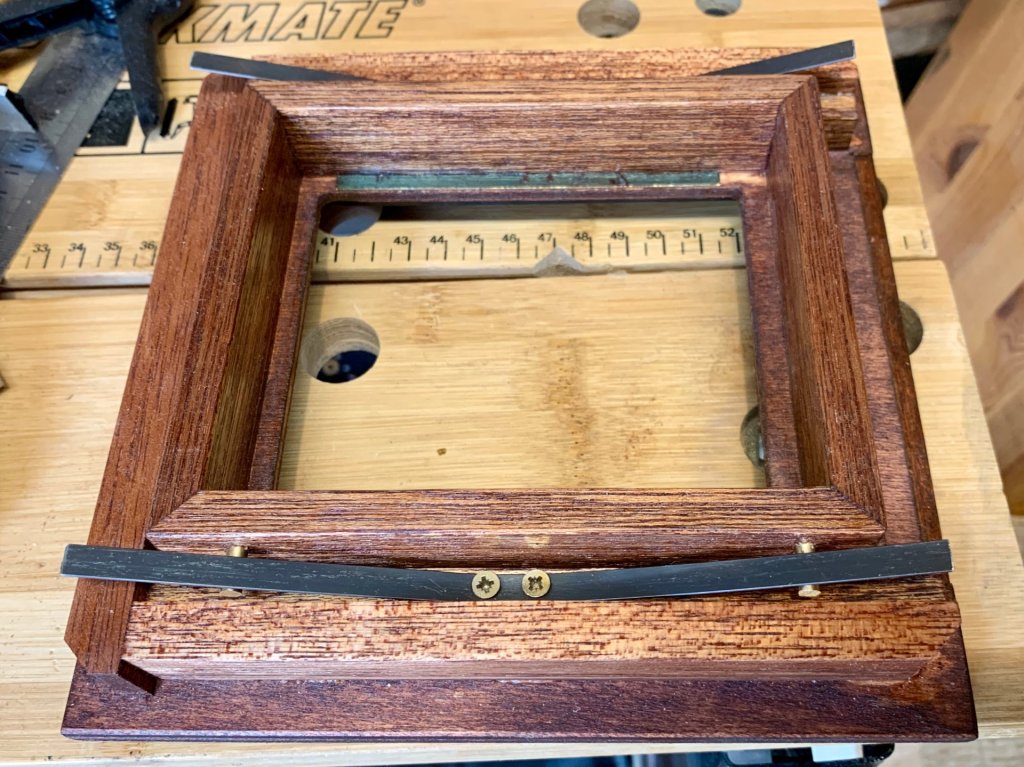
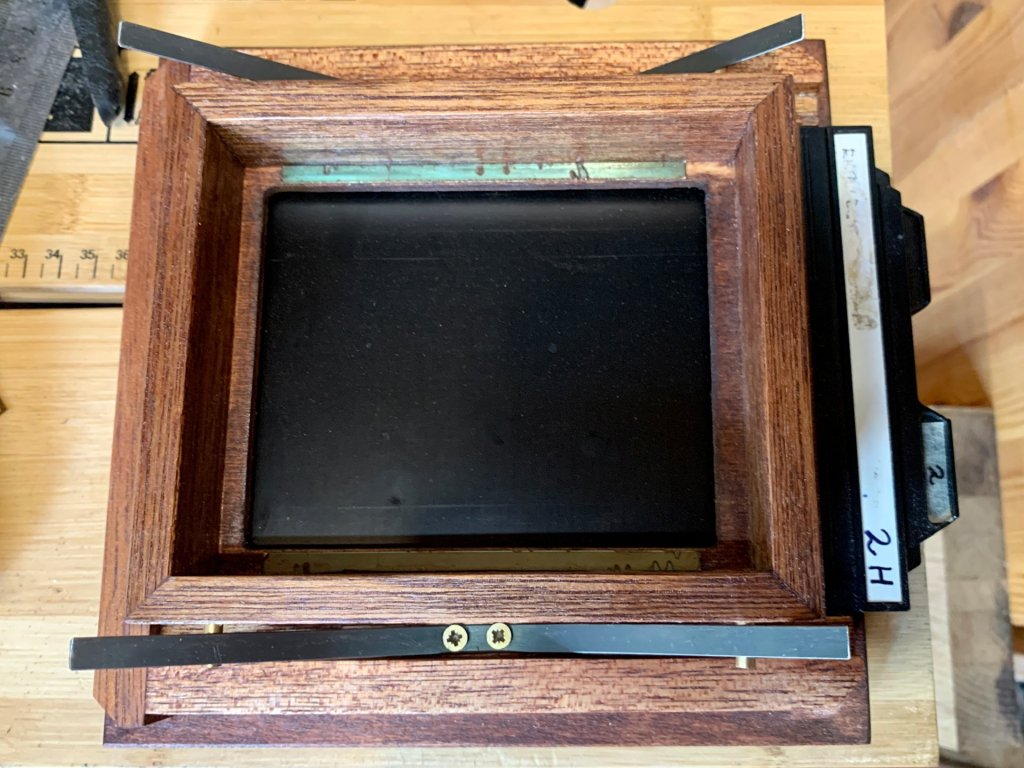
I used plywood for a couple of parts, such as the lens board, and the main body of the spring back film holder. The spring back holder is perhaps the most complex part of the build, as the ground glass focusing screen is held to the back of the camera by leaf springs, and when it’s time to take a photo you slide the film holder underneath the ground glass, which springs up, clamping the film holder in place and ensuring that the film is in the same plane that the ground glass was in during focusing.

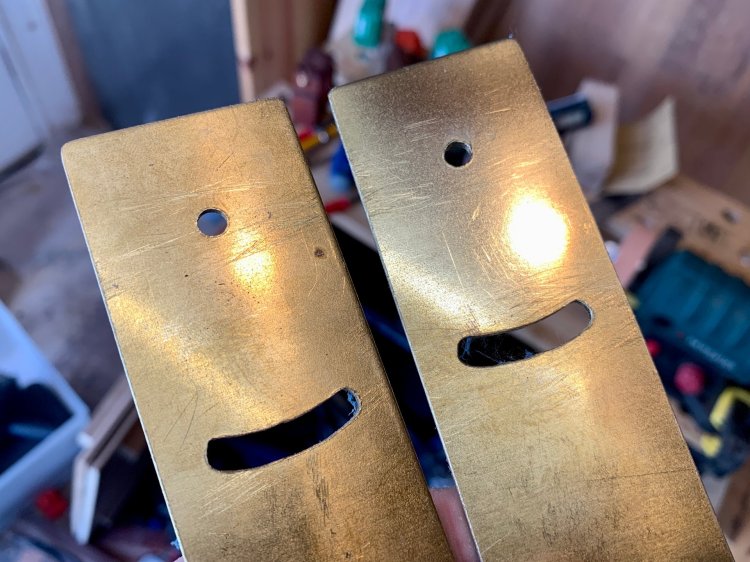
One aspect of this project that was totally new to me was metalwork. I’ve never worked with brass before, but I was pleasantly surprised how easy it was to cut 1-2mm brass sheets on the bandsaw, drill on a pillar drill and work with a file by hand. The parts I needed to make were all simple, but it took quite a lot of effort to sand and polish out the tool marks.
Jon Grepstad’s plans described a rotating back system, but I decided to omit this as I rarely shoot in portrait orientation, and it seemed like an opportunity to save a little weight and complexity.
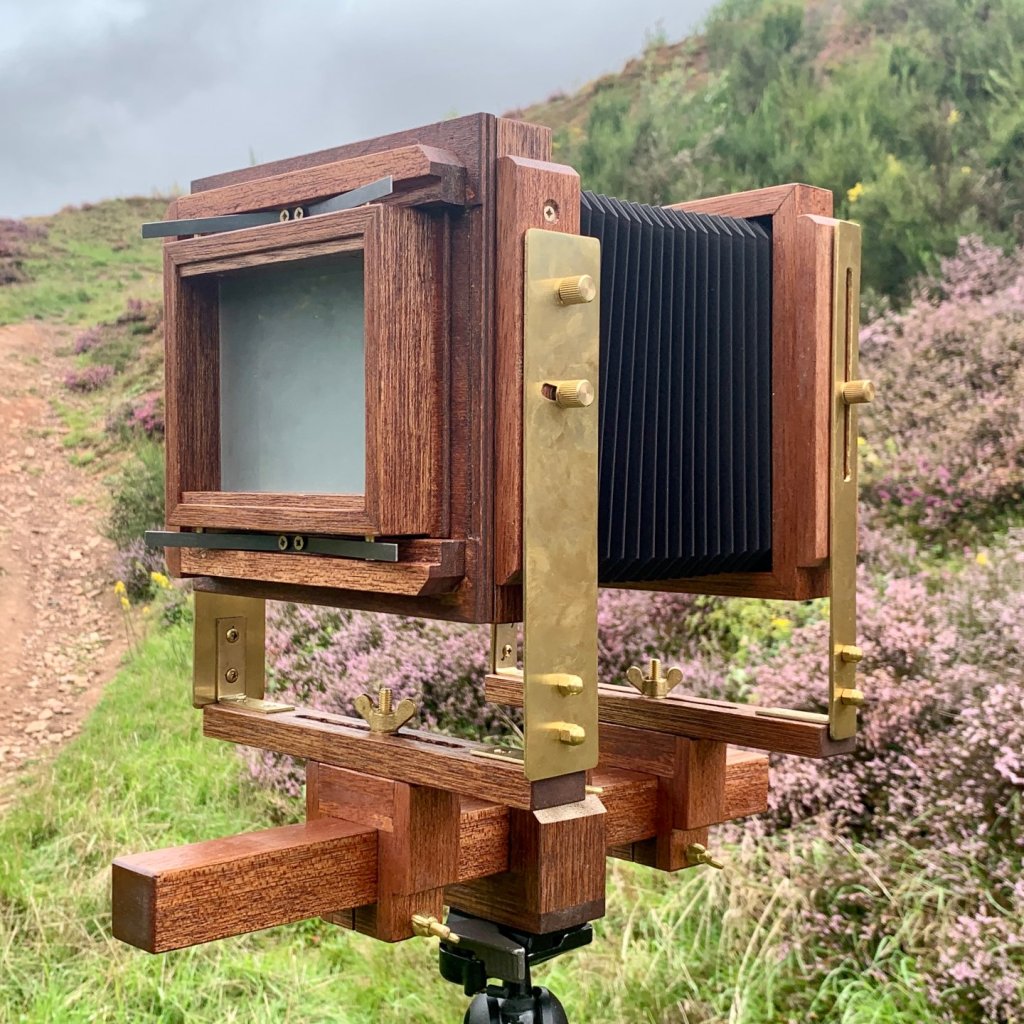
I completed the build by adding a bellows and ground glass I ordered from a photographic supplier, and a lens I salvaged from a broken camera. The bellows is conveniently the same dimension as a Toyo 45G. The ground glass is the traditional, non-Fresnel variety and the image is quite dim, but I don’t mind that. The lens is a Bausch & Lomb Rapid Rectilinear in a Kodak shutter, dated 1897. The focal length isn’t given but the maximum aperture is US 4 (Uniform System, not United States), equivalent to f/8.
To really bring out the mahogany colour and deepen the pinkish-red shade of the meranti, I finished with several coats of mahogany-tinted Danish oil. This also gives the wood a pleasant sheen rather than a high gloss finish.
Tools
I wanted to make a quick note about the tools I used. There’s a lot of discussion on the various woodwork groups online about the “best” tools and how cheap tools aren’t even worth bothering with.
I’m using budget tools exclusively, and while the build quality and precision aren’t always great compared to expensive brands, they have been sufficient for my modest needs as a hobbyist. With careful setting up and use of tools, I’ve managed to achieve sufficient precision.
- Titan TTB579PLN planer/thicknesser
- Titan TTB763TAS table saw with Saxton blade
- LIDL Parkside PBS 350 band saw with Tuffsaws blades for wood and metal
- Aldi Workzone pillar drill with Bosch drill bits
- Wickes sliding mitre saw with Saxton blade
The finished item
I took the camera out to Trooper’s Hill Nature Reserve to take pictures of it in a scenic background.


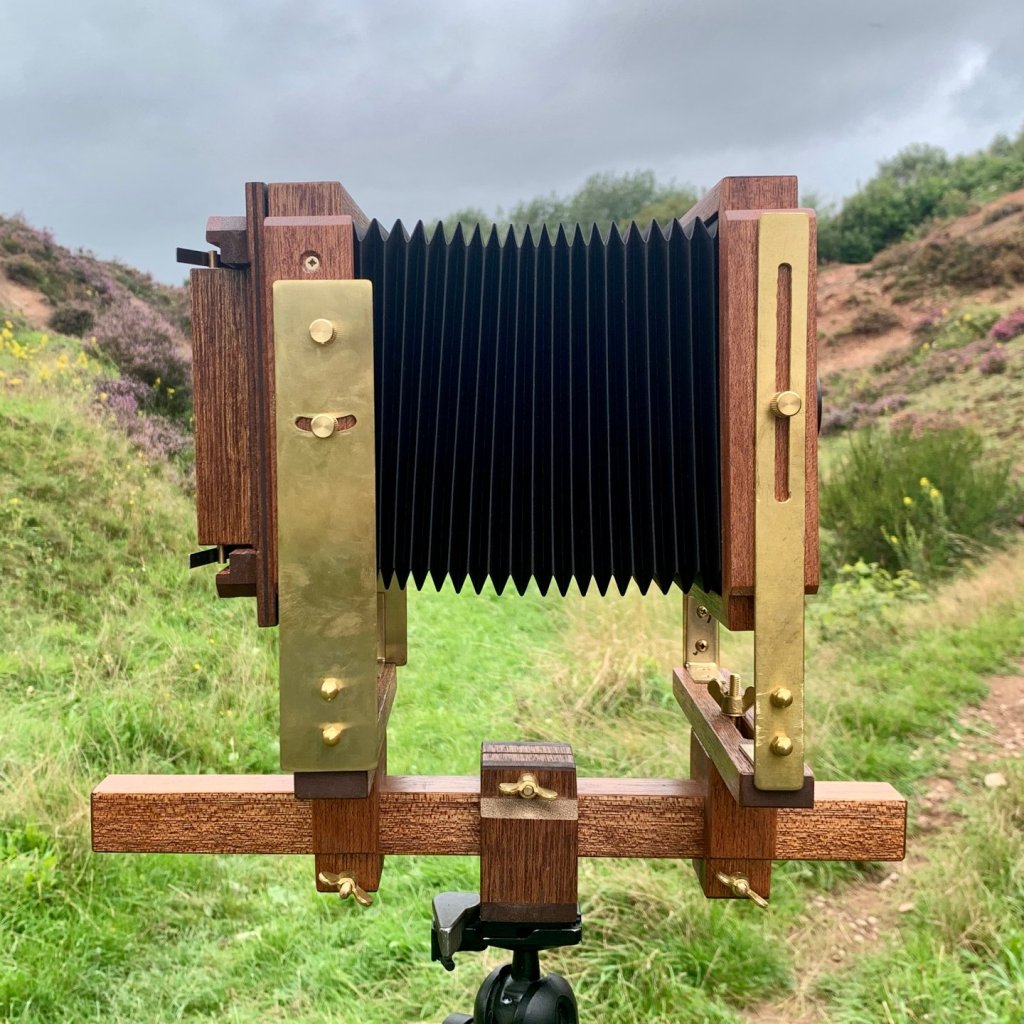
Movements
A key part of the specification of any large format camera is its movements. The length of the monorail is 380mm so this allows for generous extension of the bellows at typical focal lengths.
| Front | Rear | |
| Rise/Fall | +55mm, -35mm | 0mm |
| Shift | ±50mm | ±50mm |
| Tilt | Limited only by bellows | ±20° |
| Swing | Limited only by bellows | Limited only by bellows |
Testing
Here’s the first test shot taken with this camera, also at Trooper’s Hill.

I’m really happy with the results. For a lens that is 126 years old, it has good, even coverage and decent sharpness at f/16, two stops down from wide open. There is no evidence of light leaks.
I slightly missed critical focus, and I think that’s largely because I used wood for the monorail instead of the recommended aluminium tube. The varnish-on-varnish sliding made it quite hard to make tiny adjustments accurately. Hopefully waxing the monorail will help with a smoother action..
I also found that the leaf springs I chose are slightly too strong and clamp down on the film holder slightly too hard. You have to be quite forceful when inserting the film holder, and it is quite easy to accidentally knock the alignment of the camera. Hopefully I’ll be able to bend the springs a bit so they’re not quite as aggressive.
Finally the last thing I noticed while using the camera is that it can be quite tricky to get it aligned when setting up. None of the adjustments have a centre “click” detent, so you have to take your time aligning and adjusting when composing an image. This isn’t a fast camera to use!
Overall, I am very pleased with my first camera build. It has turned out well, and I have made a usable camera that I cam proud of, and learned some new skills along the way. I’m also very grateful to Jon Grepstad for publishing his plans.

An excellent achievement!
I’m with you on the “tools” front. If you set up your tools properly, then “bog standard” tools are fine. My Dad, a builder & sometime cabinet maker for more than 60 yrs, has never bought an expensive tool, except for his grindstone. He insists on the same expensive & hard to source grinding wheel for sharpening all his bladed articles.
I’m currently working on a large format box camera (for pinhole photography) made from Red Grandis (a eucalyptus wood). I’m hoping it goes at least half as well as your endeavour!
LikeLike
Thanks! Good luck with your box camera build. I keep thinking about making a large format box pinhole camera for exposing paper negatives. Seems like it might be a fun project.
LikeLike