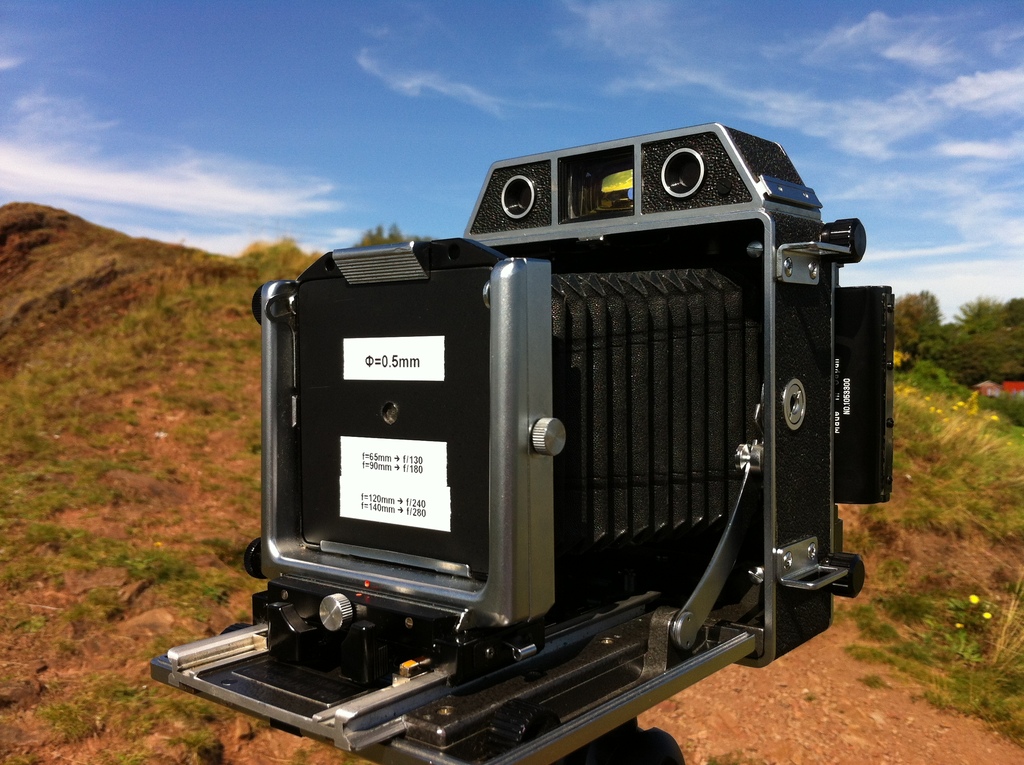
I’ve made pinhole lenses for my 35mm and digital SLRs out of body caps before, but it recently occurred to me I could make a zoom pinhole lens. I have a view camera with bellows for focusing. The effective focal length of a pinhole is always the distance between it and the film, so a pinhole mounted on bellows makes a zoom pinhole! The bellows on my Horseman 980 view camera can be used between approximately 40mm and 160mm from the film, giving a decent range of focal lengths.
Making a custom lens for a view camera is easy. Unlike SLRs, the lenses don’t attach using a complicated bayonet system. A lens is mounted into a lens board, which is simply a square plate of metal with a hole bored in it. The plate then clips into the front of the camera. I bought a small piece of 2mm mild steel, cut it into an 80mm square, rounded the corners and drilled a small hole in the middle. This hole isn’t the pinhole itself – this is where the pinhole will later be mounted. I painted the steel black to minimise internal reflections.
In the past I’ve made the pinhole itself by making a small hole in a piece of aluminium foil with a pin. I found this often makes a jagged and irregular hole of unpredictable size. This time, I asked a favour from a mate who has access to a laser cutting machine.

It’s computer-controlled and can make very precise incisions. He cut me a pinhole of diameter 0.5mm in a very thin piece of tungsten foil. I assumed the laser would zap a round hole straight through, using a round beam. But it’s cleverer than that – the beam is incredibly tiny. This next picture shows the laser beam going round the outside of the hole it was cutting. Yes, that’s a tiny laser point skirting around a half-millimetre hole. It gives a very smooth edge.

When the small piece of tungsten foil was ready, I glued it onto the mild steel plate. For the finishing touches, I added some stickers to remind me of the parameters of the pinhole (Φ=0.5mm, and various relative aperture values for various focal lengths).

So now all I need to is duck under the dark-cloth and stare intently at the dim, upside-down image on the ground-glass screen while I adjust the distance between the pinhole and the back of the camera. When I’m happy, I remove the dark-cloth and the ground-glass, and replace it with a film back.
The norm with view cameras is to have the shutter in the lens. There’s no shutter in my pinhole lens but exposures are so long that I can use the darkslide as a shutter. I worked out the exposure using an app called PinholeMeter on my iPhone. In bright sunlight, one of my pictures needed 17 seconds of exposure.
The three pictures below were taken this morning on Ilford FP4+ film. The negatives are 6×9cm in size. The first two pictures are of the same scene, but at different zooms. The images are quite soft but surprisingly good quality – no vignetting. And the exposures are pretty much spot-on 🙂


